Candela Technologies Logo
Network Testing and Emulation Solutions

LANforge WiFi Many vAP Testing

Goal: Create 7 vAP on a single a/b/g/n/AC radio to emulate a busy environment and test that station devices associate to the proper AP.

Requires LANforge 5.3.3 or later. Configure 7 vAP, add the vAP to a bridge and set up DHCP. The Device Under Test (DUT) in this case is a mobile handset or other wifi station device. Verify that station can handle many APs and select an appropriate AP from the available scan results. This example uses a LANforge CT523 system but the procedure should work on all CT521, CT522, CT523 and CT525 systems.
 
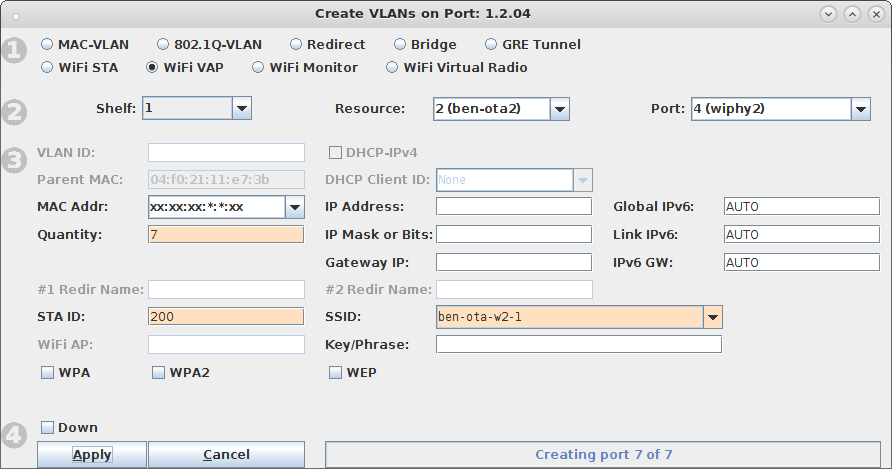
  1. In the Ports tab, select the radio wiphy2 and click Create. Configure the values appropriately and click create. screenshot
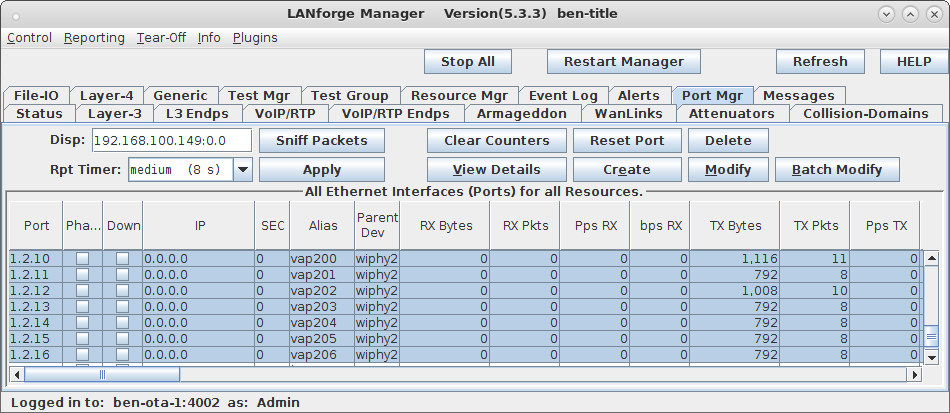
  2. In the Ports tab you will see the new WiFi vAP: screenshot
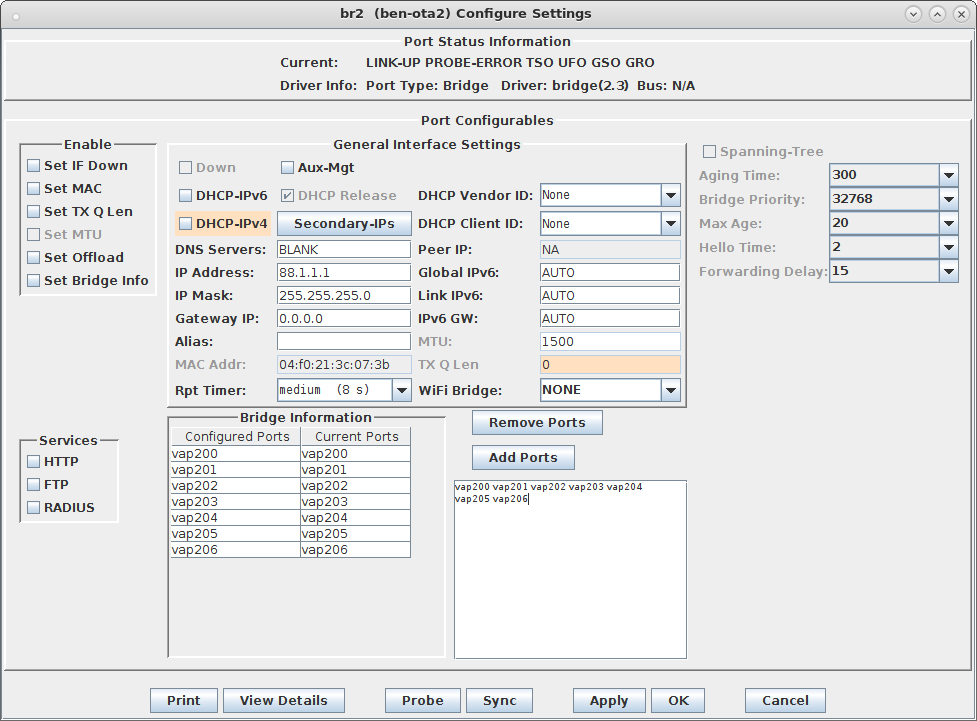
  3. Select the Status panel in the LANforge GUI, and click the Netsmith button for the appropriate resource. Right-click and select the 'New Bridge' option. In this example, I selected 'br2' as the bridge name. After creating the bridge, click Sync to show the new bridge device. Right-click on it and select Modify Port. Add each of the vAP you just created to the bridge and then apply: screenshot
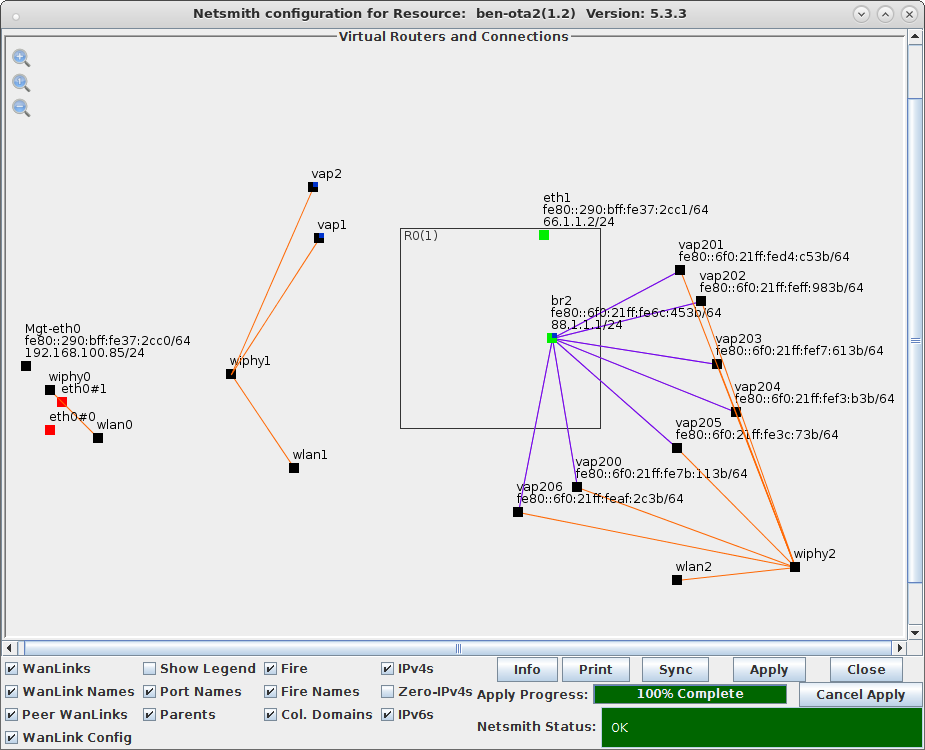
  4. Create a virtual router in Netsmith and add br2, and optionally a wired port (eth1) to the router. Double-click the br2 port and configure DHCP to match its IP address. When complete, Netsmith should look something like this: screenshot
  5. Now, we should have 7 vAP able to accept stations and give out DHCP addresses. Depending on the DUT, the user may wish to run iperf on LANforge, or on an upstream device connected to the LANforge eth1 port. For an initial test, make sure the DUT can connect to one of the vAP and get an IP address. The DUT should also see each of the vAP in its listing of available APs. This example will use LANforge WiFi Station on a different radio as the DUT. Here is a listing of the scan results: screenshot
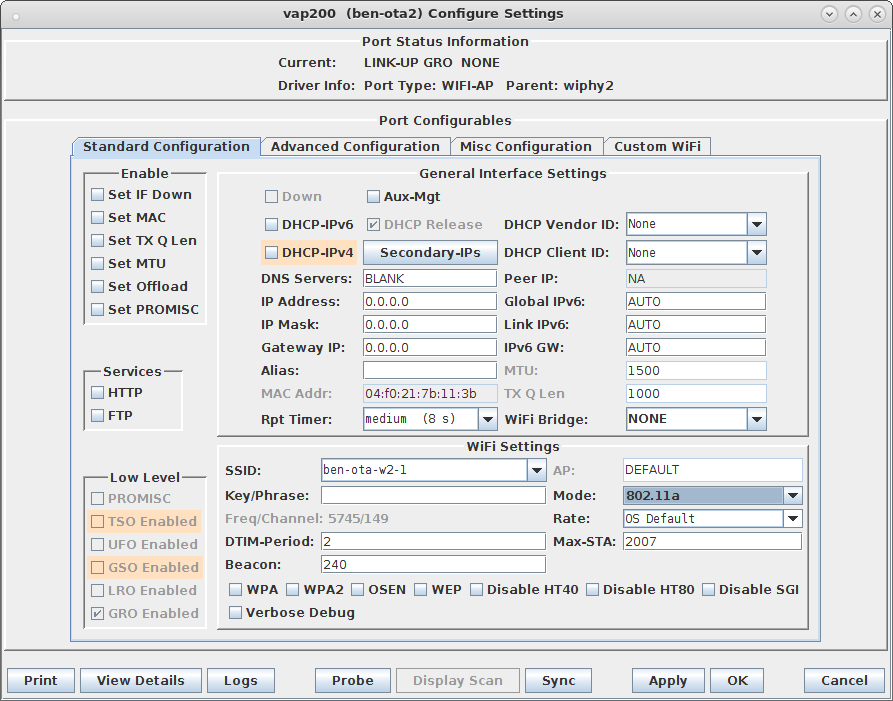
  6. To make it a bit more interesting, we will now set the operating modes for one AP to be 802.11a, a second to be 802.11n, and the rest will remain 802.11AC. These APs are running on channel 149, so b and g mode are not available on this radio. To set the mode, double-click the vap200 row and set the Mode to be 802.11a and click OK to apply. Use similar procedure to set vap201's mode to 802.11an: screenshot
  7. Now, request the DUT to re-scan and re-associate to the network. There should now be one 802.11a, one 802.11n, and 5 802.11AC vAP in the scan results. A well behaved DUT should attempt to connect to the AP with the higest rate that the DUT supports. In this case, the LANforge Station properly selected the 802.11AC vAP: screenshot
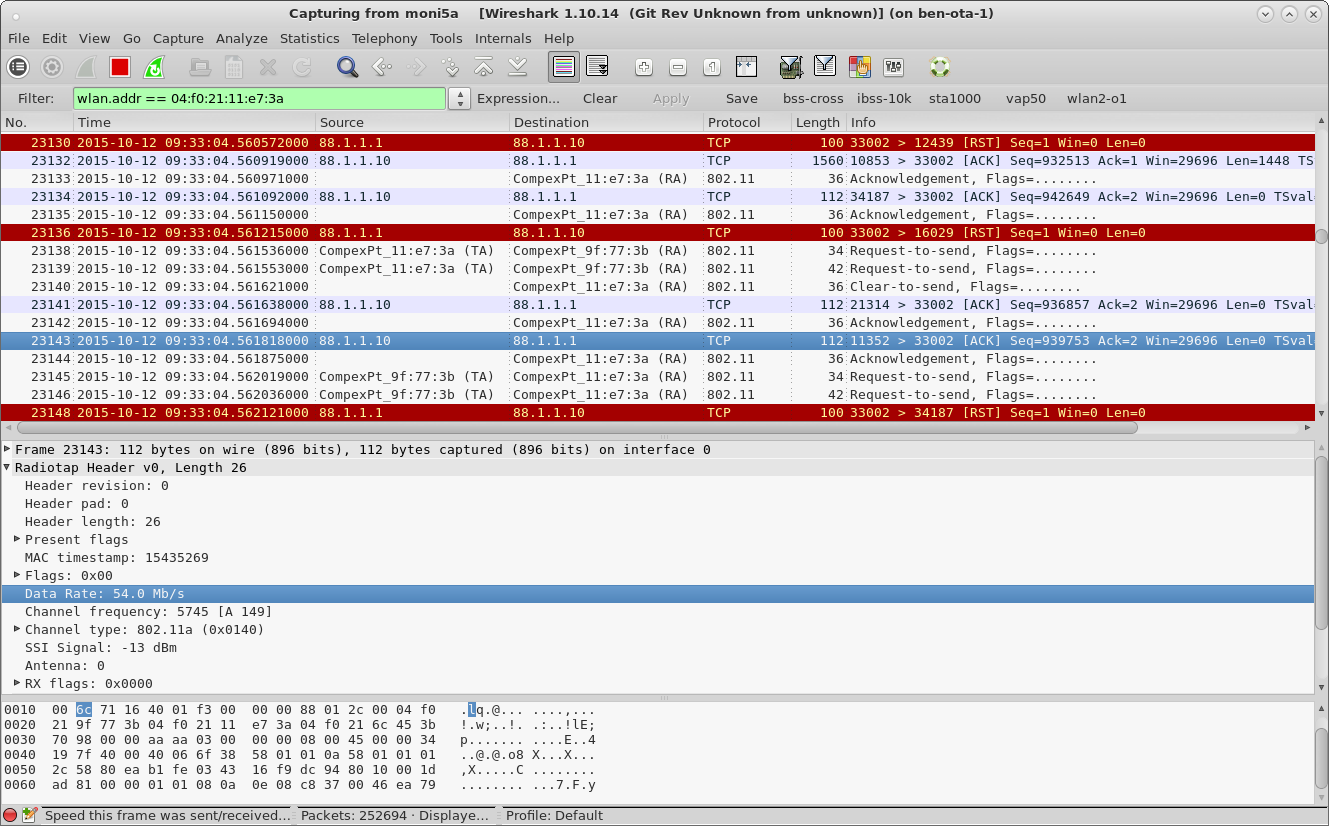
  8. For additional testing, you may wish to use additional LANforge radios to create more vAP, change the SSID and configure DUT to connect to a particular SSID, admin down vAP to make sure DUT will properly connect to a new AP, and much more. You may also run traffic on the different APs to ensure that if a DUT connects to a 802.11a AP, then it does not try to send any 802.11n (HT) encoded traffic. A LANforge radio configured for monitor mode could verify this, as could third-party sniffers.: screenshot

Candela  Technologies, 2417 Main Street, Suite 201, Ferndale, WA 98248, USA
www.candelatech.com | sales@candelatech.com | +1.360.380.1618
Facebook | LinkedIn | Blog