Candela Technologies Logo
Network Testing and Emulation Solutions

LANforge WiFi Testing Fast Roaming Stations with 802.11r

Goal: Use automated script to migrate stations between APs and report results.

Requires LANforge 5.2.11 or later. Configure Stations to use FT-EAP (802.11r) and associate them with an 802.11r AP network. Use the 'WiFi Mobility' LANforge-GUI Plugin to automate roaming the stations between the APs. The plugin will create graphs and other reports that can be saved to HTML. This example uses a LANforge CT523 system but the procedure should work on all CT520, CT523 and similar systems.

The two APs under test are on the same channel, so a single radio/NIC on LANforge can roam virtual stations between the APs. But, if the APs were on different channels, only a single station per radio would be supported. Multiple CT523 or other high-density systems can be used to migrate stations between APs on different channels.

 
  1. Configure stations to connect to APs configured for 802.11r. This requires special AP software support and usually an AP Controller (APC).
    1. Go to the Port Manager tab, select wiphy0 on proper resource, click Create, fill out appropriate information and create desired number of Station interfaces.
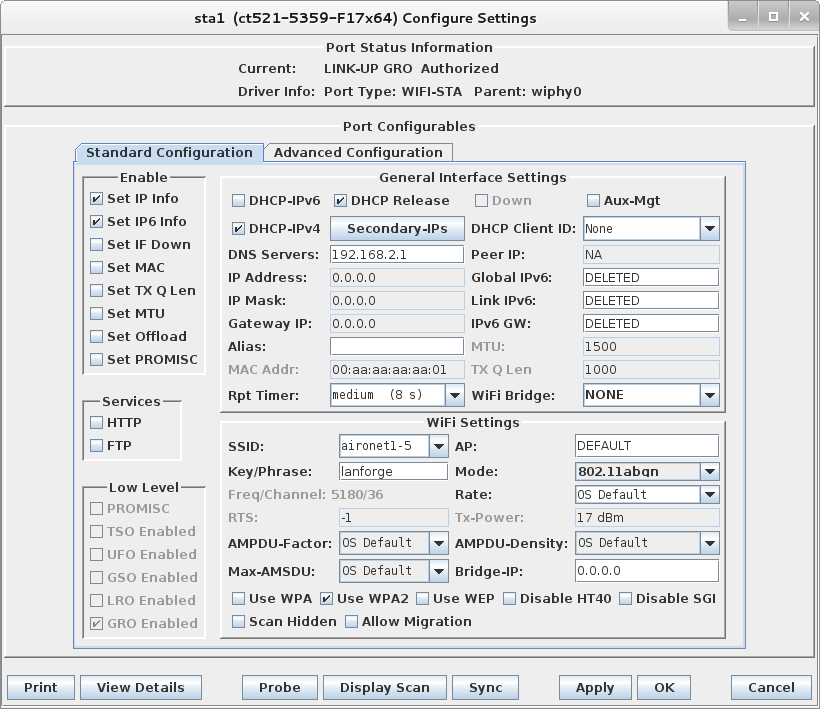
    2. The new stations should appear in the Port-Mgr table. Double-click to modify one of them. Configure IP Address information, SSID and select WPA2: screenshot
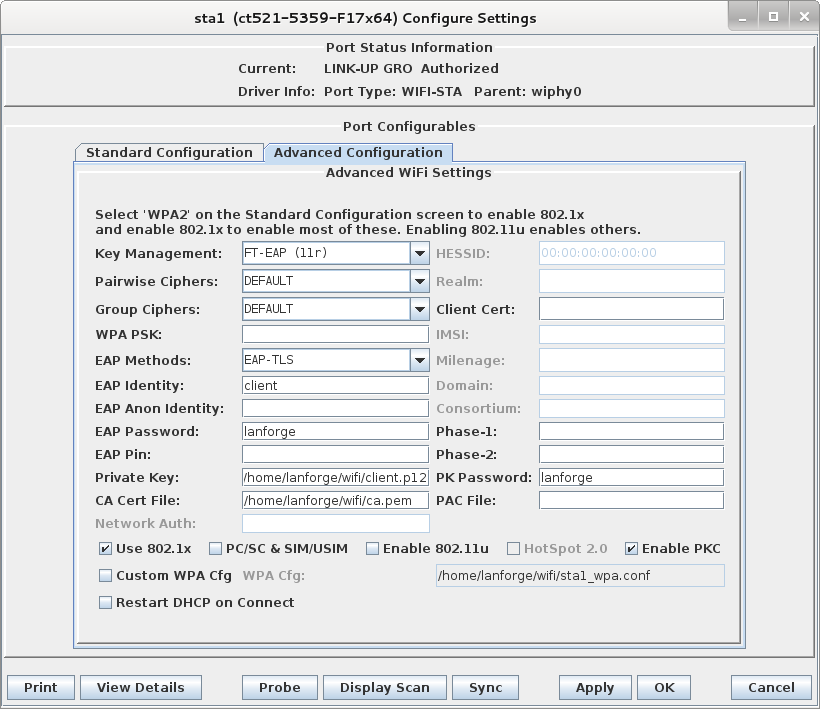
    3. Select the Advanced Configuration tab in the Port-Modify window and configure the Key Management, Private Key and other values needed to connect to the APs. Be sure to un-select the Restart DHCP on Connect checkbox so that DHCP is not refreshed each time a station roams: screenshot
    4. Once the single station is connecting properly, use Batch-Modify to configure the rest of the stations to match the first.

    For more information see LANforge User's Guide: Ports (Interfaces)

    , WiFi Station Cookbook
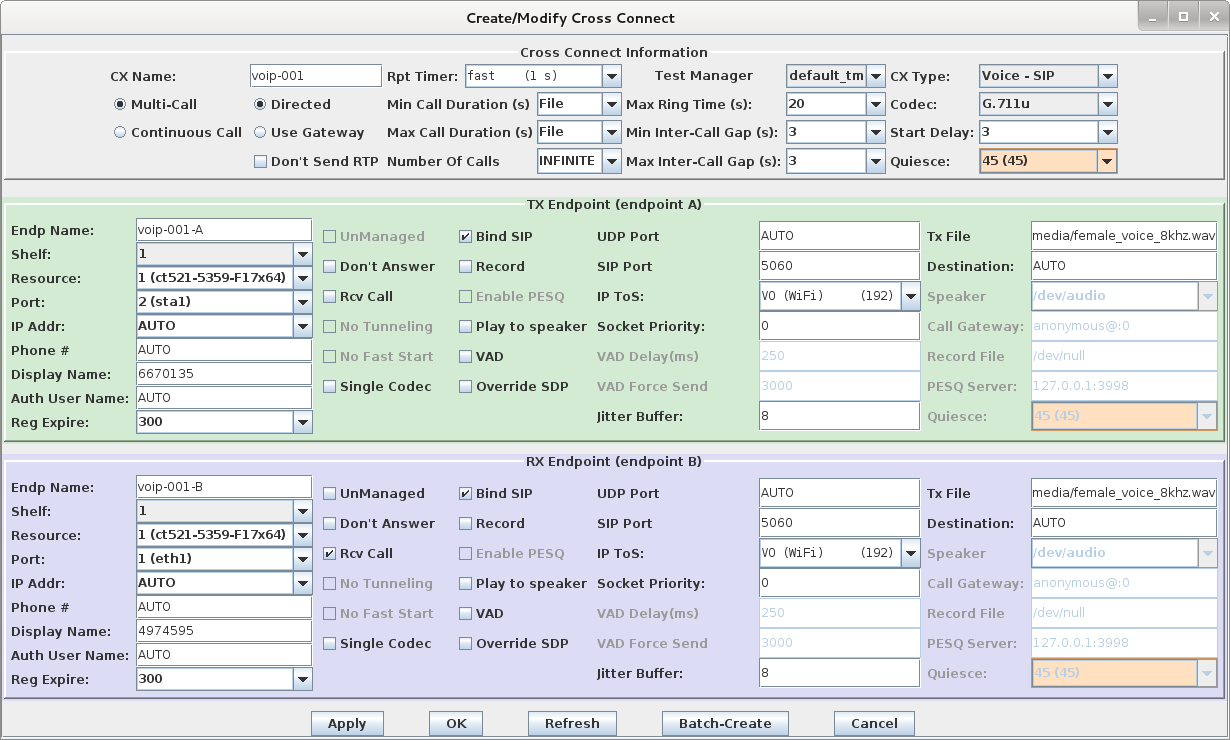
  2. Create VOIP connections between the wired Ethernet eth1 interface and the stations. This will add realistic traffic load to the network under test and allow LANforge to report packet-loss statistics during roaming. The VOIP feature costs extra, so you may wish to use a normal Layer-3 UDP connection which should also provide good reports and a realistic traffic load. The steps below are for VOIP, but Layer-3 would be very similar.
    1. Go to the VOIP/RTP tab, click Create, and configure a VOIP connection on eth1 and the first station: screenshot
    2. Apply the configuration and make sure the call can complete. Then click Modify on the VOIP connection and use Batch-Create to create one connection for each of the WiFi stations.
    3. Select the VOIP and/or Layer-3 connections and start traffic flow. For this example, the connections should remain running while the roaming takes place. It would also be valid to do roaming without any traffic if that is the desired test case.
  3. Start the WiFi Migration script.
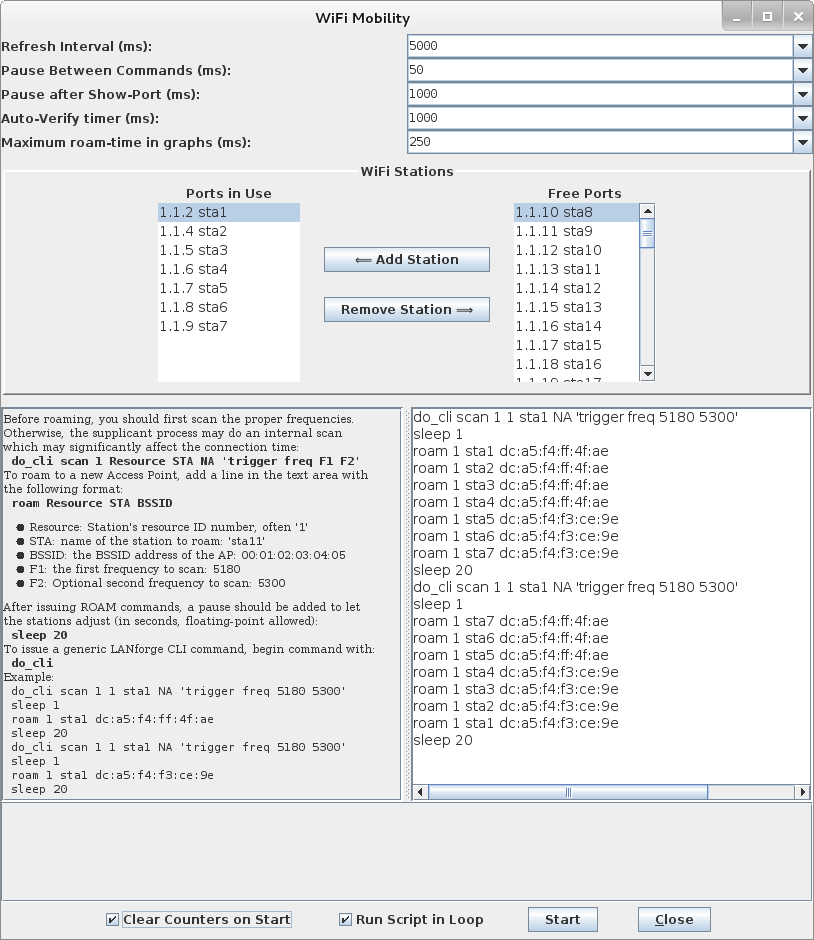
    1. Go to the Port Manager tab, select the stations you wish to roam, right-click and choose the WiFi Mobility menu option. screenshot
    2. The options at the top default to common values and may not need to be changed. The ports will be automatically configured based on the selection on the Port Manager tab, and can be adjusted before starting the script. The Ports in Use should normally include all stations used in the script. The configuration requiring the most work from the user is the roaming script itself. There is a help section on the left, and a script-entry field on the right. Once the script is written, it should be saved in a text file on the user's PC so that it can easily be pasted into future WiFi Mobility scripts. Some key points are that you must scan about 1 second before roaming or the roam logic in the supplicant process will either fail or do it's own roaming. Either way, the results may be worse than if you do the roam properly in the script. It can take a bit of time for LANforge to get all of the data it needs to report on the roam attempt, so it is suggested that stations not roam more often that about once every 10-20 seconds. If reporting is less important, then the stations can roam more often.
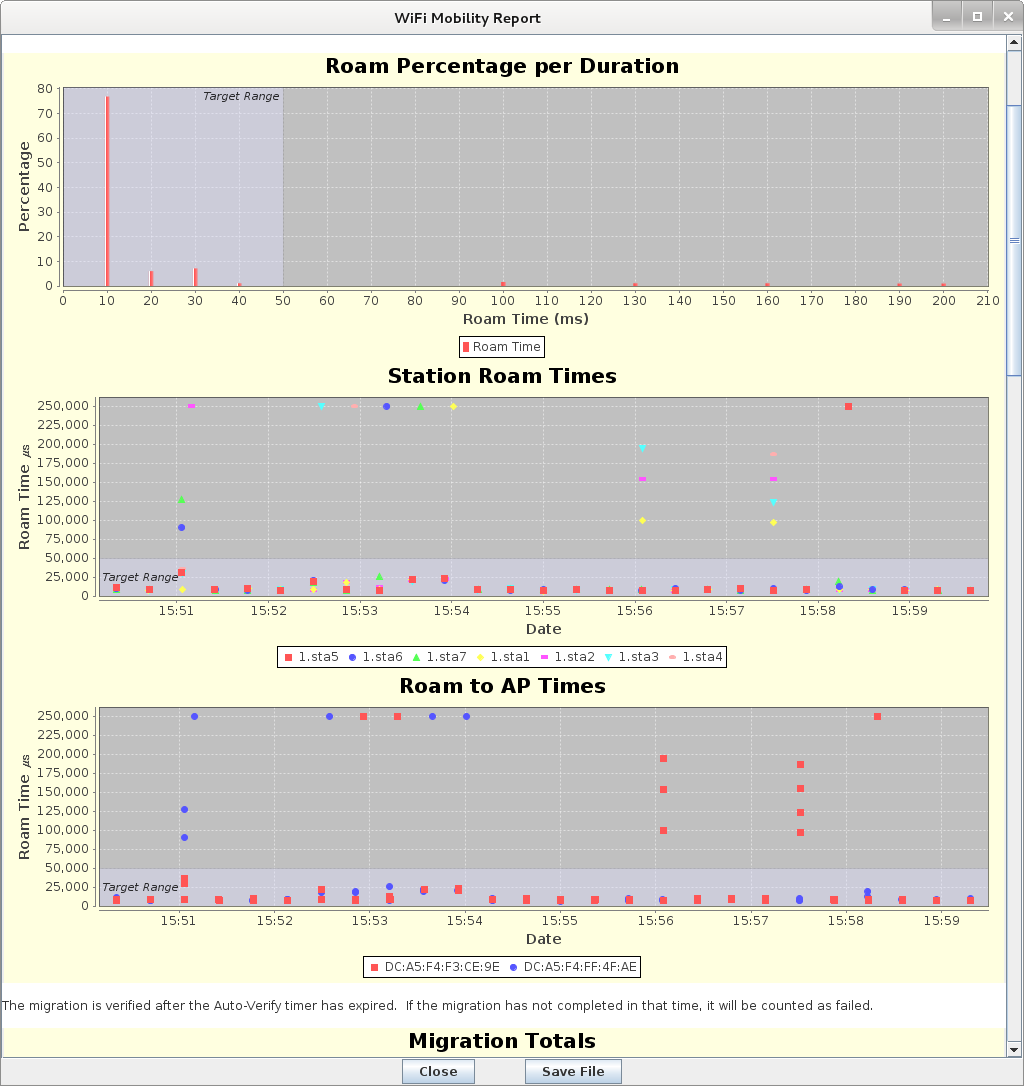
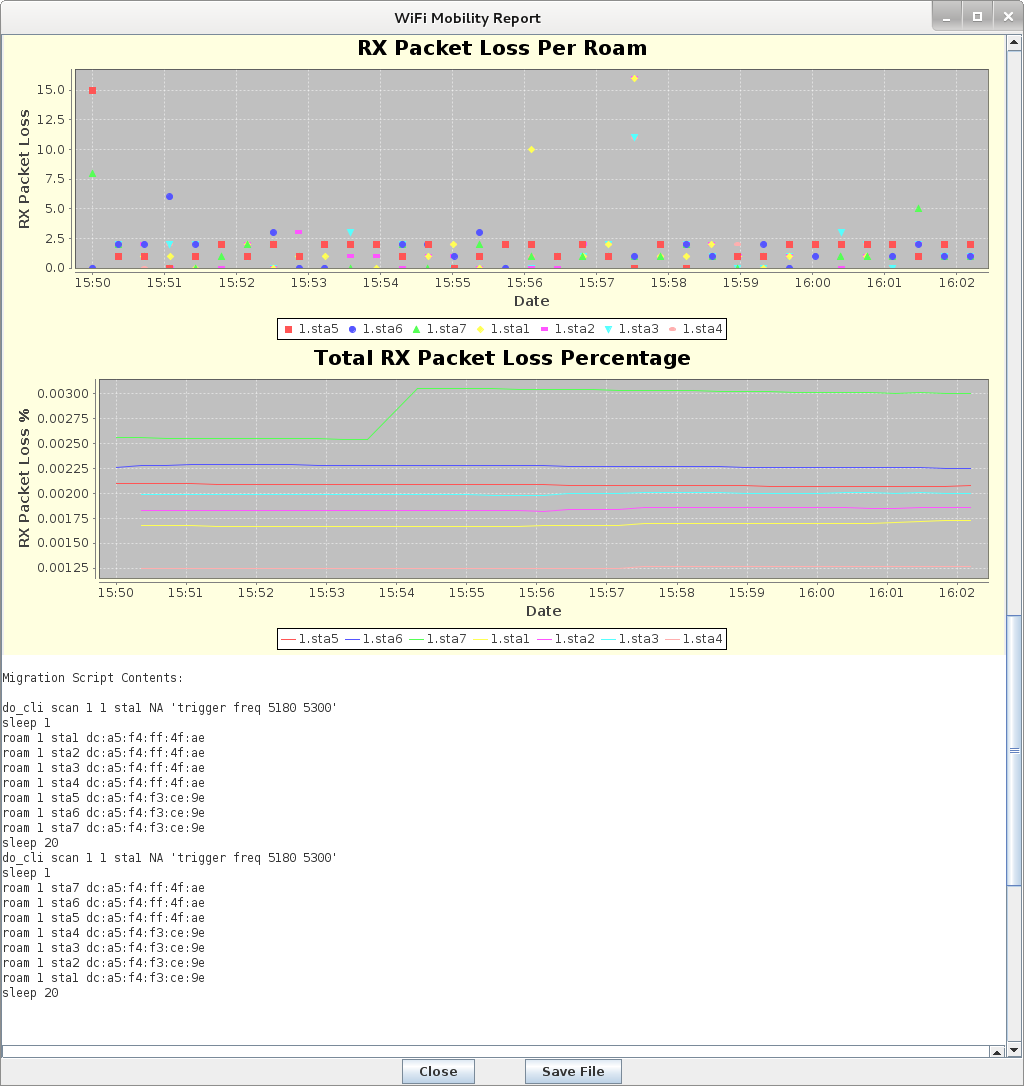
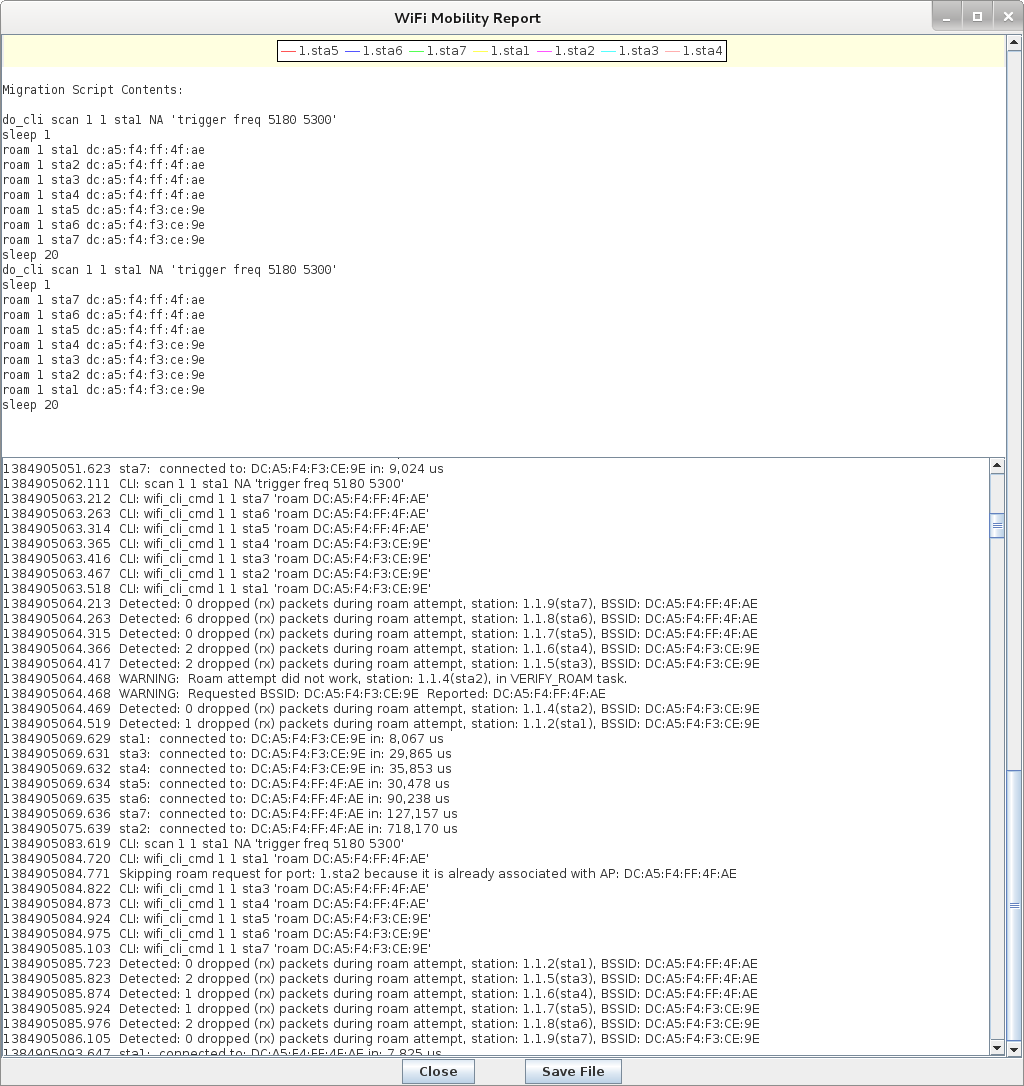
    3. Once the script is properly configured, click Start to start the roaming. A window will pop up that has live-updating graphs of various reports. A text log is at the bottom for more detailed analysis, and the whole thing can be saved as HTML. The graphs can be scaled and configured through right-click menus if desired. It will take 1-2 complete roam attempts before the graphs are able to show any useful information. screenshot
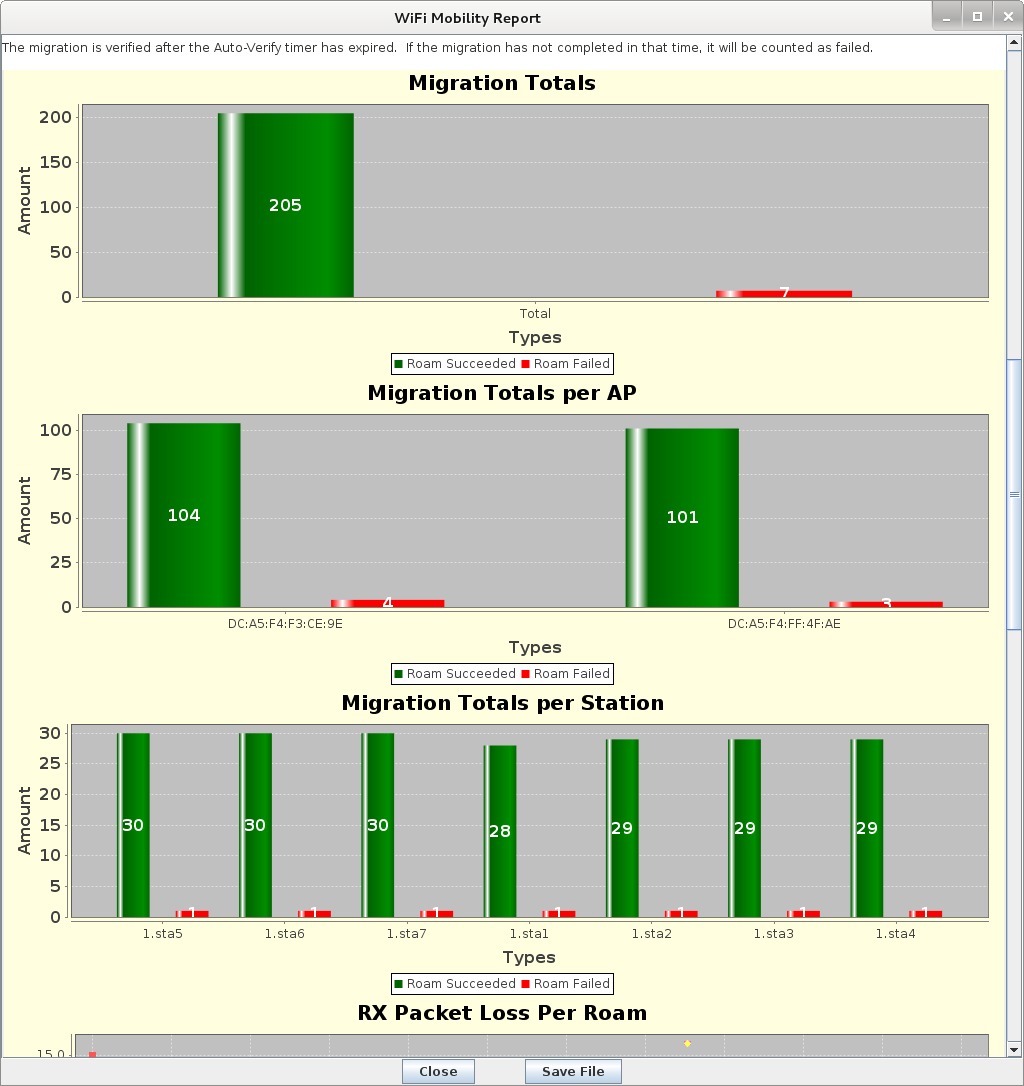
    4. Migration totals graphs. screenshot
    5. Packet Loss graphs. screenshot
    6. Text log with timestamps. Can be coorelated with wpa_supplicant logs and other log files to debug specific roam attempts. screenshot

Candela  Technologies, 2417 Main Street, Suite 201, Ferndale, WA 98248, USA
www.candelatech.com | sales@candelatech.com | +1.360.380.1618
Facebook | LinkedIn | Blog