Candela Technologies Logo
Network Testing and Emulation Solutions

Testing Latency at different packet sizes using the Hunt test

Goal: Setup and run a Hunt test for an AP using the LANforge CT523c or similar system in order to test Latency at the highest throughput rate supported by the DUT.

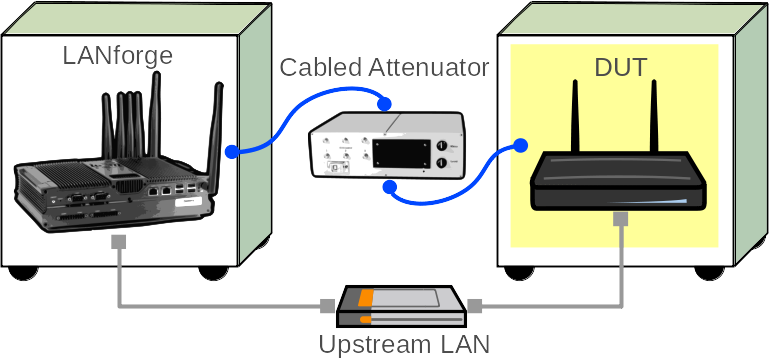
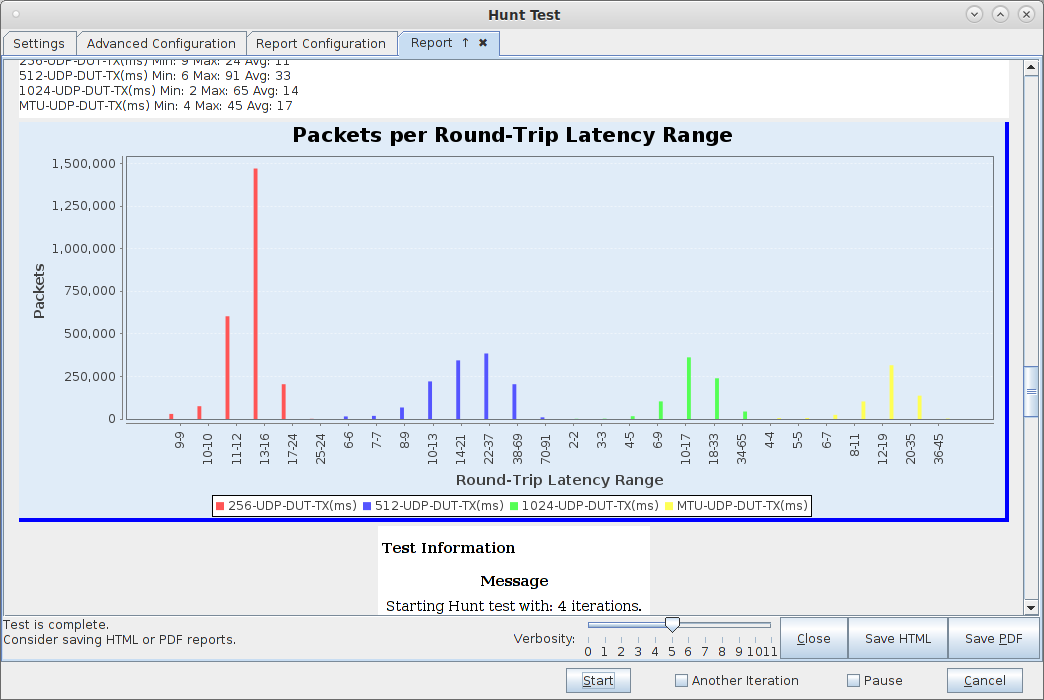
In this test scenario, the LANforge CT523c is used to generate packets of different sizes in the downstream direction through an AP. The test hunts to find the best throughput, and then re-runs the traffic test configured to a percentage of the best actual throughput. Latency graphs show how well the DUT performs. This guide assumes you have some experience with Chamber View, and that you have a LANforge system, a programmable attenuator like the CT704b and two isolation chambers like the CT820a. The AP should be in one chamber, the LANforge system is in the other chamber, and the attenuator is cabled between them. In this example, the Attenuator is left at an optimal configuration, but you can also use this same Hunt test to generate a report at different RF signal levels using the Attenuator. This feature requires LANforge version 5.4.2 or higher.

 
  1. Configure Chamber View for Hunt and Similar Tests.
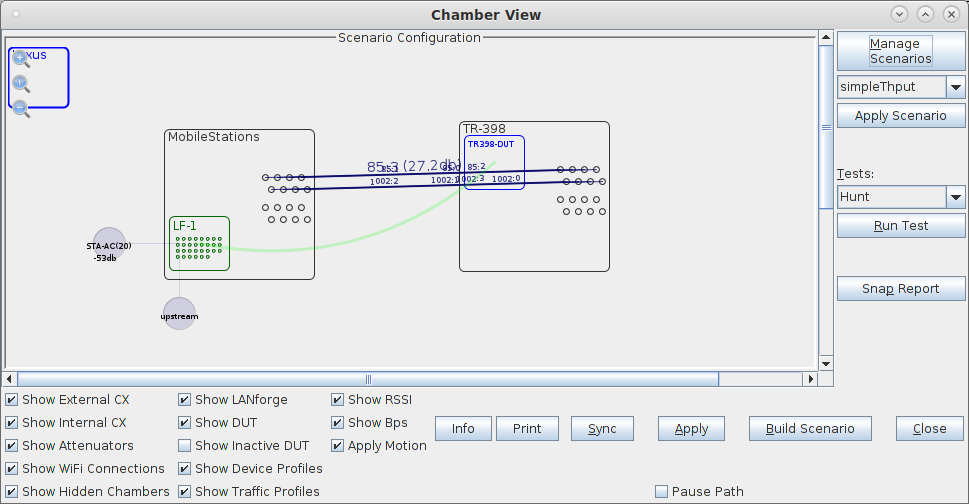
    1. Open Chamber View by clicking on the 'Chamber View' button in the LANforge-GUI. If you have an appropriate scenario already created, then skip to the next section, otherwise you will need to build a scenario that matches your system. You can right-click in Chamber View to create various objects. screenshot
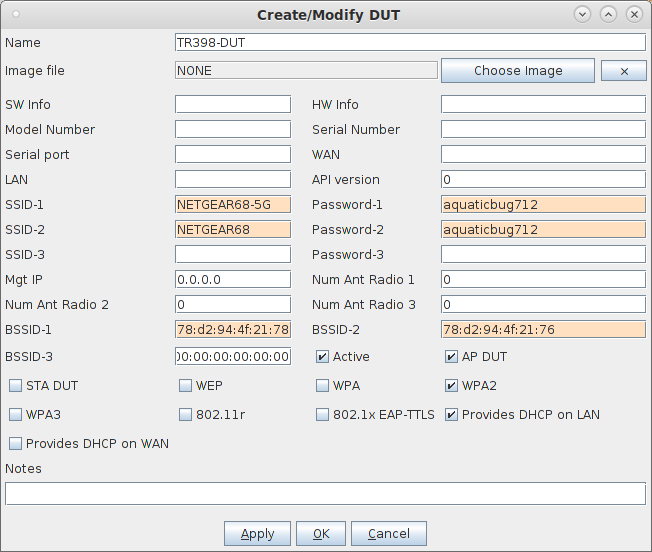
    2. Create a Device Under Test (DUT) Profile that matches your AP. The BSSID is important to configured so that LANforge knows when it is connected to the correct AP. screenshot
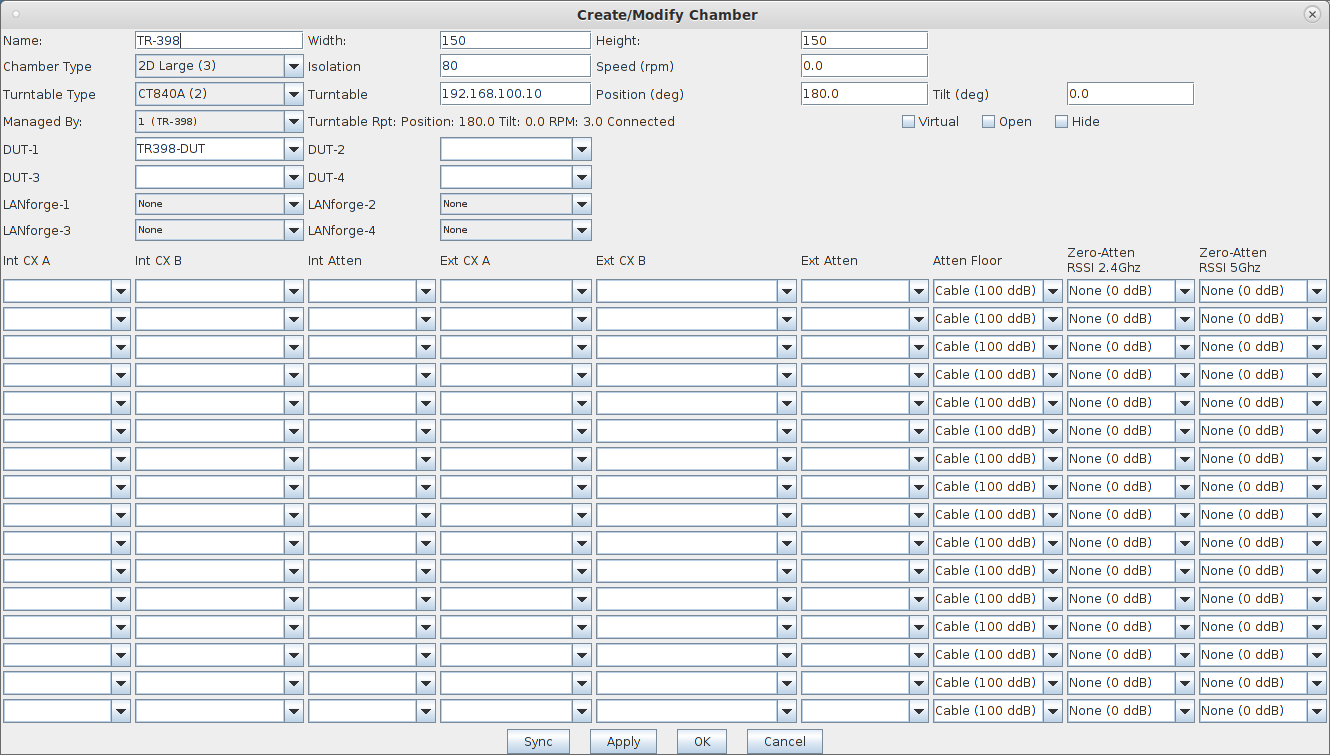
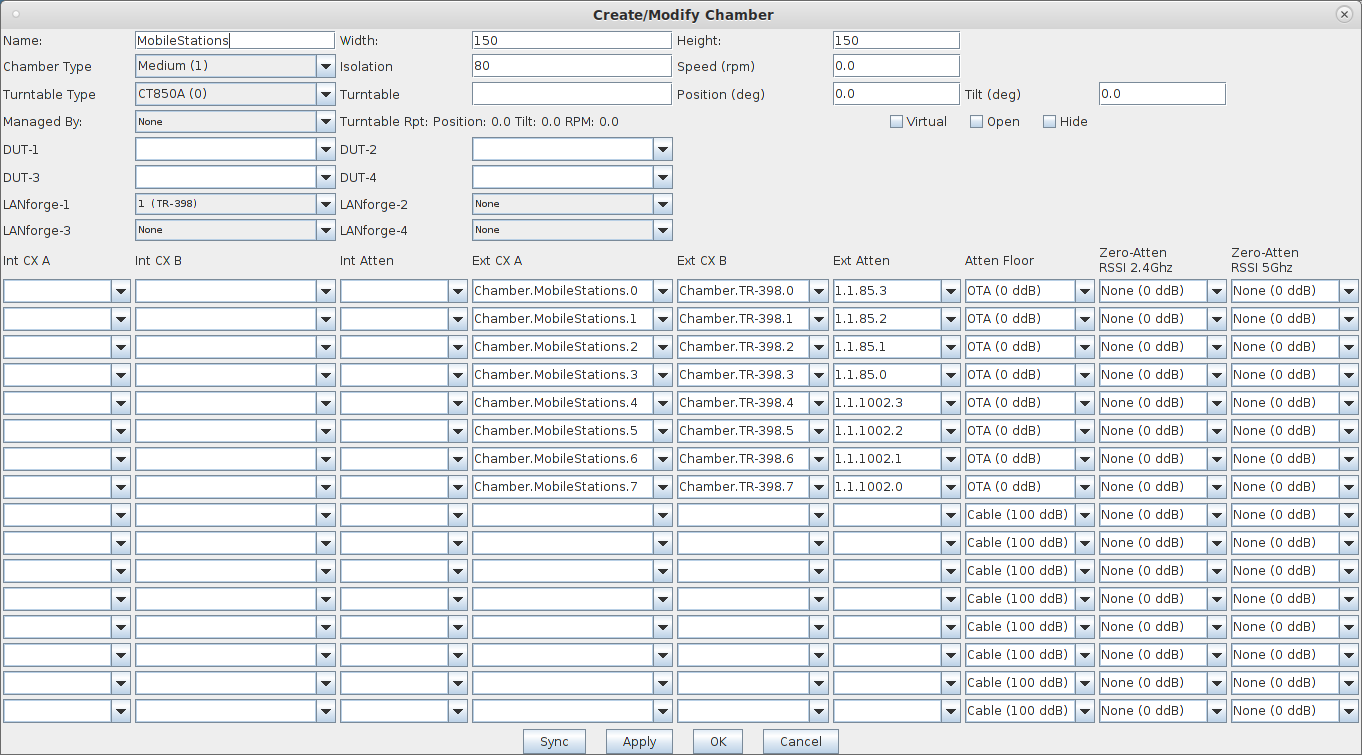
    3. Create a chamber object to hold the DUT, and add the DUT to that chamber. If you have no chambers, you can create a fake chamber, but your test will not be isolated and may not function as desired. screenshot
    4. Create a chamber object to hold the LANforge system, and add the LANforge to it. Add connections from this chamber to the DUT chamber, specifying the proper Attenuator modules. Please view our other cookbook on setting up attenuator connections in LANforge. screenshot
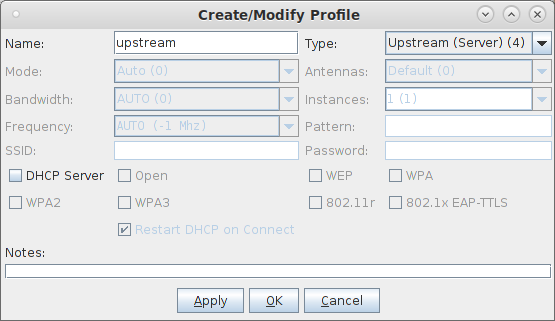
    5. Configure an Upstream profile using eth1 on the LANforge system. screenshot
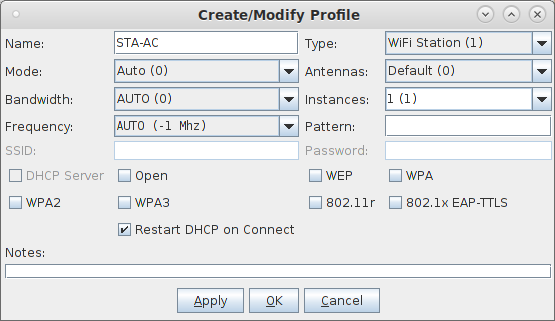
    6. Configure an STA profile on the LANforge system. screenshot
    7. Configure a Chamber View Scenario and add the STA profile (mapped to desired wiphyX radio and DUT). Add an upstream profile mapped to DUT LAN side (or possibly WAN side if that is more appropriate for your DUT). screenshot
  2. Use Chamber View for Hunt test.
    1. Open Chamber View by clicking on the 'Chamber View' button in the LANforge-GUI. Load appropriate scenario. Apply the Scenario, then Build the scenario. screenshot
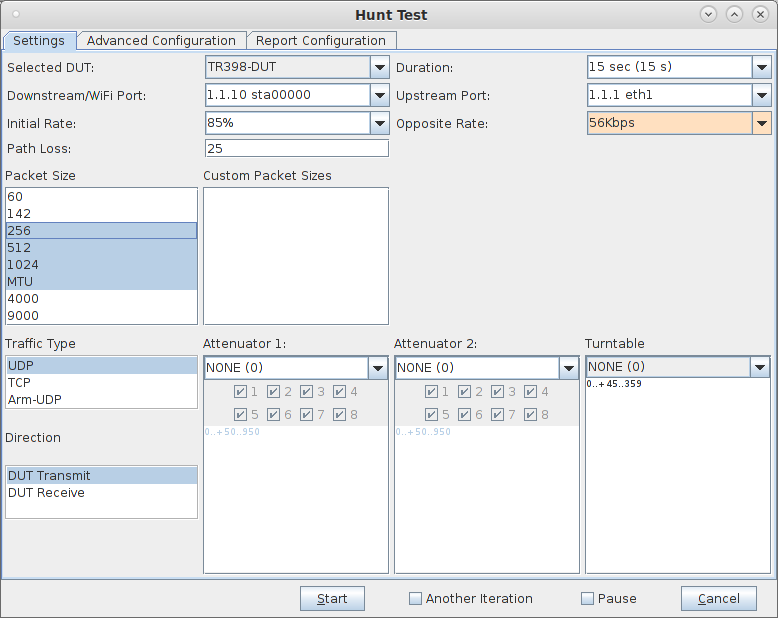
    2. Select the Hunt test and click Run Test. You should see the Hunt Test configuration window pop up. It will remember the last configuration for most fields. Select the DUT and WiFi station device, and select the combinations of traffic types and packet sizes you wish to send. screenshot
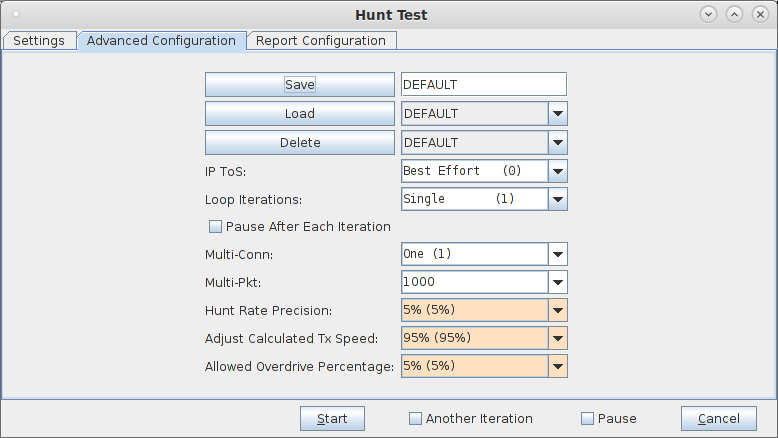
    3. The Advanced Configuration screen can tune the hunt criteria, save/restore configuration and other options. screenshot
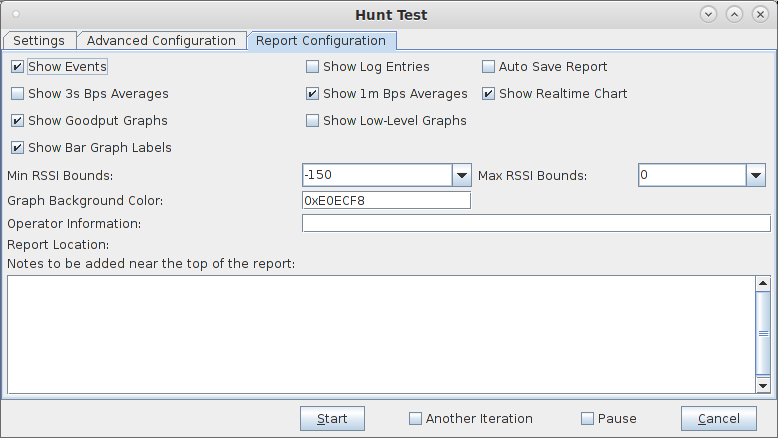
    4. The Report Configuration screen can tune how the reports are generated. screenshot
    5. When the configuration is complete, click the Start button (which will change to 'Stop' once start is clicked) to start the test. An interactive report window will be created and will be updated as the test runs. screenshot
    6. When the test is complete, click the Save HTML button to save an HTML report and generate the PDF. The PDF file will be linked from the HTML page. You can also click 'Save PDF' and the browser will be directed to open the pdf file directly. Please see this example Hunt Report.

Candela  Technologies, 2417 Main Street, Suite 201, Ferndale, WA 98248, USA
www.candelatech.com | sales@candelatech.com | +1.360.380.1618
Facebook | LinkedIn | Blog