Candela Technologies Logo
Network Testing and Emulation Solutions

CI/CD Automated Testing of Access Points

Goal: Setup a framework to automatically find new builds, install them on target AP, run regression tests, and report values. Generate graphs of key data over all runs for historical view. Candela support is available to help customize scripts and fully implement this for your particular environment.

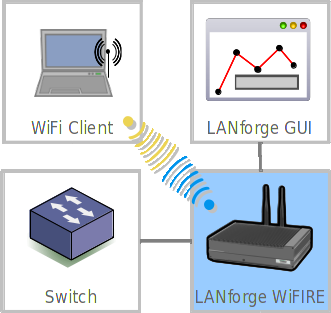
In this test scenario, a LANforge CI/CD package (ct523c, RF chamber, Test Controller and other bits and pieces) consumes AP firmware build images, runs automated tests, and reports the values. A test-orchestrator machine queries the build system to find new builds. Work-items are created when new images are found. A test-bed controller looks for images that match the hardware in the test bed. The test-bed controller updates the AP with new firmware, reboots and configures it. The test-bed controller then automates control of the LANforge system to run a series of tests and then gatherers the results. When the tests are finished, they are uploaded back to the test-orchestrator. The test-orchestrator will regenerate historical graphs when new results are found, and upload the finished reports to a web server.

 
  1. Configure Systems for automated testing. In this example, there are three main systems: Test-Orchestrator (TO), Test-Bed Controler (TB), and LANforge system (LF). The AP under test is referred to as DUT. Many of the details are left out of this document, your favorite search engine or network administrator should be able to help show you the details.
    1. The automation uses ssh and scp to do its work. So, first you have to make sure that the TB can log into the TO with ssh without requiring password. This example uses the user 'lanforge' on the TO and LF machines.
    2. The testbed machine user must be able to run'sudo' without needing a password.
    3. In order to read console logs, the TO should act as the serial console server for the LANforge and AP DUT. In order to have the lanforge user on the TB system access the serial ports, you must change the permissions:
      sudo chmod a+rwx /dev/ttyUSB*
      This command must be run after the serial consoles are connected, or at least re-run once all of the /dev/ttyUSB* devices are found.
    4. Install additional software packages needed by the automation scripts.sudo pip3 install pexpect-serial
  2. Configure LANforge to be used as an automated testbed.
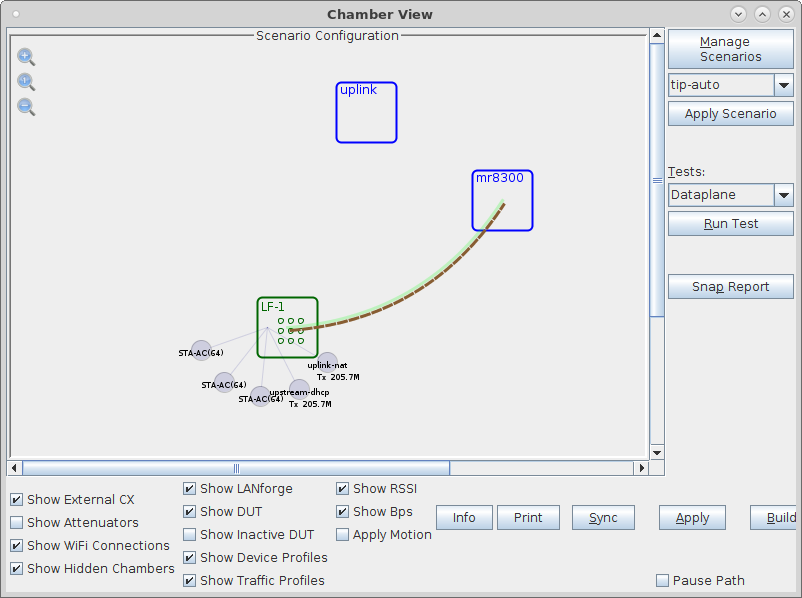
    1. Clean up any old config and create a chamber view scenario and DUT. screenshot
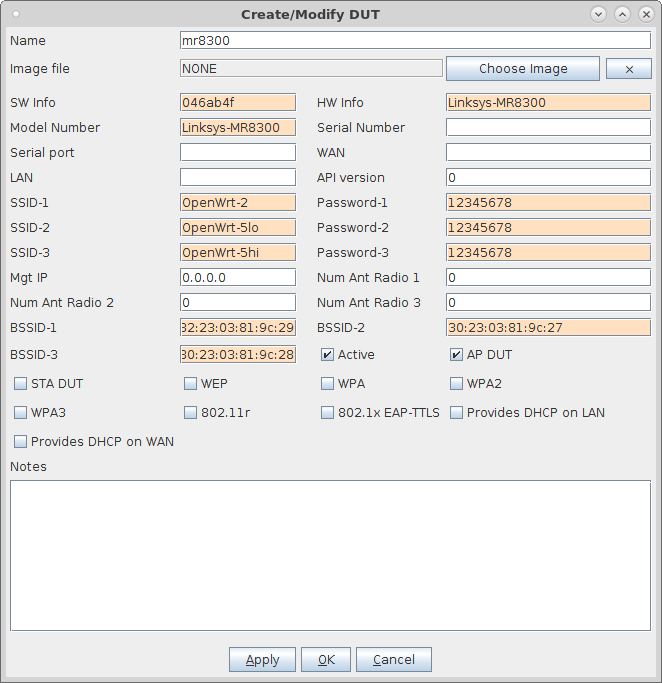
    2. In this example, the AP DUT is called 'mr8300'. screenshot
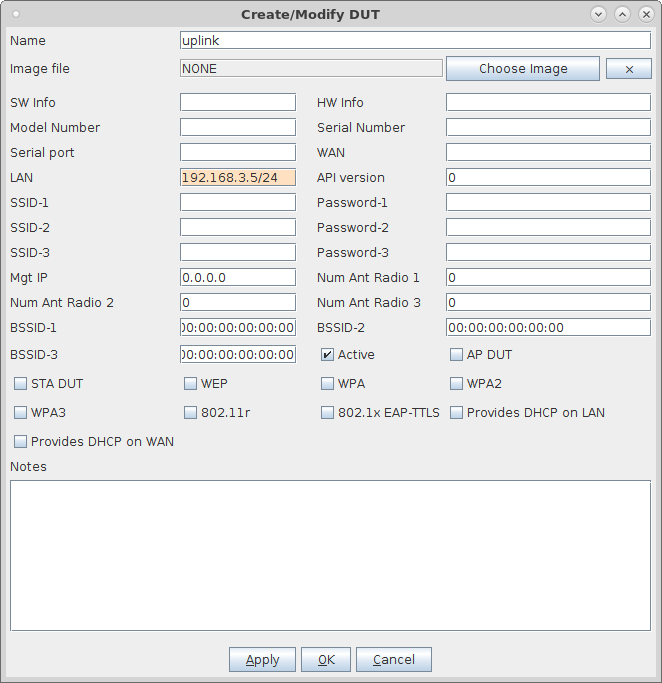
    3. This configuration uses some advanced virtual-router features in LANforge to have LANforge serve the DUT DHCP and provide a private NAT'ed network for the DUT the stations connected to it. The uplink DUT is part of how this is configured. The LAN address is the gateway for the virtual router. In this case, the LANforge machine's DUT uplink port is eth1, and it is cabled to a network that uses 192.168.3.5 as the gateway/router. Other test beds may use different Ethernet ports to provide these features. screenshot
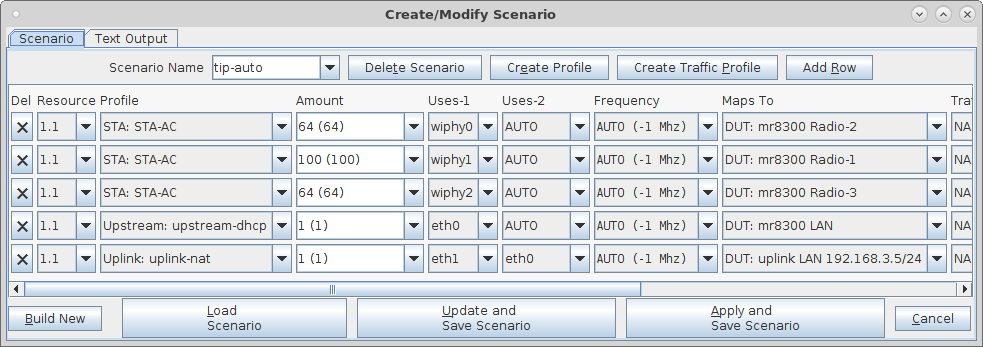
    4. The Chamber View scenario creates stations on the available radios, provides the Upstream port (from perspective of the DUT), as well as uplink + NAT for the interface that routes DUT traffic upstream of LANforge. screenshot
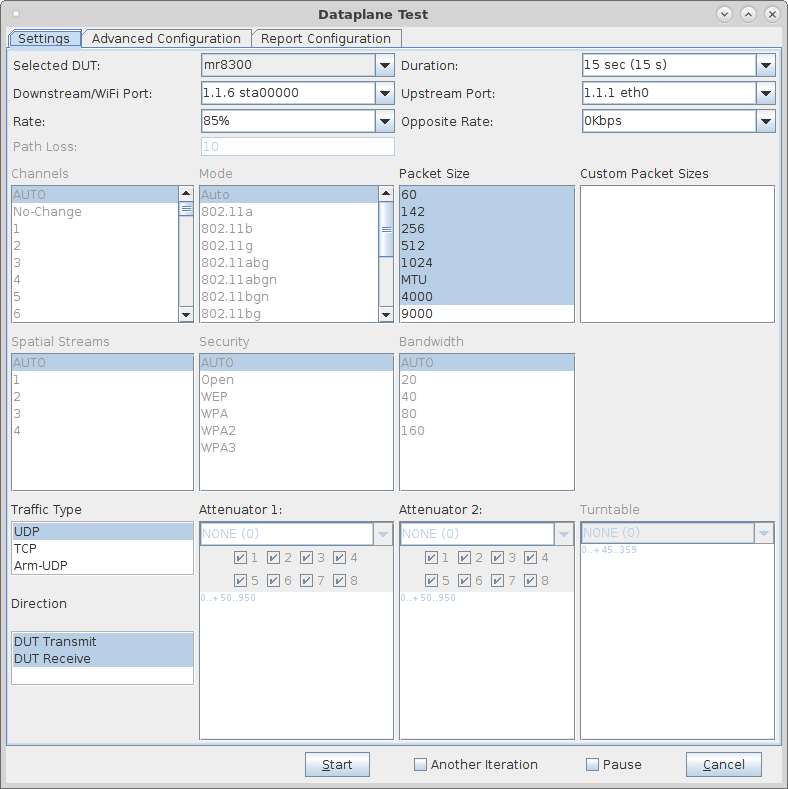
    5. Once chamber-view is set up, you need to create some test configurations for the various automated tests you wish to run. In this example, one test we use is the Dataplane test to test throughput at different packet sizes. screenshot
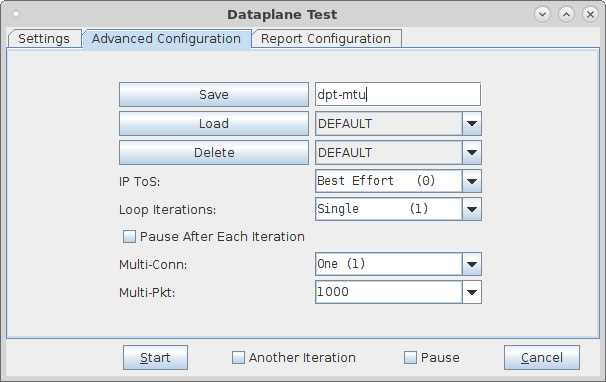
    6. On the Dataplane Advanced tab, select a name and save the config. We will use that name later when configuring the automated tests. screenshot
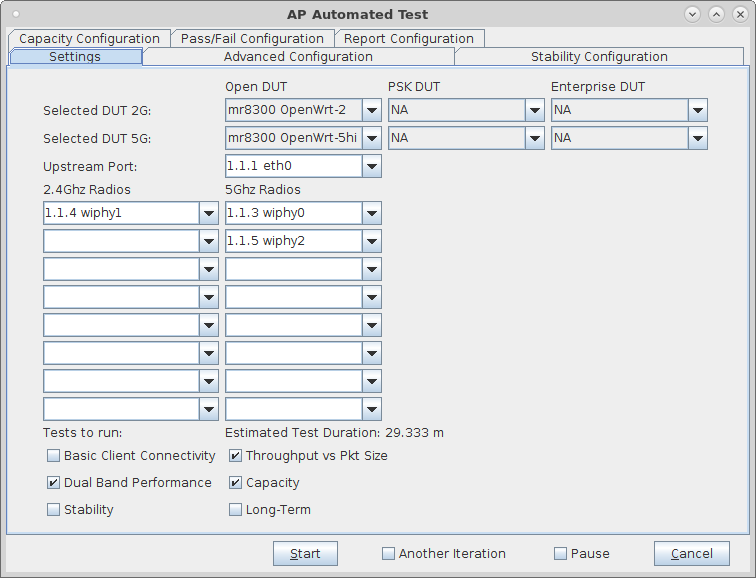
    7. Configured the AP-Auto test as well. screenshot
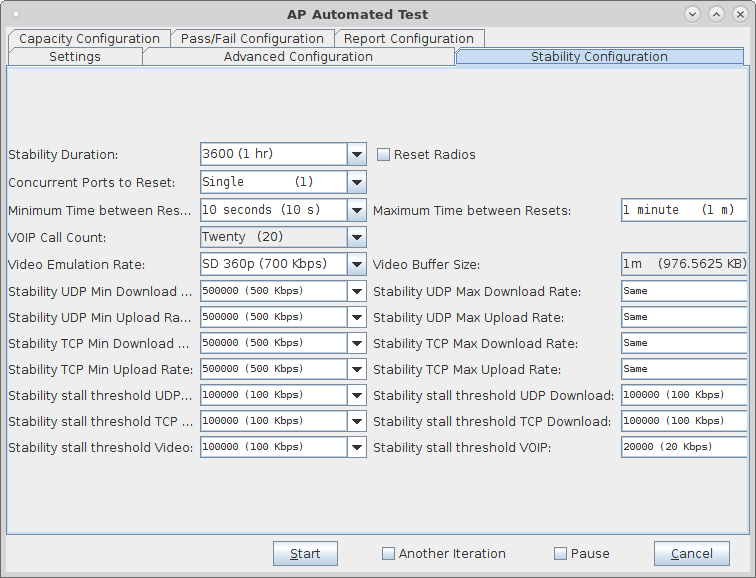
    8. Configure the AP-Auto Stability configuration. screenshot
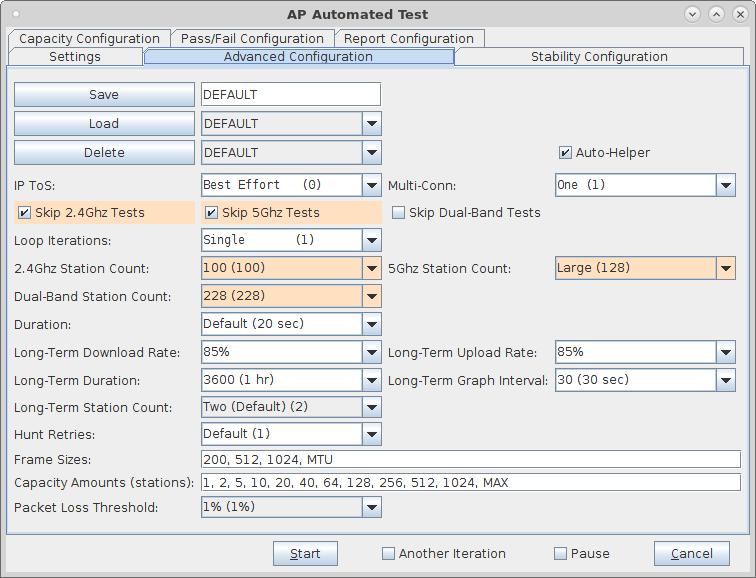
    9. Configure the AP-Auto Advanced configuration, and save the configuration when done. screenshot
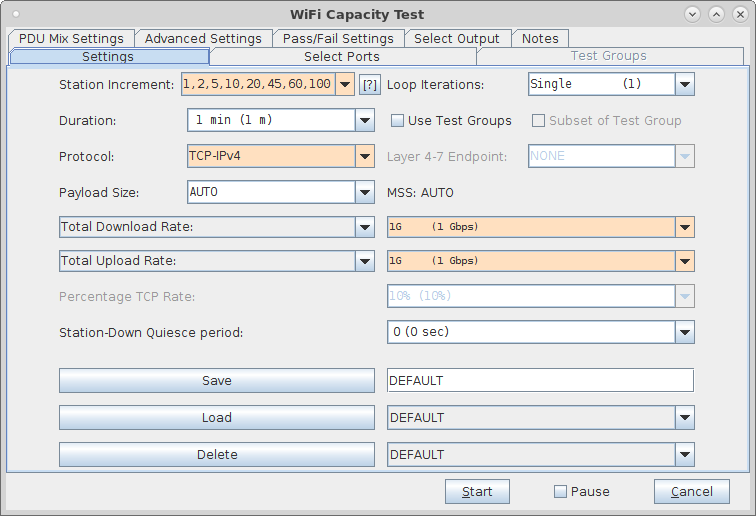
    10. Configure a capacity-test, and save the configuration. screenshot
  3. Configure Testbed Contoller. This system will use the lanforge-scripts project (installed at /home/lanforge/scripts on LANforge systems). You will probably want to have a separate code repository for the Testbed automation. Candela can help you build scripts specific to your environment. This example shows how it was implemented for one project.
    1. Create a directory structure that looks like this. The 'cicd' directory will contain glue logic to talk to the Test Orchestrator and to the LANforge automation. The testbeds directory holds information for each testbed in your configuration. The lanforge directory has a sub-directory called 'lanforge-scripts' that points to the lanforge-scripts project. screenshot
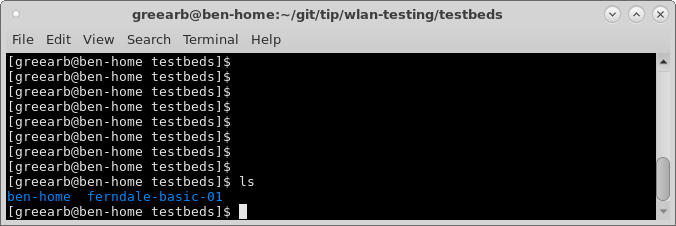
    2. Inside the testbeds directory will be a sub-directory for each testbed in the project. In this example, we have two testbeds. We will focus on the one called 'ben-home' screenshot
    3. The ben-home testbed directory contains the Chamber View scenario, AP Auto, Dataplane and capacity configuration files. The automation will apply the OpenWrt-overlay on top of the base OpenWrt image after upgrading the software on the AP. This is an optional step and may not be useful for other DUTs. screenshot
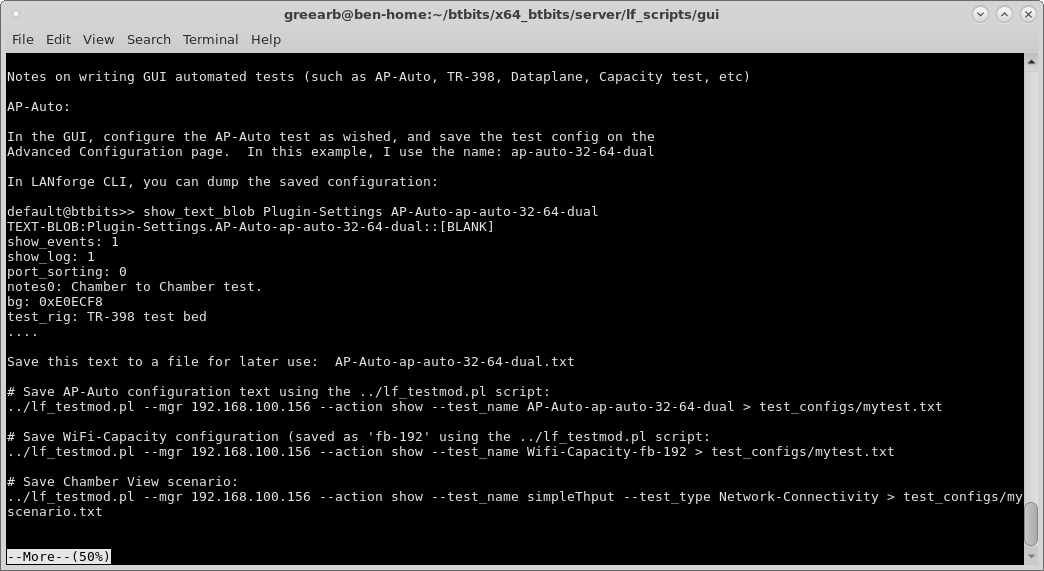
    4. The text configuration files were created by using the lf_testmod.pl script from the lanforge-scripts project. Please see the scripts/gui/README.txt for details. screenshot
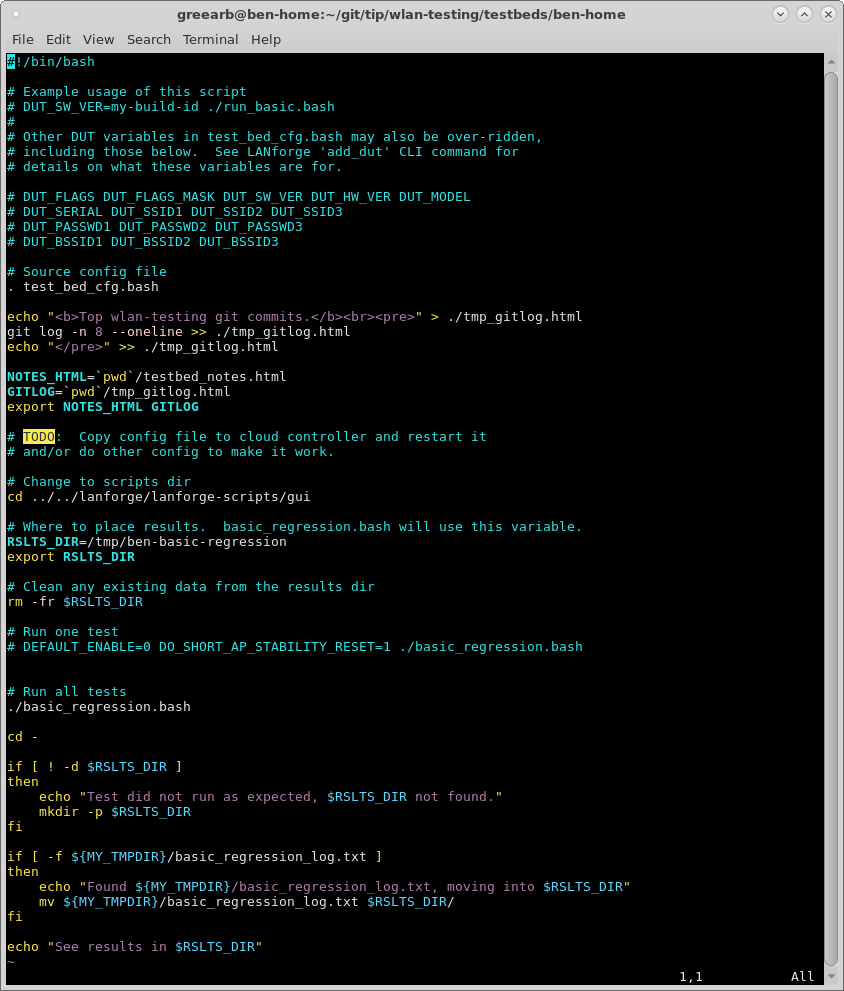
    5. The run_basic.bash script is a helper script that sets some environment variables and then calls the lanforge-scripts/gui/basic_regression.bash script. screenshot
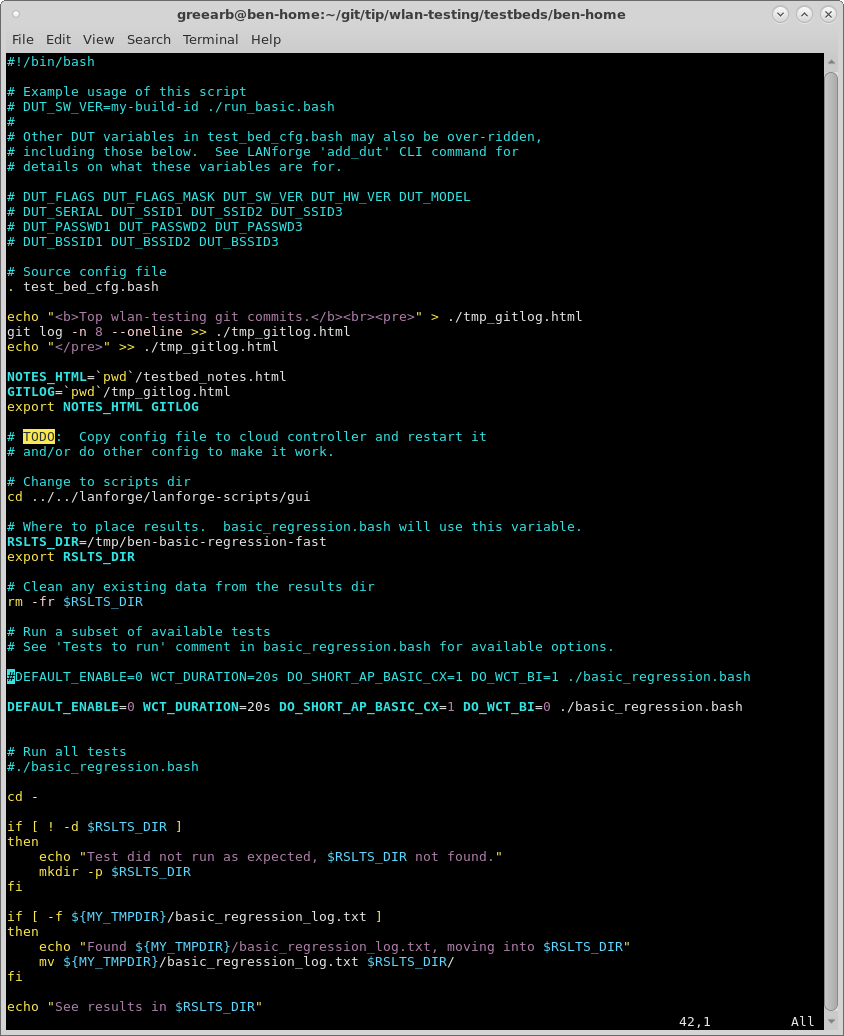
    6. The run_basic_fast.bash script disables most of the tests and just runs a few specific ones. screenshot
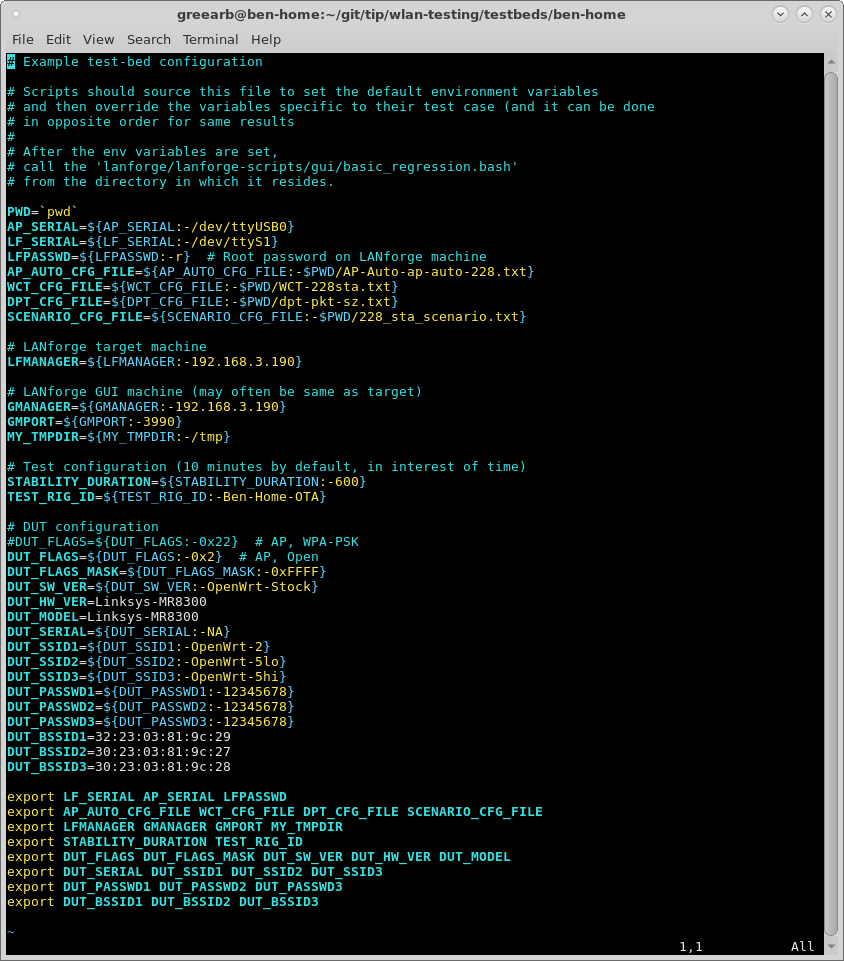
    7. Both of the scripts use the test_bed_cfg.bash file to configure the details about the device-under-test and the LANforge system. This configuration will allow the automation to properly do its work. screenshot
    8. The testbed_notes.html is a snippet of HTML that will be added to reports to describe this test bed. screenshot
    9. The cicd directory contains a directory for each of the test-beds, named similar to the testbeds directory. In this case, we are using the ben-home testbed. This directory will hold a file called TESTBED_INFO.txt. This describes the DUT hardware platform so that the test orchestrator knows what testbed can handle which binary images (this project is doing builds for multiple hardware platforms.) screenshot
    10. The cicd directory also contains a script that queries the test orchestrator. The code in it is beyond the scope of this guide, but roughly speaking, it queries the test orchestrator's web page to find new work items, and when found, it will execute the test and upload results back to the orchestrator. An example run of this tool is:
      ../testbed_poll.pl --jfrog_passwd secret --url http://192.168.100.195/tip/testbeds/ben-home/pending_work/
      For full automation, this program should run in a loop, waiting 2 minutes between tries to give the orchestrator time to notice the results and remove the old work-item.
  4. Configure test orchestrator. This system is visible to all the test beds. It could be a VM running in a cloud, or some other system running in your lab. It will have a web server, and directories dedicated to the automation.
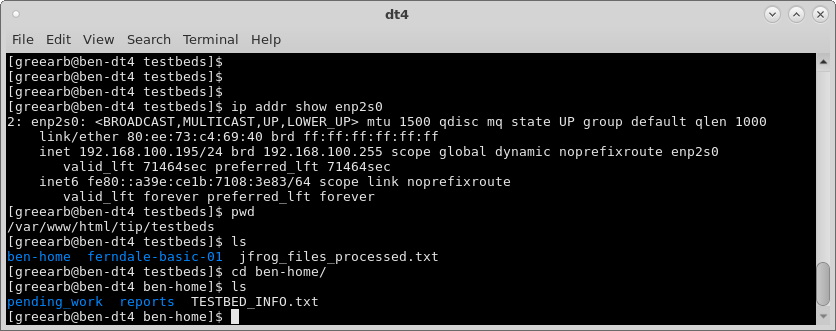
    1. Create a directory structure that looks like this. A copy of the cicd/[testbeds] should be placed here. In particular, the TESTBED_INFO.txt is important. screenshot
    2. The orchestrator will poll the build artifact system to find new builds and build work-items. It will place the work-items in the test-beds that it wishes to execute the tests. screenshot
    3. The testbed controller will find this work item, do the work, and then upload the results to the location specified in the work-item. The test-orchestrator will then generate summary reports for all available results, including comparison graphs for the different test runs. It will upload these results to some web page so that users can view the end results.

Candela  Technologies, 2417 Main Street, Suite 201, Ferndale, WA 98248, USA
www.candelatech.com | sales@candelatech.com | +1.360.380.1618
Facebook | LinkedIn | Blog