|
|
||
| Network Testing and Emulation Solutions |
Public access open WiFi service is often gated with a web sign-on form (a captive portal). LANforge virtual stations can emulate sign-in to the captive portal using the portal-bot.pl script. This script is by necessity incomplete because many captive portals have different behaviors and login form requirements. With this script, you provide a bot plugin that bridges the gap. This cookbook will coach you through a basic portal-bot integration and then you will create ten stations that authenticate through a captive WiFi portal. In this example, we will be testing agains a simple LAMP server on the upstream side of the AP. Do no use your LANforge server as the LAMP server because the routing will be difficult. In this chapter, a LAMP server is at 10.26.1.254, and there is an /etc/hosts entry for basic-portal to that address. |
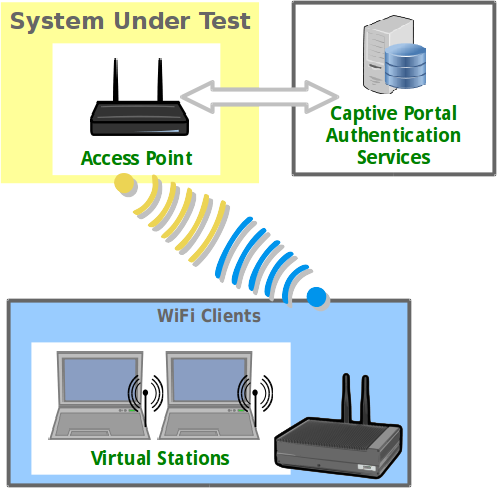 |
The basic order of operations of a captive portal are summarized in these steps:
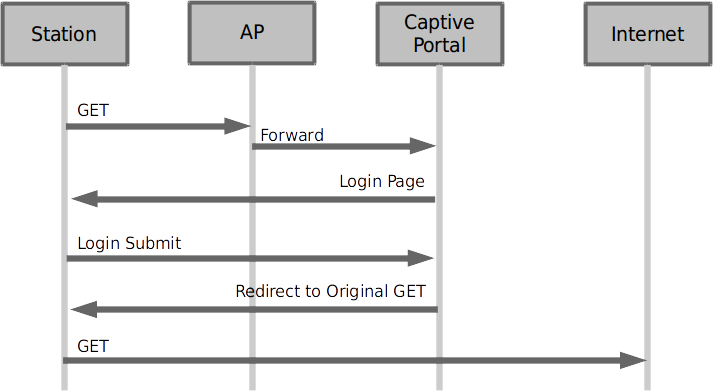
If you wish to set up a login and logout page on an Apache/PHP server to test with, you can copy the below files to the /var/www/html directory on the LAMP server.
<!DOCTYPE html !>
<?php
$valid = true;
if ($_SERVER['REQUEST_METHOD'] == 'POST') {
   /* custom error reporting, see get_explanation */
   if (!array_key_exists('username', $_POST)) {
      header("HTTP/1.1 400 Bad Request");
      header("X-err-no: 9400");
      header("X-err-msg: missing username");
      $valid = false;
   }
}
?>
<html>
<head>
   <meta http-equiv="Content-Type" content="text/html; charset=utf-8" />
<?php if($valid) { ?>
   <title>Login</title>
<?php } else { ?>
   <title>Bad Request</title>
<?php } ?>
</head>
<body>
   <?php if ($_SERVER['REQUEST_METHOD'] == 'POST') { ?>
      <?php if(!$valid) { ?>
         <h1>Bad Request</h1>
      <?php return; } ?>

      <?= $_POST['username'] ?> access granted.
   <?php } else { ?>
      <form method="post" action="">
         Login:<input type="text" name="username" value="" /><br />
         <input type="submit" name="login" value="Login" />
      </form>
   <?php } ?>
</body>
</html>
Getting a redirect to the login page does not have to be very complex. The portal-bot script will first start off requesting whatever URL you wish, so request http://basic-portal/start. Here is an Apache configuration line to redirect that URI to login.php:
<Location /start>
   Redirect /start /login.php
</Location>
After adding this redirect, restart your Apacher service using this command:
sudo apachectl configtest && sudo apachectl restart
You can use the command curl -sqv http://basic-portal/start to test out the redirect you just created.
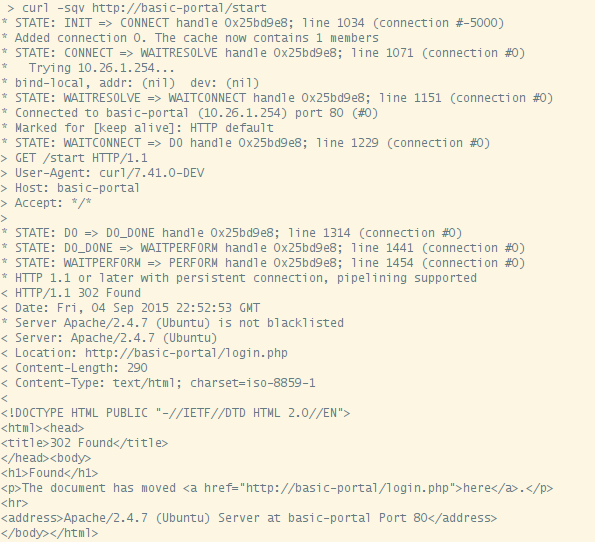
Before we get straight to working with portal-bot.pl, let's see how it is used. Your LANforge installation has an example script called portal-bot.bash-example for you to copy and modify. This script is intended for you to login and logout separately. The LANforge manager will call portal-bot.pl differently when building up the station or tearing down the station, these actions are similar:
The portal-bot.bash script is for exercising your portal-bot.pl script options from the command line while you develop with it. This is very close to the values you will place in the Ports→Misc/Post IF-UP field.
You will never place the PBOT_NOFORK option in the
Ports→Misc/Post IF-UP field because that will interrupt
the processing of the LANforge Manager process. You will also never place
$* in that field, either. You can place the --verbose
and --debug flags in there, but it can fill your disk with
log output more quickly.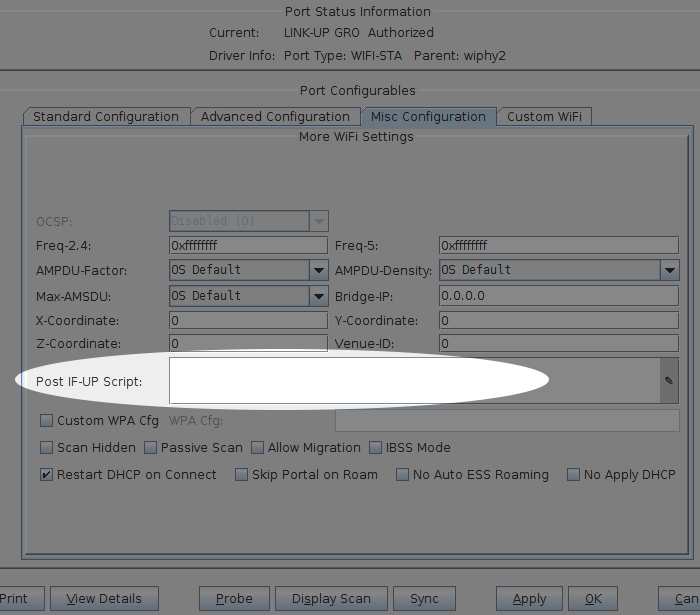
PBOT_NOFORK=1 ./portal-bot.pl \
   --dev          sta100                       \
   --bot          bp.pm                        \
   --ip4          10.26.2.30                   \
   --dns          192.168.100.1                \
   --mgt          /dev/null                    \
   --delays       0,1,3                        \
   --user         "bob"                        \
   --pass         "secret"                     \
   --ap_url       "http://basic-portal/"       \
   --start_url    "http://basic-portal/start"  \
   --login_form   "login.php"                  \
   --login_action "login.php"                  \
   --logout_url   "logout.php"                 \
   --verbose --debug $*
PBOT_NOFORK=1 ./portal-bot.pl \
   -i    sta100                       \
   -b    bp.pm                        \
   --ip4 10.26.2.30                   \
   --dns 192.168.100.1                \
   --mgt /dev/null                    \
   --delays 0,1,3                     \
   -u    "bob"                        \
   -p    "secret"                     \
   -a    "http://basic-portal/"       \
   -s    "http://basic-portal/start"  \
   -n    "login.php"                  \
   -o    "login.php"                  \
   -t    "logout.php"                 \

   -v -d $*
A common misconception is thinking that $* is a command-line argument. It is only used in bash scripts. Do not put $* on the command-line.
PBOT_NOFORK=1 ./portal-bot.pl -i sta100  -b bp.pm --ip4 10.26.2.30 \
        --dns 192.168.100.1 --mgt /dev/null -u "bob" -p "secret" \
        -a "http://basic-portal/"  -s "http://basic-portal/start"
        -n "login.php" -o "login.php" -t "logout.php" -v -d

The first six arguments are provided by LANforge when you use portal-bot.pl with a station. You want to populate these in your bash script, but not in the Post IF_UP field.
The second set of arguments describe your own AP environment:
You may specify skips by adding a zero: --delays 1,0,2
You may specify a random time by using 'random': --delays 1,random,2
You may specify just one time for all delays: --delays 2
You may specify a random range: --delays 3-20,4-25
We will connect to our LANforge system*. You want to copy this file to your own ./portal-bot.bash file, edit it and then make it executable.
Now let's see how to use this script with station sta100. Run the commands:
 $ cd /home/lanforge
 $ chmod +x portal-bot.bash
 $ ./portal-bot.bash
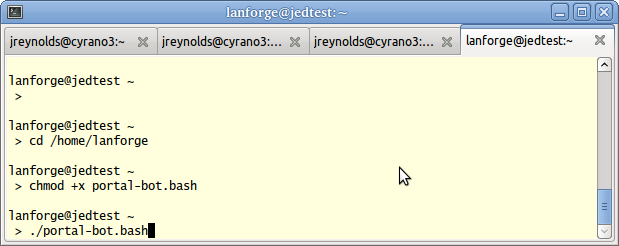
You will see a lot of output, it will show the contents of the web pages it finds.

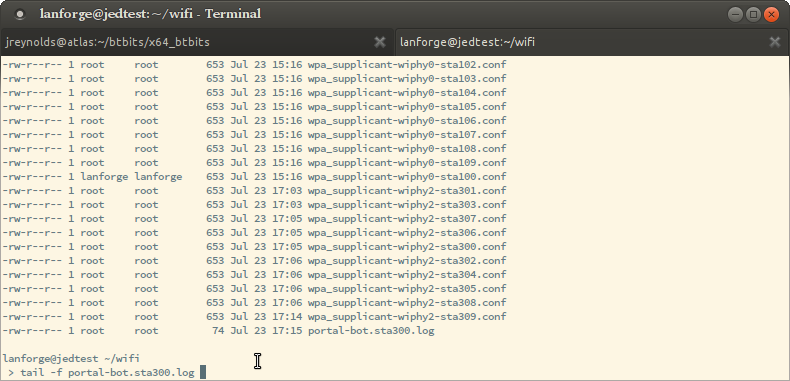
Typically you won't need to look at this output in the terminal, and you will not add -d -v flags to your LANforge stations. You very likely will need to check the log output from these scripts in case you need to diagnose connection problems during your test. Each virtual station leaves a log in the /home/lanforge/wifi directory, like wifi/portal-bot.sta100.log
To find the actual curl commands being executed, you want to grep the logs. Below is an example of grepping the logs and running the curl command.
 $ cd /home/lanforge/wifi
 $ grep Submitting portal-bot-sta100.log
Submitting: /home/lanforge/local/bin/curl -sLki -c /tmp/sta100_cookie.txt -b /tmp/sta100_cookie.txt -4 --interface sta100 --localaddr 10.44.4.222  --dns-servers 192.168.100.1  --dns-interface sta100  --dns-ipv4-addr 10.44.4.222  -X GET  'http://basic-portal/start'
Submitting: /home/lanforge/local/bin/curl -sLki -c /tmp/sta100_cookie.txt -b /tmp/sta100_cookie.txt -4 --interface sta100 --localaddr 10.44.4.222  --dns-servers 192.168.100.1  --dns-interface sta100  --dns-ipv4-addr 10.44.4.222  -X POST -d 'username=bob' 'http://basic-portal/login.php'
You might noticed that some of the commands in the log might appear repeated, there are areas of redundant logging. There is a case where you can legitimately see repeated commands: when you have an Post IF_UP value configured for the port you are testing with. (Remember that the Post IF_UP field should be blank when developing the script.)
Remember, this curl command cannot be run without first doing
a source /home/lanforge/lanforge.profile in your shell
(our curl is a custom build). Here is an example. We take a command similar
to the one above, add -qv and cancel it using
 $ cd /home/lanforge
  $ source lanforge.profile
  # add a -qv to see header details
  $ /home/lanforge/local/bin/curl -qv -sLki -c /tmp/sta100_cookie.txt -b /tmp/sta100_cookie.txt -4 --interface sta100 --localaddr 10.41.4.223  --dns-interface sta100  --dns-ipv4-addr 10.41.4.223  http://basic-portal/start
* STATE: INIT => CONNECT handle 0xa80158; line 1397 (connection #-5000)
* Added connection 0. The cache now contains 1 members
*   Trying 10.51.0.254...
* TCP_NODELAY set
* bind-local, addr: 10.41.4.223  dev: sta100
* SO_BINDTODEVICE sta100 failed with errno 1: Operation not permitted; will do regular bind
* Name 'sta100' family 2 resolved to '10.41.4.223' family 2
* Local port: 0
* STATE: CONNECT => WAITCONNECT handle 0xa80158; line 1450 (connection #0)
^C
There are many arguments to the curl command, but in general, you should
be able to copy and paste the command into a terminal and it should work
(see note about lanforge.profile above). Below is an example of
a curl command, with
 $ /home/lanforge/local/bin/curl -qv \
    -sLki                           \
    -c /tmp/sta100_cookie.txt       \
    -b /tmp/sta100_cookie.txt       \
    -4                              \
    --interface sta100              \
    --localaddr 10.41.4.223         \
    --dns-interface sta100          \
    --dns-ipv4-addr 10.41.4.223     \
    http://basic-portal/start
| Switch | Example Value | Purpose |
|---|---|---|
| -q | Suppress page output | |
| -v | Verbose, prints diagnostic steps | |
| -s | Suppresses page output | |
| -L | Follow redirects | |
| -k | Suppress certificate validation errors | |
| -i | Print HTTP headers | |
| -c | sta100_cookie.txt | Send cookies from file |
| -b | sta100_cookie.txt | Save cookies to file |
| -4 | Use IPv4 | |
| --interface | sta100 | bind to this interface |
| --localaddr | 10.41.4.223 | bind to this address |
| --dns-interface | sta100 | send DNS queries from this interface |
| --dns-ipv4-addr | 10.41.4.223 | bind to this address when sending DNS queries |
| --dns-interface | sta100 | send DNS queries from this interface |
| -X | GET | Use HTTP GET method |
| POST | Use HTTP POST method | |
| -d | 'username=bob' | URL encoded form parameters used during POST method |
Your portal-bot.bash script is intended to be a way of focusing on the development of your bot plugin and not repetitively typing a long curl command.
Your bot plugin, the Perl module you will write for your captive portal, is central to the operation of the portal-bot.pl script. It is also important that you do not alter the portal-bot.pl script unless absolutely necessary, because your changes could be overwritten by upgrades. Any alteration to the time at which the fork() call is made in this script can make the LANforge server grind to a halt.
The example bot, bp.pm, provided with LANforge defines four subroutines. In order:
If you get a redirect to another port, compare the --login_url value to this. If it is different, consider updating your login_url parameter.
There might be many form parameters, like ones for a session id, a PHP_SESSID, a cookie, a base64 encoded string indicating your originally requested url (or just a plain URL-encoded url), and any possible co-branding parameters that might indicate any advertising campaigns associated with this captive portal. Missing some of these might make submitting the form give you an error. Store these values as necessary in your bot:: namespace. You do not submit your login page in this method.
my $post_data = "username=".uri_escape($user_name);
my @response  = ();
request({'curl_args'=> $::curl_args,
  'url'       => $post_url,
  'method'    => 'POST',
  'delay'     => '0,3',      # see --delays option
  'post_data' => $post_data,
  'print'     => 1},         # turns on debugging
  \@response);
The submit_login function uses the $::delay[1] parameter if --delays were set. See paragraph on randomDelay.
In order to add events, such as page load time, you want to use the botlib::newEvent() function:
my $page_time = botlib::time_milli() - $::start_at;
newEvent("portal_login: $result", $page_time, $::dev);
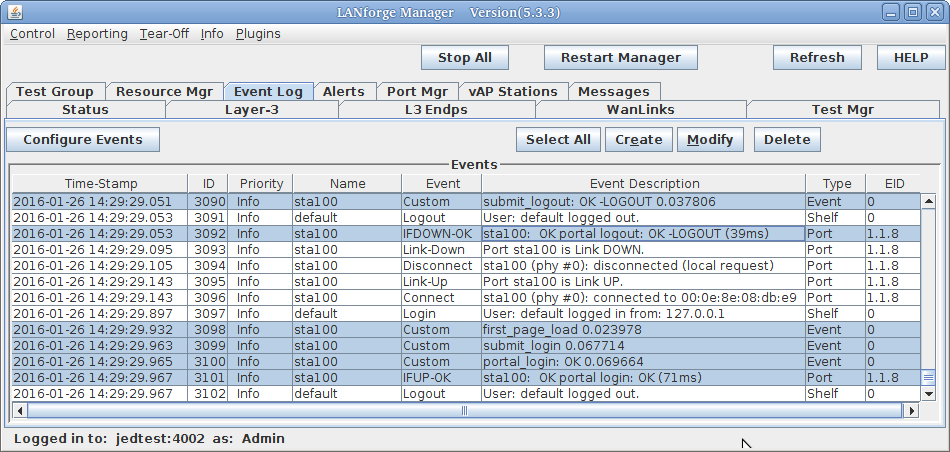
Your event log will gain messages like these:
sub get_explanation {
   for $line (@$ra_result) {
      ($err_code) = $line =~ /^X-err-no: (.*)$/
         if ($line =~ /^X-err-no: /);
      ($err_msg ) = $line =~ /^X-err-msg: (.*)$/
         if ($line =~ /^X-err-msg: /);
   }
   return "$err_code, $err_msg";
}
Notice how this parses out the HTTP headers found if the parameter
username were missing when doing a POST to basic-portal/login.php:
header("X-err-no: 9400");
header("X-err-msg: missing username");
You will see these messages show up in the LANforge Events log:

We have now covered all of the scripting development areas for the portal-bot.pl plugin you will write.
We assume you have portal-bot.bash working at this point. This is how you can configure a single station:
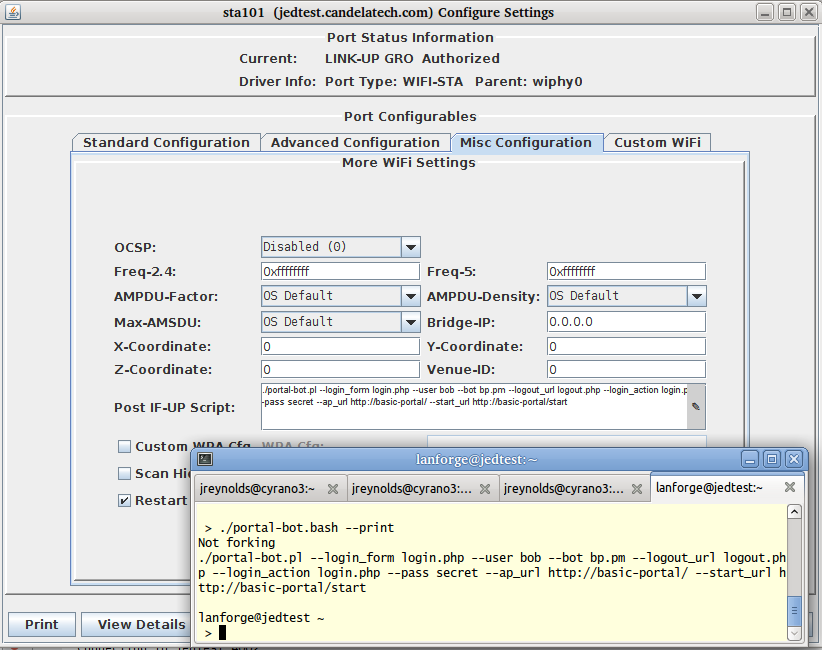
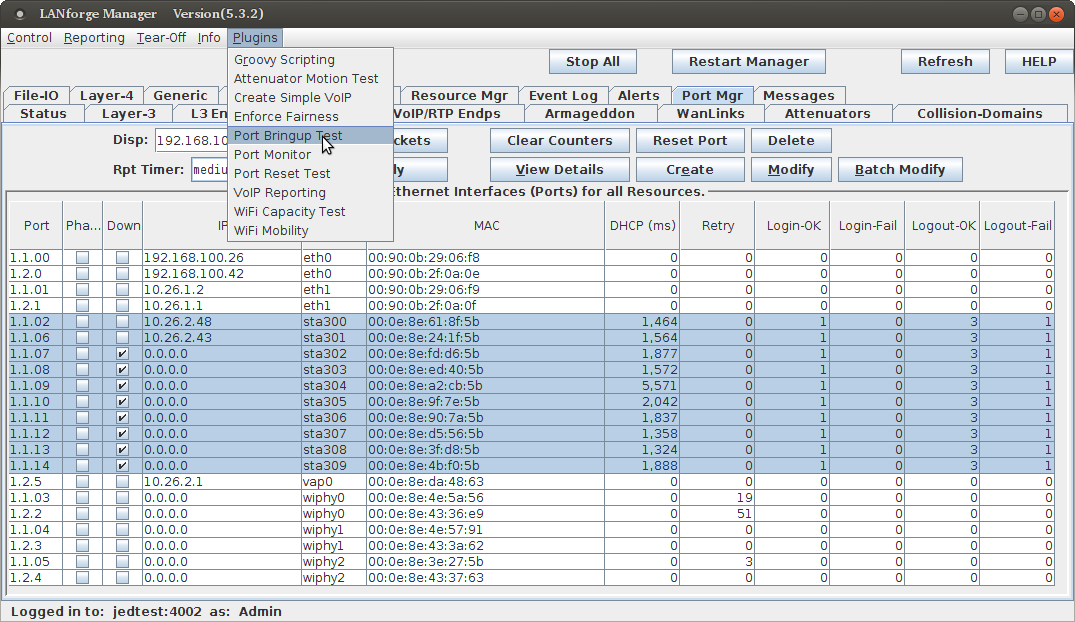
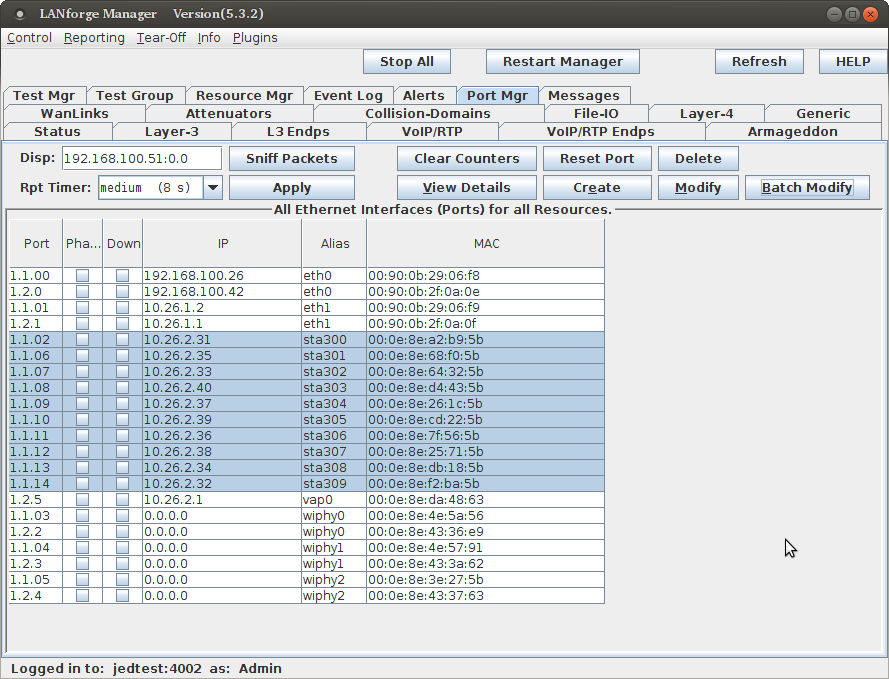
To get multiple virtual stations logging in an out using the GUI, we just need a few of those parameters for the station configuration. We will use the Batch Modify feature to alter a series of stations.
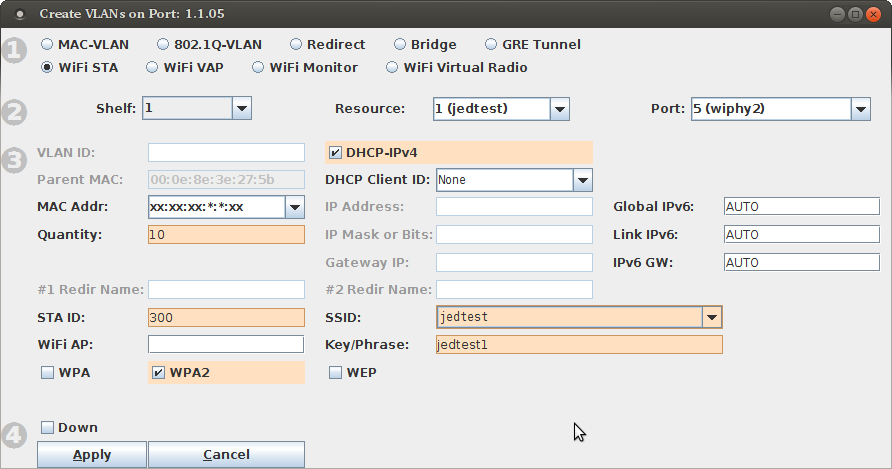
./portal-bot.bash --print
portal-bot.pl --bot bp.pm --user bob --pass bob1 --ap_url http://basic-portal/
 --start_url  http://basic-portal/start --login_form login.php --login_action login.php
 --logout_form logout.php
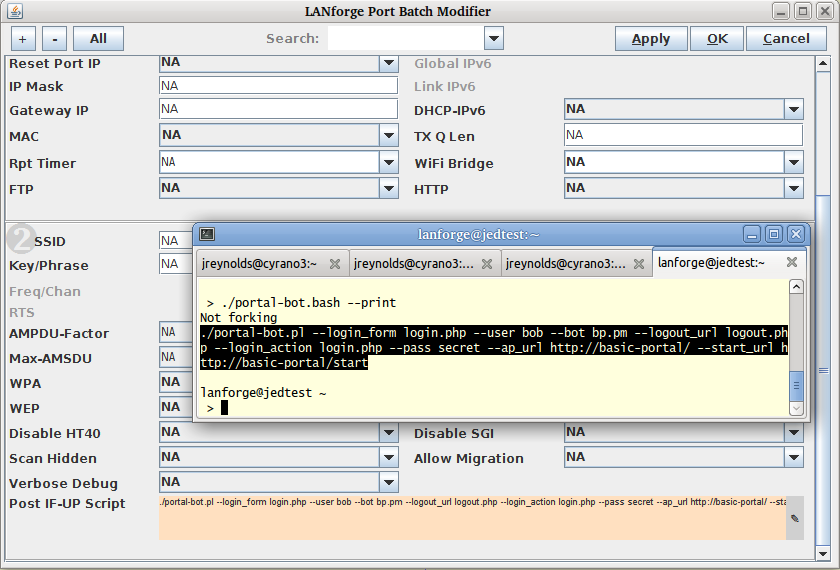 Click OK
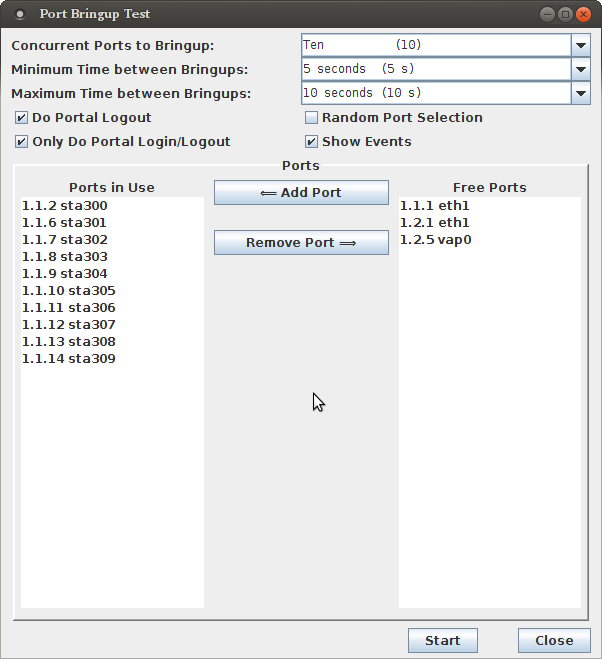
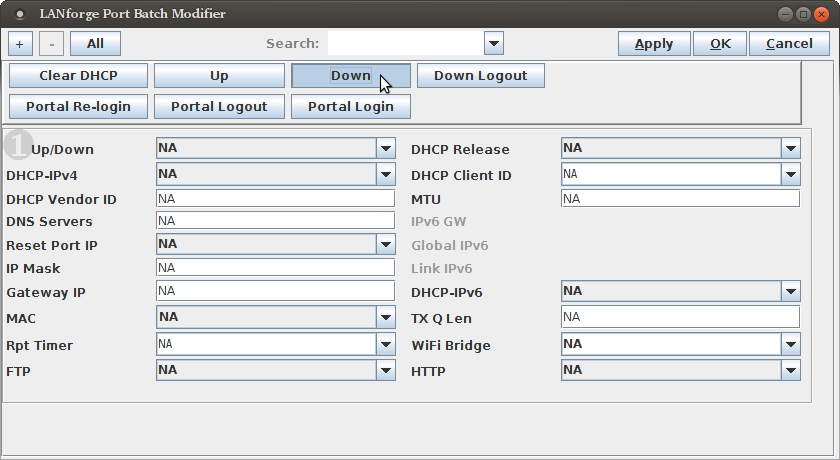
Exercising these stations starts with bringing them up and down using the Batch Modify tool.

tail -f portal-bot.sta300.log
If your station cannot talk to the captive portal, like you have a time-out, these steps will help identify where there is a misconfiguration:
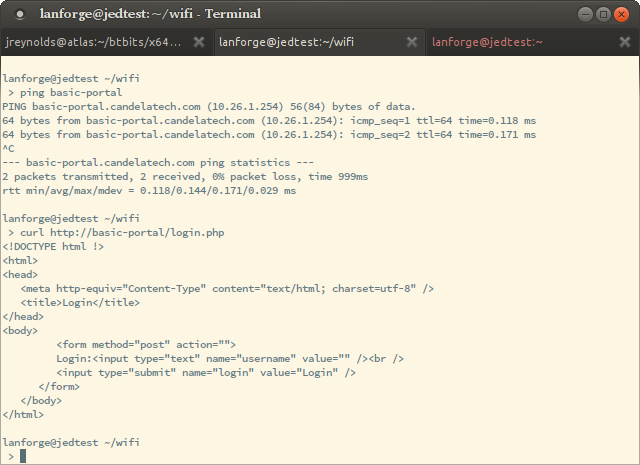
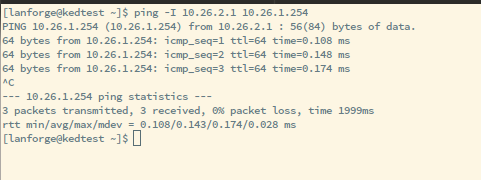
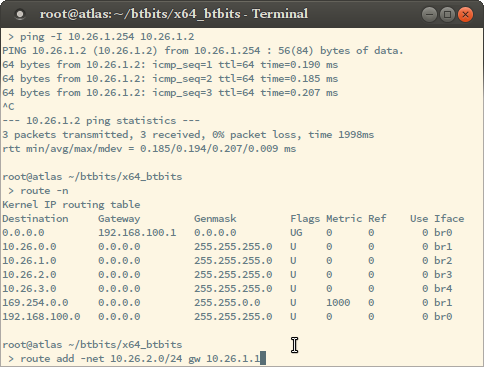
route -n
route add -net 10.27.0.0/23 gw 10.26.1.1

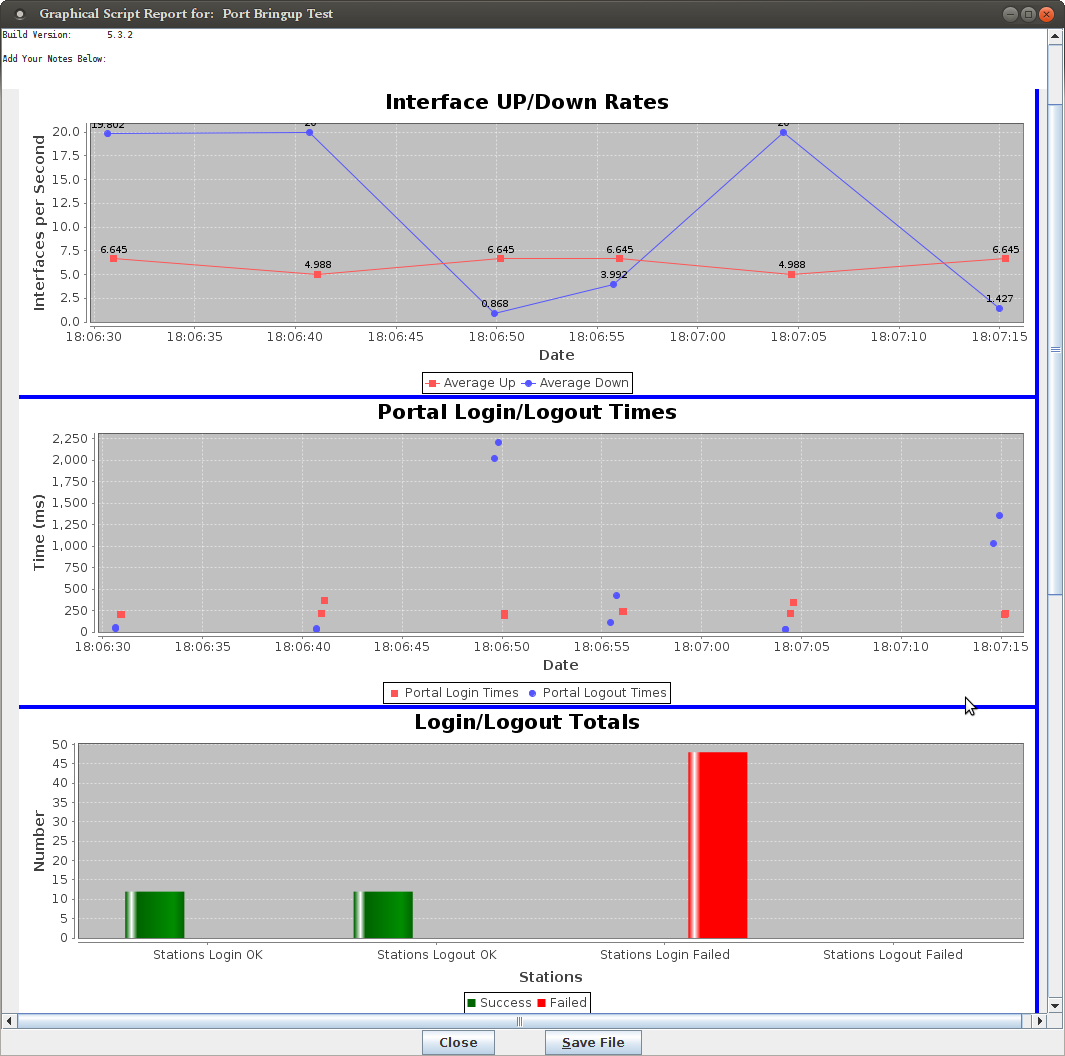
Using the Port Bringup Plugin is a much more fun way to get data than looking at log files.
