Candela Technologies Logo
Network Testing and Emulation Solutions

LANforge Scripted Attenuation of a WiFi Connection

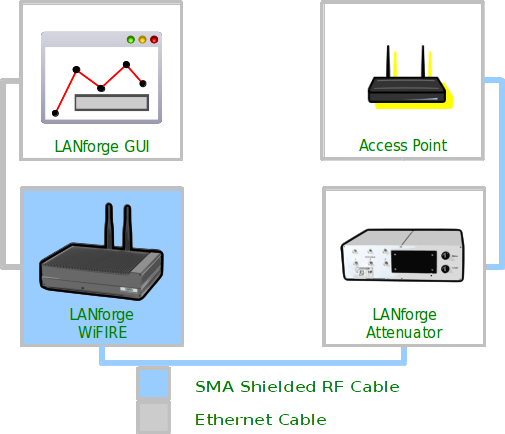
Goal: Operate the CT703 WiFi Attenuator with a script to see the effect on a Layer-3 connection.

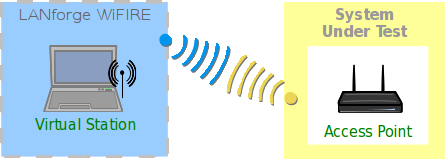
The LANforge GUI provides scripting support for the CT703 Attenuator. This cookbook provides a basic example of how to graph connection throughput and signal strength with a single station connection. Use this example as a basis for building more complex attenuation scripts. Requires LANforge 5.2.11+ and CT703 Attenuator.
 
  1. Create a WiFi station
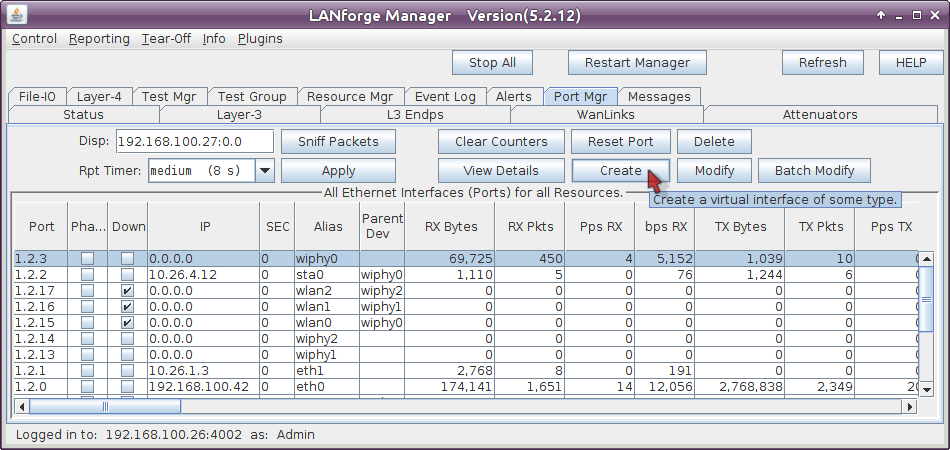
    1. In the Ports tab, select wiphy0 and click Create screenshot
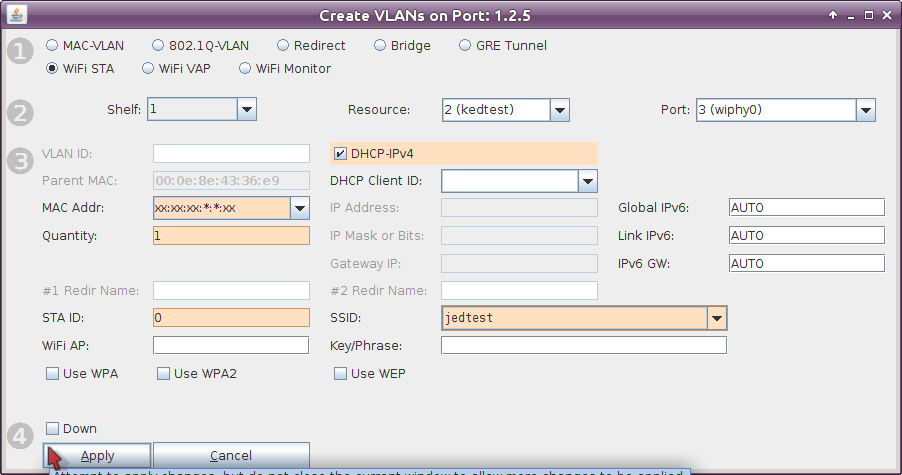
    2. In the Create VLANS window, craft one wifi station: screenshot
      1. Select WiFi STA
      2. For MAC address, choose xx:xx:xx:*:*:xx
      3. Select DHCP-IPv4
      4. Enter Quantity 1
      5. Specify 0 for STA ID
      6. The example SSID for this cookbook is jedtest
      7. ...and then click Apply
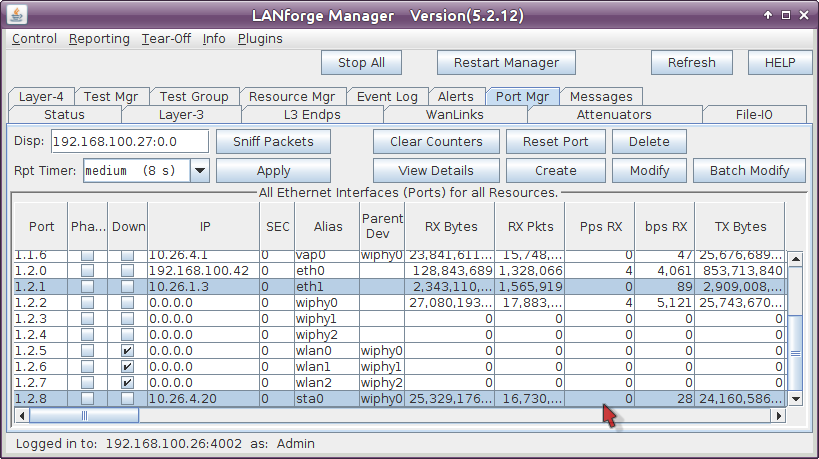
    3. You will see a station created: screenshot
  2. Create a connection to the Station
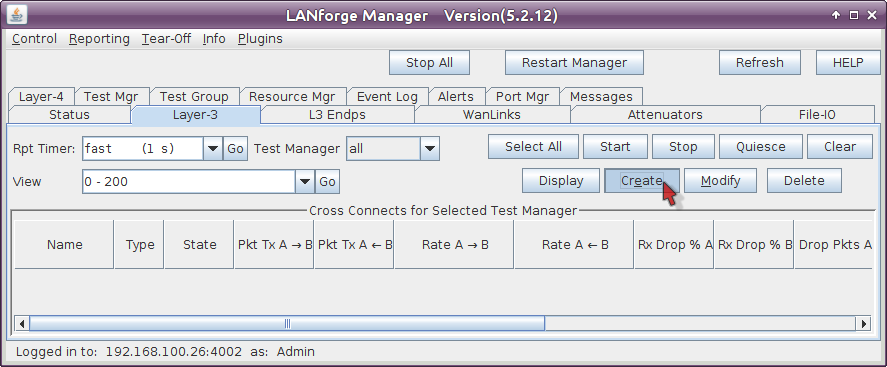
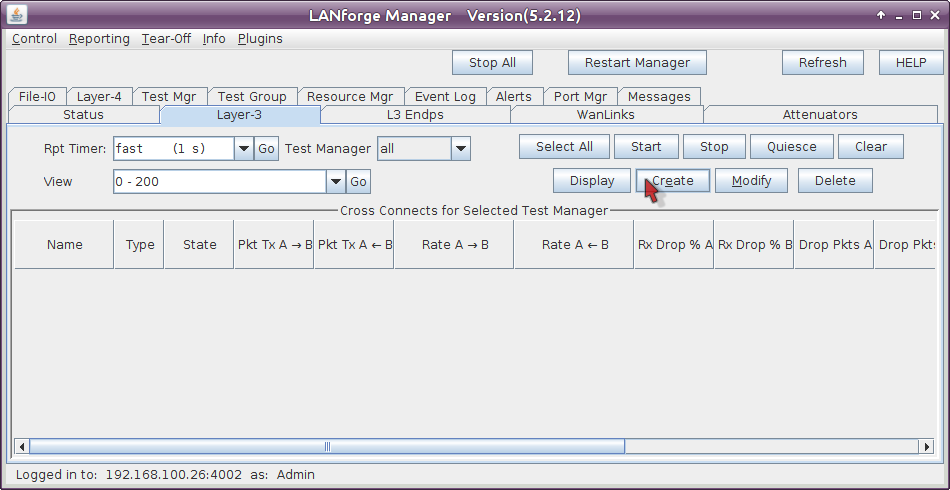
    1. In the Layer-3 tab, click Create screenshot
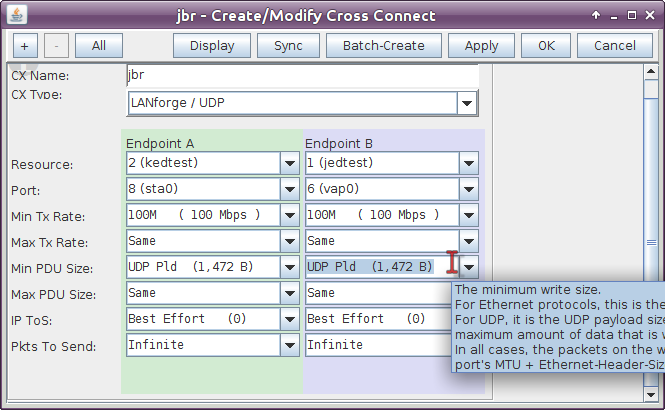
    2. Create two-way station traffic screenshot
      1. This example connection is named jbr
      2. Connection Type is LANforge / UDP
      3. This example resource is kedtest, where our stations live
      4. The Endpoint A Port will be the station sta0,
      5. and the Endpoint B Port will be upstream of the ap, eth1.
      6. We'll set the Min Tx Rate for both sides to 100 Mbps
      7. and set the PDU Size to UDP Pld (1,472 B).
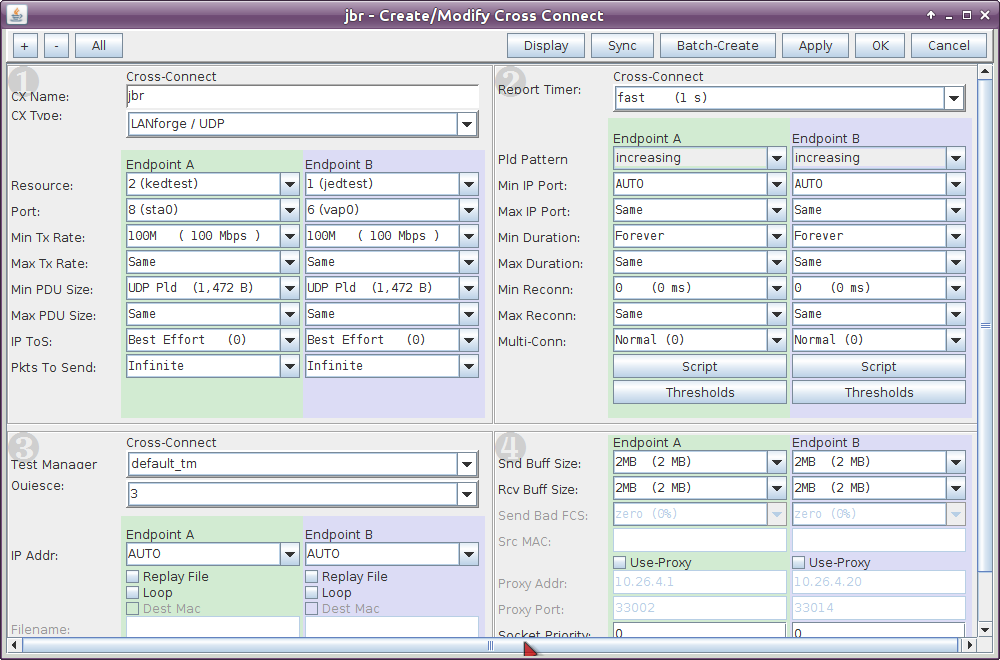
      8. Use the + button to expand the window to panel 4 and add 2MB of buffers to the connection: screenshot
      9. ...then click OK
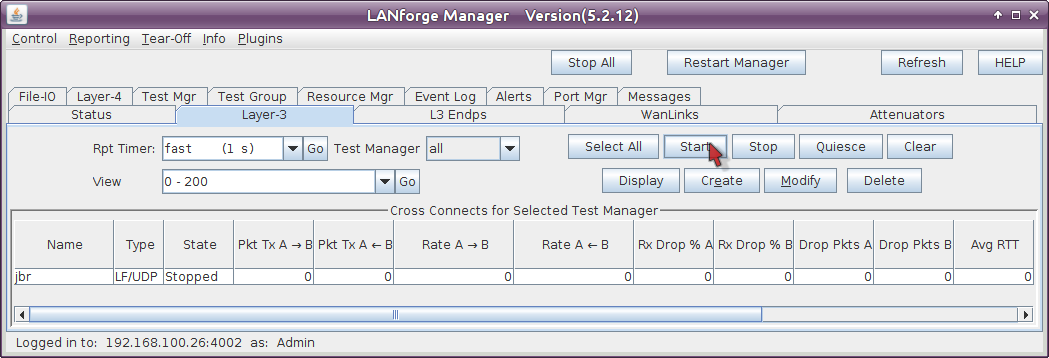
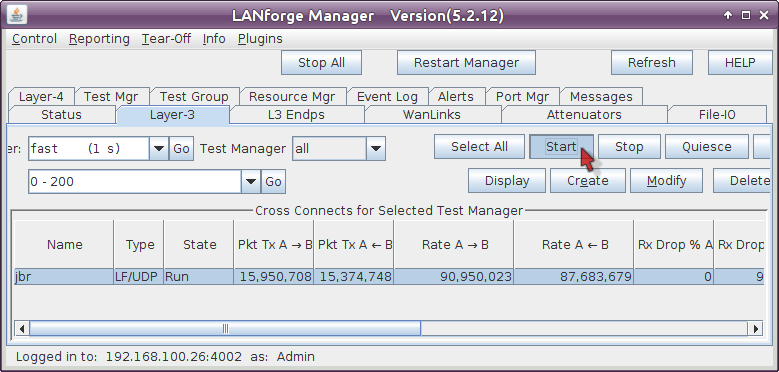
    3. You will see connection jbr in the Layer-3 tab now: screenshot
    4. Begin traffic on this station by selecting it and clicking Start screenshot
  3. Create an Attenuator Script
    1. In the Attenuators tab, select your attenuator and click Modify screenshot
    2. You will see the Modify Attenuator window. Click on the Script button. screenshot
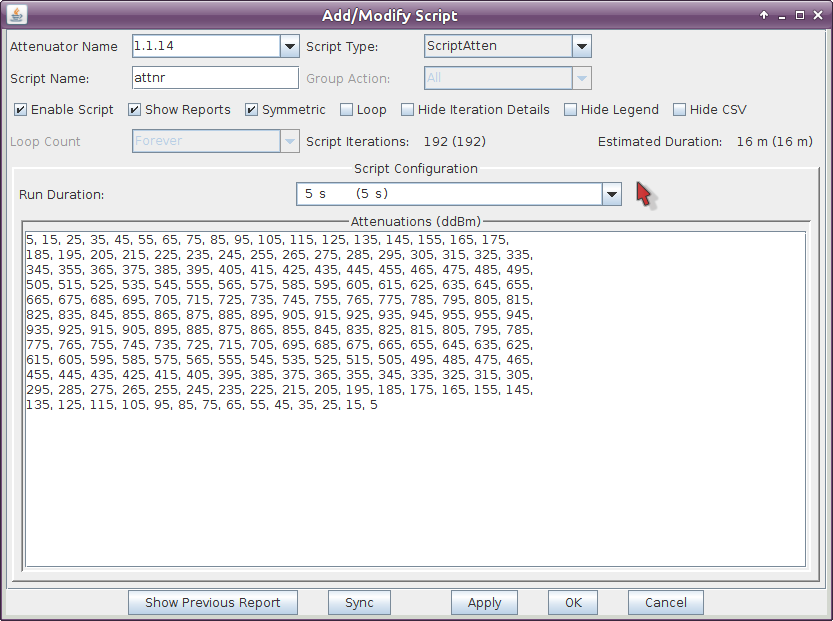
    3. The Add/Modify Script window opens. In the picture below you see a huge list of numbers (the attenuation levels). These numbers are not pre-populated. You can copy and paste them out of this document or create a series with other commands listed below. screenshot
      1. In the Script Type pulldown, select ScriptAtten
      2. Type in the name for the script, this example is called attnr
      3. Select Symmetric
      4. Choose 5 s for Run Duration. This will run the Attenuator at each ddB value for this period of time.
      5. Enter the following attenuation values for a 16 minute long test. This will send the attenuator from 5 to 955ddB and back:
      6. 5, 15, 25, 35, 45, 55, 65, 75, 85, 95, 105, 115, 125, 135, 145, 155, 165, 175, 
        185, 195, 205, 215, 225, 235, 245, 255, 265, 275, 285, 295, 305, 315, 325, 335,  
        345, 355, 365, 375, 385, 395, 405, 415, 425, 435, 445, 455, 465, 475, 485, 495,  
        505, 515, 525, 535, 545, 555, 565, 575, 585, 595, 605, 615, 625, 635, 645, 655,  
        665, 675, 685, 695, 705, 715, 725, 735, 745, 755, 765, 775, 785, 795, 805, 815,  
        825, 835, 845, 855, 865, 875, 885, 895, 905, 915, 925, 935, 945, 955, 955, 945,  
        935, 925, 915, 905, 895, 885, 875, 865, 855, 845, 835, 825, 815, 805, 795, 785,  
        775, 765, 755, 745, 735, 725, 715, 705, 695, 685, 675, 665, 655, 645, 635, 625,  
        615, 605, 595, 585, 575, 565, 555, 545, 535, 525, 515, 505, 495, 485, 475, 465,  
        455, 445, 435, 425, 415, 405, 395, 385, 375, 365, 355, 345, 335, 325, 315, 305,  
        295, 285, 275, 265, 255, 245, 235, 225, 215, 205, 195, 185, 175, 165, 155, 145,  
        135, 125, 115, 105, 95, 85, 75, 65, 55, 45, 35, 25, 15, 5
      7. ...click OK
    4. In the Attenuators tab, you will notice that your attenuator now reads Enabled in the Script column. Select the attenuator and click the Start button. screenshot
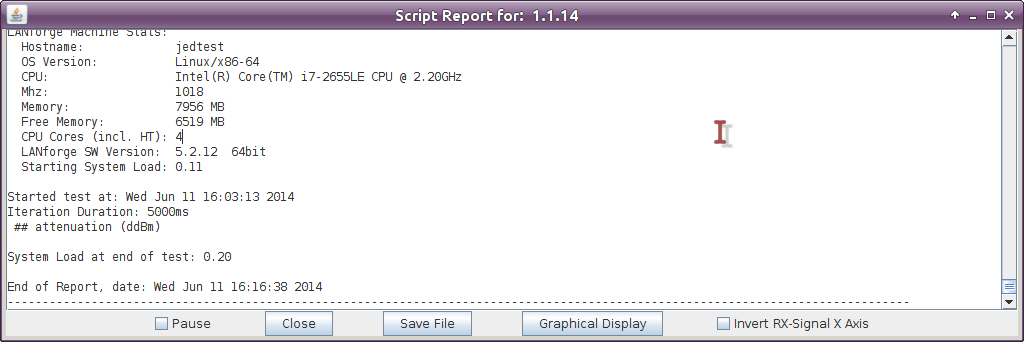
    5. The window Script Report will appear. This monitors the script behavior of the attenuator script. screenshot
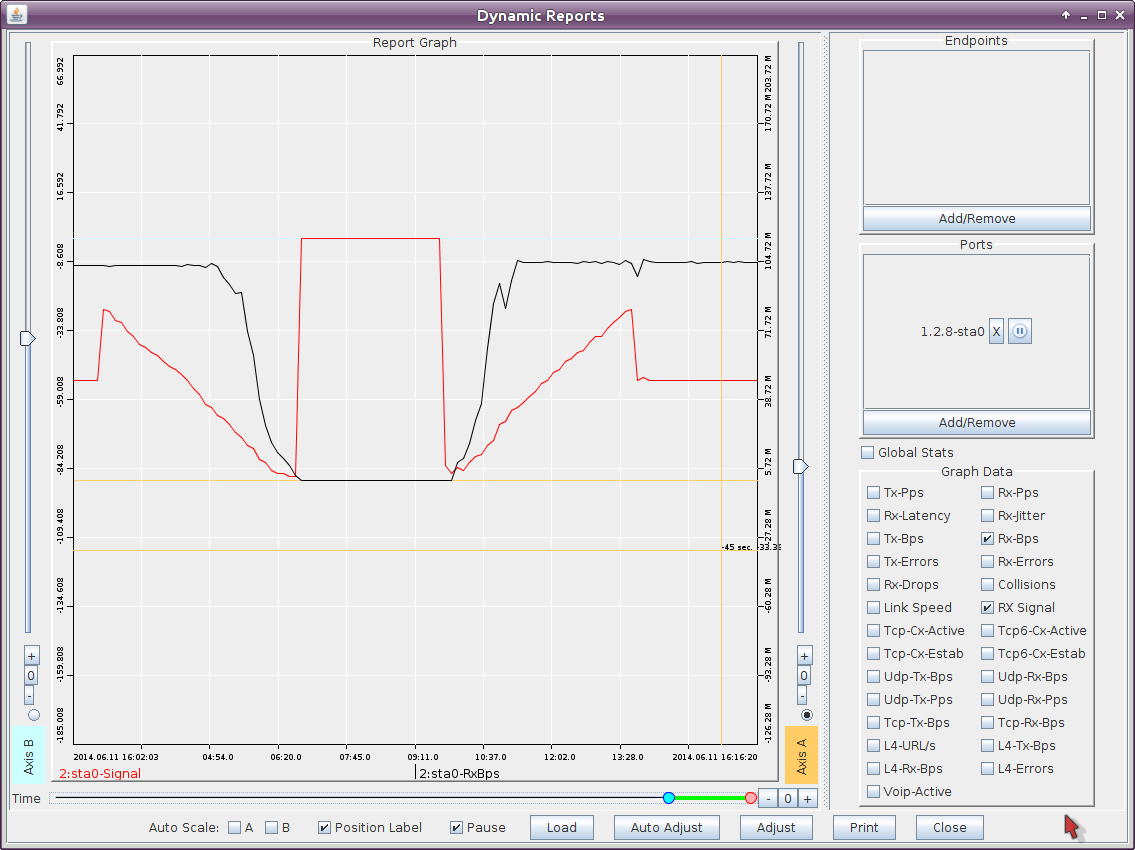
    6. To monitor the progress of traffic and signal as it progresses, you will go to the Ports tab. Click on sta0, right click and select Dynamic Display. The Dynamic Reports window will open. Choose the following selections to refine the display: screenshot
      1. Unselect Tx-Bps
      2. Select Rx-Bps
      3. Select Rx-Signal
      4. Drag the label sta0-signal to the left side of the X axis
      5. Click Adjust and set Maximum Time to 30 min, click OK
      6. Click Auto Adjust
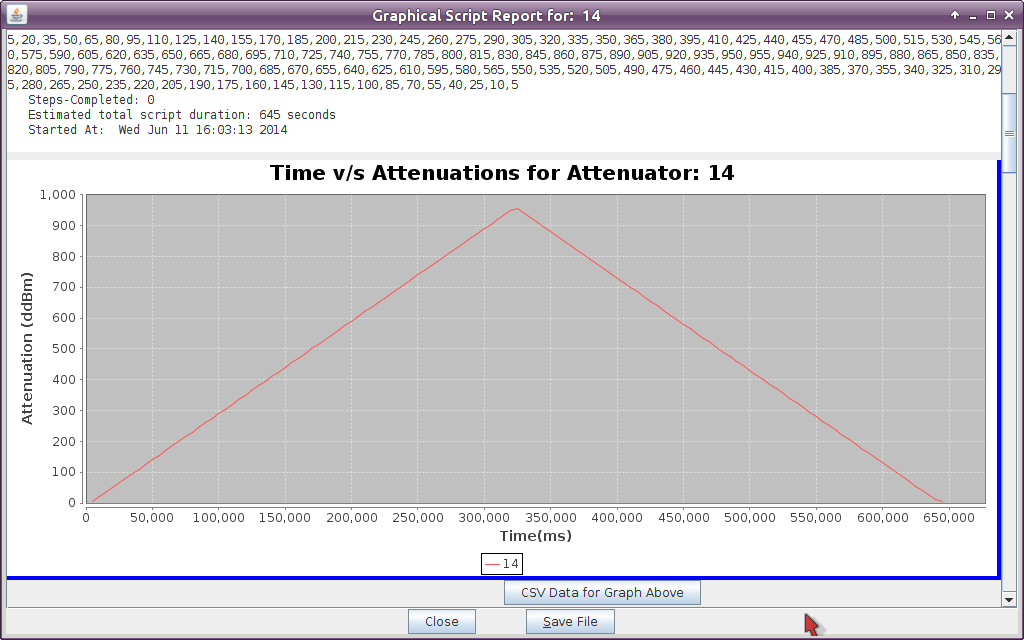
    7. At the end of the attenuator script run, the Layer-3 connection will still be running, but the Script Report window will say End of Report. At this time, click on Graphical Display. You will see a graph of the attenuation level over time. screenshot
  4. Creating attenuation sequences
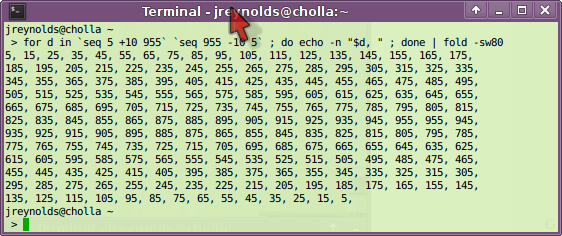
  5. It is relatively simple to generate a sequence of numbers right from a Terminal window (on Linux). Below are some examples: screenshot
    1. The 10 ddB step series we used in this example:
      for d in `seq 5 +10 955` `seq 955 -10 5` ; do echo -n "$d, " ; done | fold -sw80
    2. A 5 ddB step series, as precise as the CT703 can run:
      for d in `seq 0 +5 955` `seq 955 -5 0` ; do echo -n "$d, " ; done | fold -sw80
    3. A 15 ddB step series from full attenuation to 25 ddB:
      for d in `seq 955 -15 25` ; do echo -n "$d, " ; done | fold -sw80
    4. A sawtooth ranging from 950 to 0 ddB:
      i=0; while [ $i -lt 100 ]; do echo -n $(( $i%11 * 95))", "; i=$[ $i+1 ]; done | fold -sw80

Candela  Technologies, 2417 Main Street, Suite 201, Ferndale, WA 98248, USA
www.candelatech.com | sales@candelatech.com | +1.360.380.1618
Facebook | LinkedIn | Blog