Candela Technologies Logo
Network Testing and Emulation Solutions

Multiple Thousands of UDP Connections

Goal: Set up and run traffic on multiple thousands of UDP connections.

LANforge-FIRE has the capability to create multiple thousands of UDP connections using only two ports. This example creates 1000 Layer-3 connections between two sets of 1000 MAC-VLANS that can all run simultaneously. This feature can be used to test stateless connection services such as DNS, DHCP, and file streaming systems.

The upper limit of the total number of concurrent connections is determined by the processor speed and total memory available on the system running the LANforge server software. In addition, the packet rate and payload size of each connection will also affect performance. Larger packet sizes take less CPU time to process.

NOTE: If you are attempting to run this test scenario, you will need a LANforge license key that enables the correct number of ports. Please contact us at support@candelatech.com for assistance.
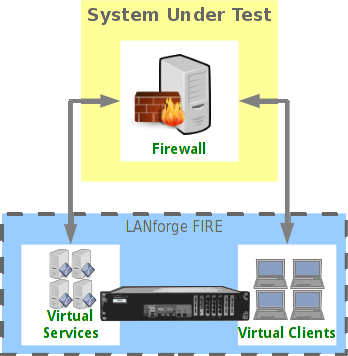

 
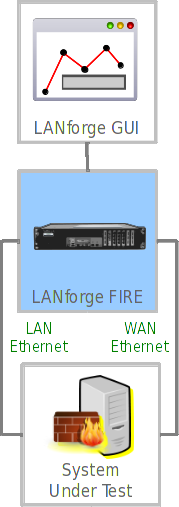
  1. For this example, we are using a CT503-MIX 1Gx4 with multiple 10 Gigabit fiber NICs. We have cabled two physical ports on this single LANforge system together. Our plan of action will be to create 1000 MAC-VLANs on each port as endpoints for 1000 Layer-3 UDP cross connections. screenshot
    1. Connection Suggestion: If you are using the LANforge GUI Client remotely connected to your LANforge Server (like using a VPN), this process will appear rather sluggish. This suggishness is caused by the volume of reporting traffic flowing to the GUI. We suggest you connect to the LANforge Server desktop using Remote Desktop or VNC.
    2. Reporting Suggestion: When creating 2000 MAC-VLANs and 1000 Layer-3 connections, we are actually creating 2000 + (3 x 1000) = 5000 reportable entities that could generate up to 5000 x 4kB = 20,000kB of traffic per reporting interval. We intentionally set our reporting intervals low (10 or more seconds) to keep the GUI client responsive.
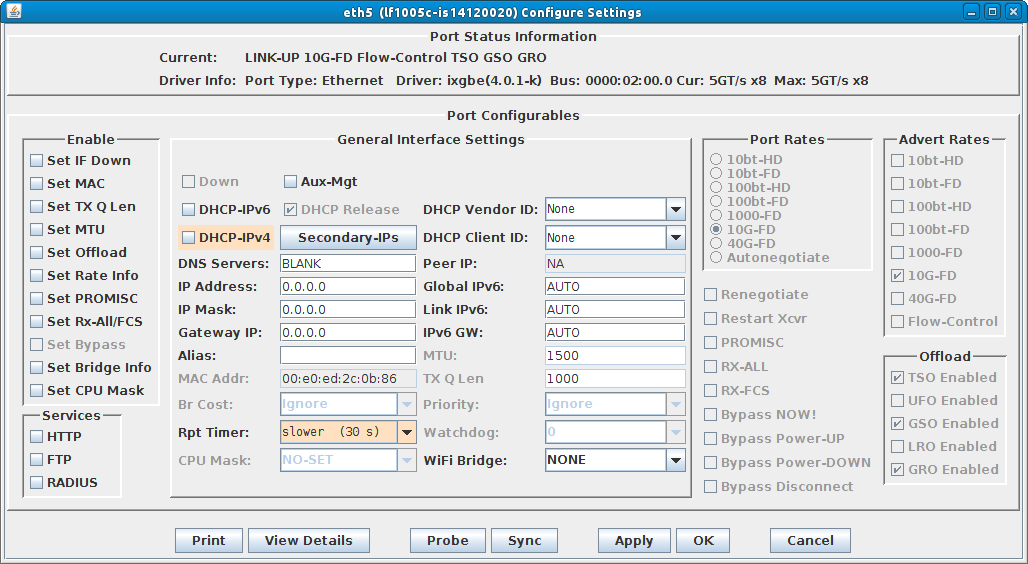
  2. Set up two physical ports so that they have 0.0.0.0 IP addresses and IP masks. We will choose eth4 and eth5 for this example. We will base our MAC-VLANs off these two physical ports. Set the reporting level for these two ports to a low frequency: 30 sec.
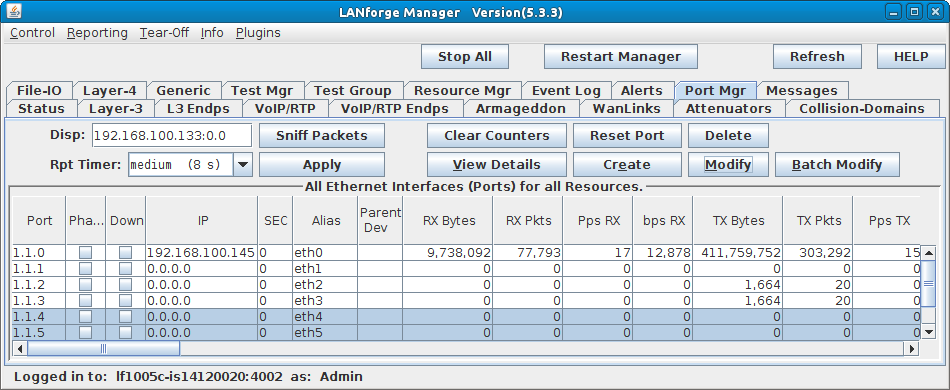
    1. In the LANforge GUI, go to the Port Manager tab. screenshot
    2. Assign IP addresses and masks to the two ports. screenshot
    3. Verify the port configuration.

    For more information see LANforge User's Guide: Ports (Interfaces)
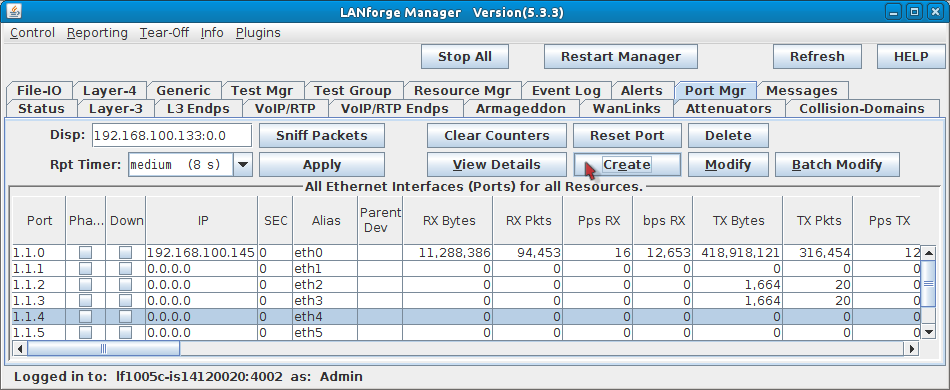
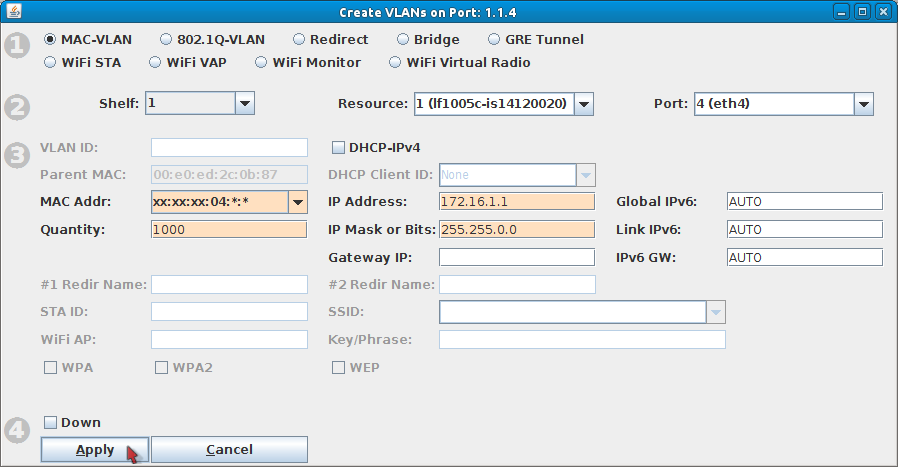
  3. We will use the Port Batch Create tool to create 1000 MAC-VLANs on each of the two ports.These MAC-VLAN ports should report more frequently than the parent ports: set them to report every 15 seconds. We also want to create MAC addresses that are distinct for these two groups: the first three octets will match the parent port, but we will set their fourth octets to 04 and 05 to remind us of their parent ports. The following two octets will be random (specified with '*').
    1. In the Ports tab, highlight port eth4 and click the Create button. screenshot
    2. Follow the these steps to create 1000 MAC-VLANs on the port. screenshot
      1. Create a MAC Address pattern similar to the parent MAC address pattern: 00:e0:ed:30:*:*
      2. Set Quantity to 1000
      3. Set an initial IP Address: 172.16.1.1
      4. Set the IP Mask: 255.255.0.0
      5. Click Apply, this takes a second to start.
      6. You do not need to close the Create window.
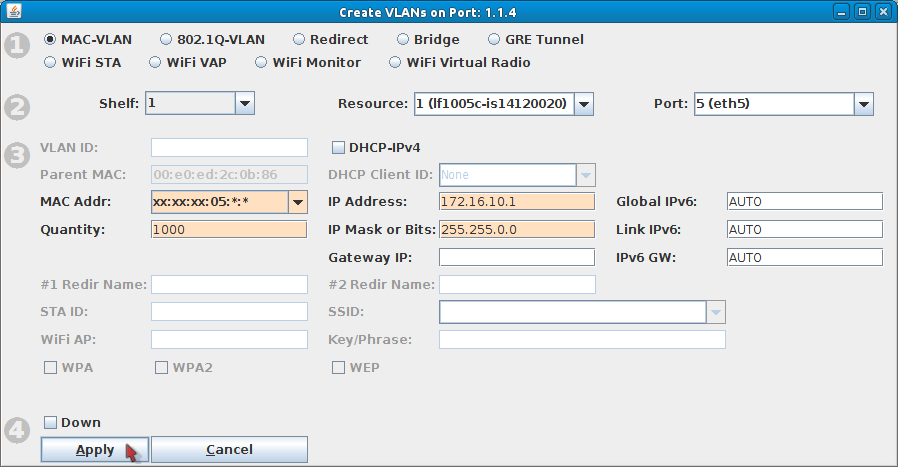
    3. Repeat the previous step with these changes to create the next 1000 MAC-VLANs on port eth5. screenshot
      1. Create a MAC Address pattern similar to the parent MAC address pattern: 00:e0:ed:05:*:*
      2. Set Quantity to 1000
      3. Set an initial IP Address: 172.16.10.1
      4. Set the IP Mask: 255.255.0.0
      5. Click Apply, this takes a second to start.
      6. When the progress bar switches to Ready you can click Cancel to close the Create window.
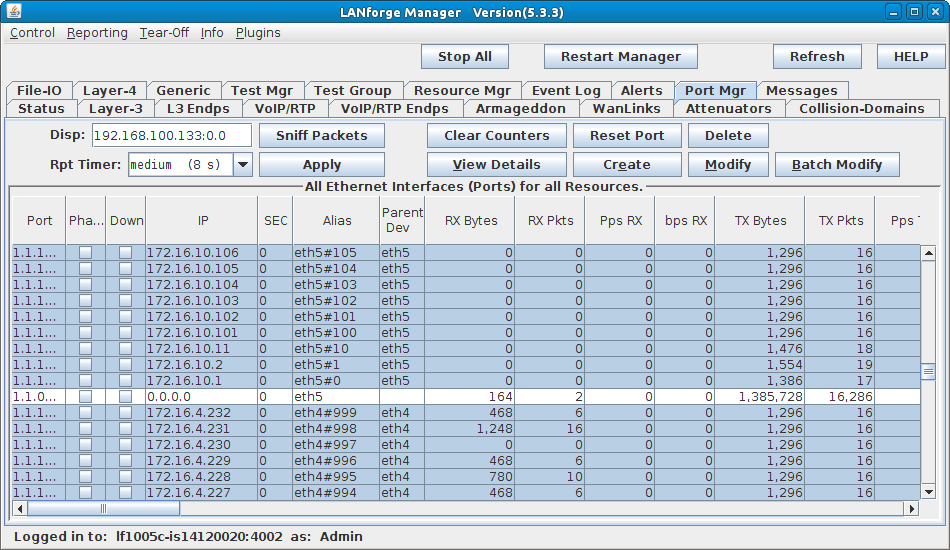
    4. Check the Ports tab to watch the IP addresses get assigned to the MAC-VLANs. This will take 5 or more minutes. screenshot
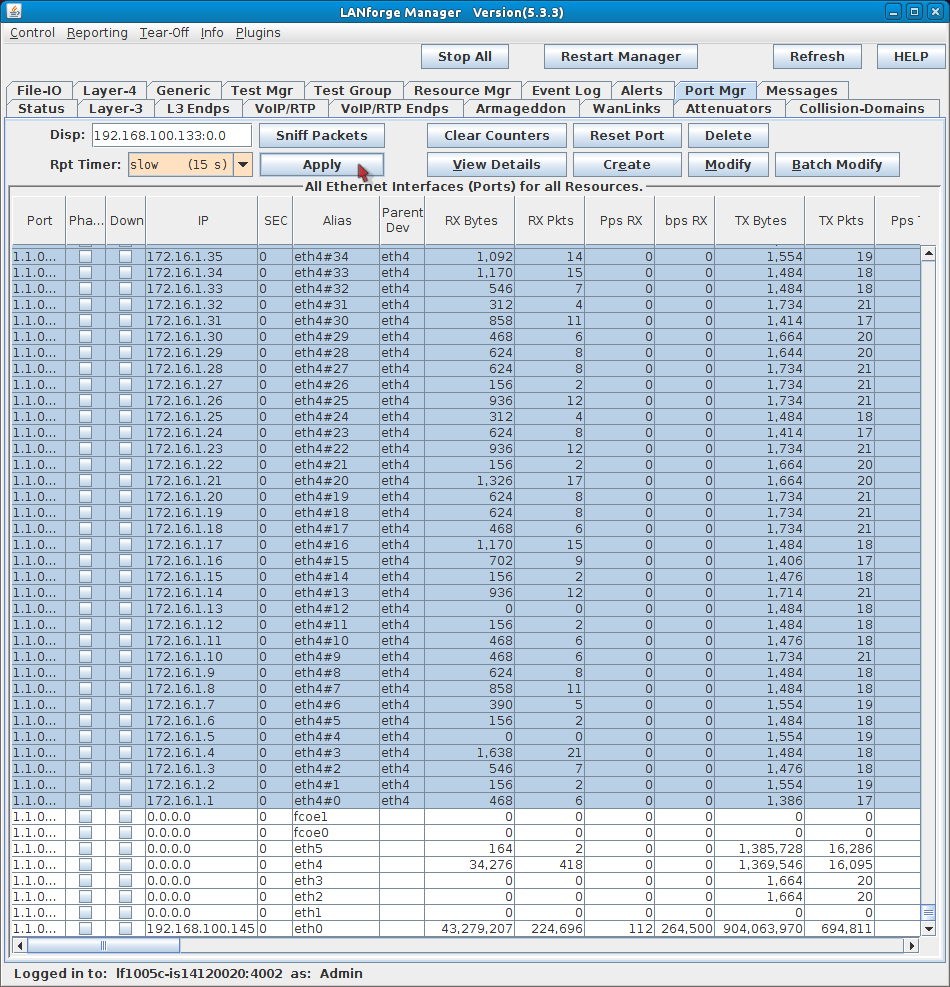
    5. Adjust the Report Timer. screenshot
      1. Click the Column header labeled Port to sort all the newly created MAC-VLANs to the top.
      2. Select all the MAC-VLANs.
      3. Change the Rpt Timer setting to slow (15 s)
      4. Click Apply.
  4. Create Cross Connects between the MAC-VLANs. We can create all these cross connections in two steps. First we will create the first cross-connect. Next, we will batch-create the remaining 999 cross connections using the first as a template.
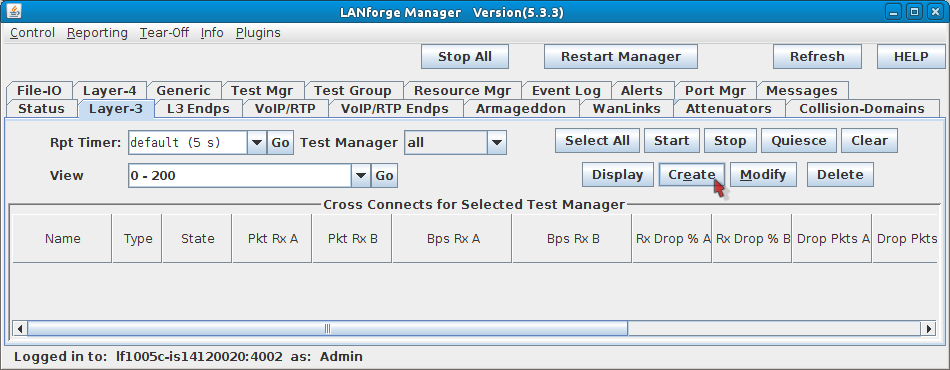
    1. Switch to the Layer-3 tab and click the Create button to see the Create/Modify Cross Connect window. screenshot
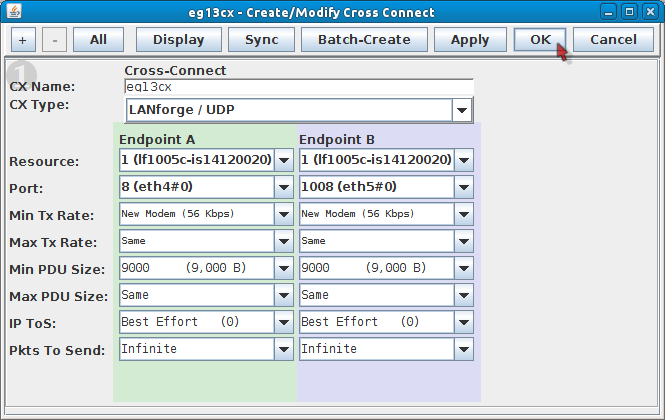
    2. Set up the cross connection between the first two MAC-VLANs. screenshot
      1. Connection name: eg13cx
      2. Port, TX Endpoint: eth4#0
      3. Port, RX Endpoint: eth5#0
      4. Min PDU Size: 9,000 B
      5. Click the OK button to save.
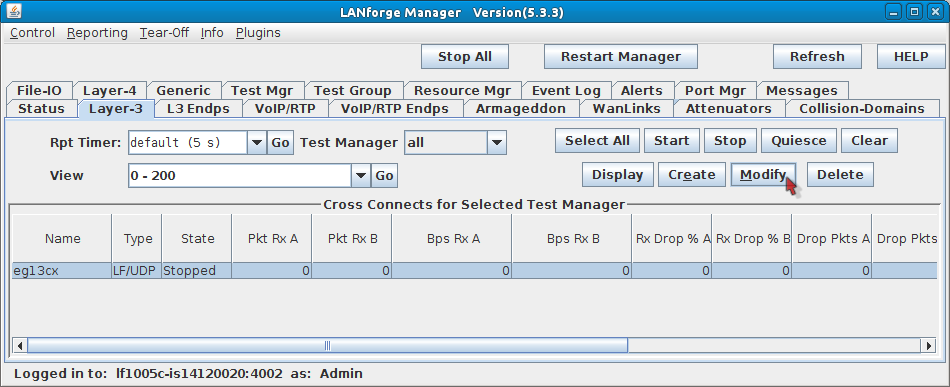
    3. In the Layer-3 tab... screenshot
      1. Select the cross-connect eg13cx
      2. Click Modify in the Layer-3 tab.
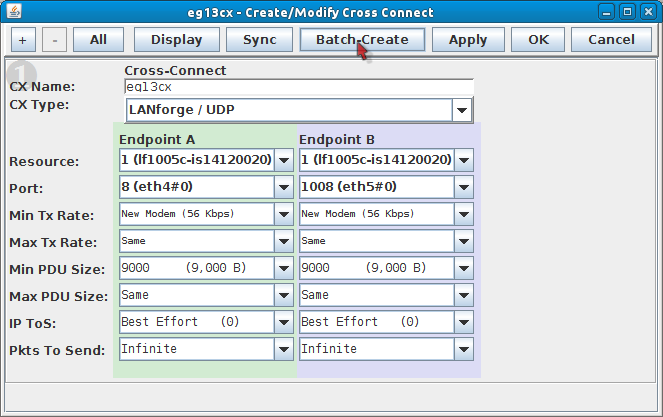
    4. Click Batch Create in the Create/Modify Cross Connect window. screenshot
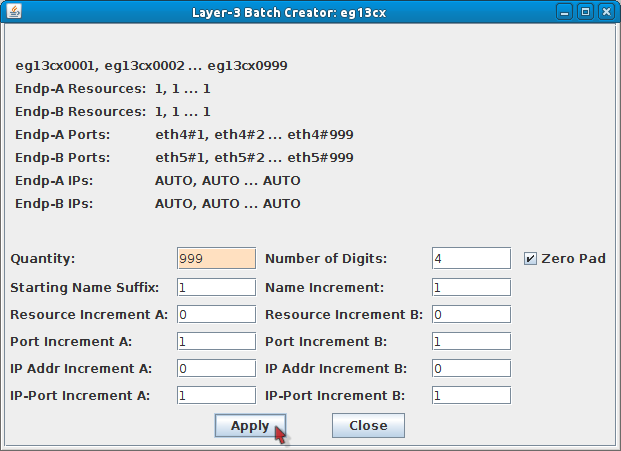
    5. We can create cross connects in one batch. Using the Layer-3 Batch Creator window: screenshot
      1. Specify for Quantity: 999. This brings us to 1000 cross connects.
      2. Starting Name Suffix: 1
      3. Click the Apply button to create the cross connects.
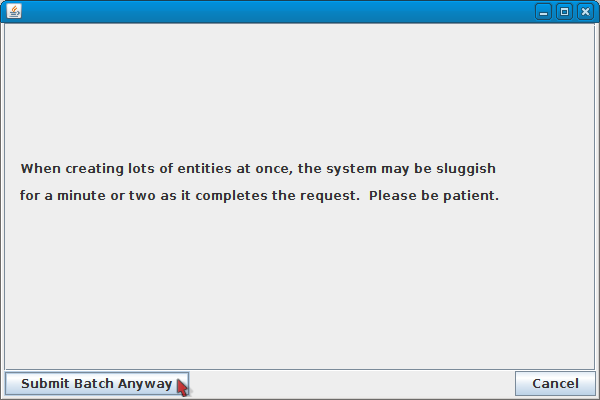
    6. Expect the system to work for a few minutes while it creates the cross connects. screenshot
      1. When the process completes, the Batch Warning will disappear.
      2. Click the Cancel button on the Create/Modify Cross Connects window.
    7. Update Report Timer for all cross connects. screenshot
      1. The Layer-3 tab now shows the first 200 Layer-3 cross connects.
      2. Use the View dropdown to display all the cross connects: select All and press Go.
      3. Click the Select All button to select all cross connects.
      4. Select slow (10s) in the Rpt Timer dropdown.
      5. Click the Report Timer Go button to apply. This will help keep the GUI responsive.
  5. Start your cross connects.
    1. In the Layer-3 tab, click the Select All button.
    2. Then click the Start button.
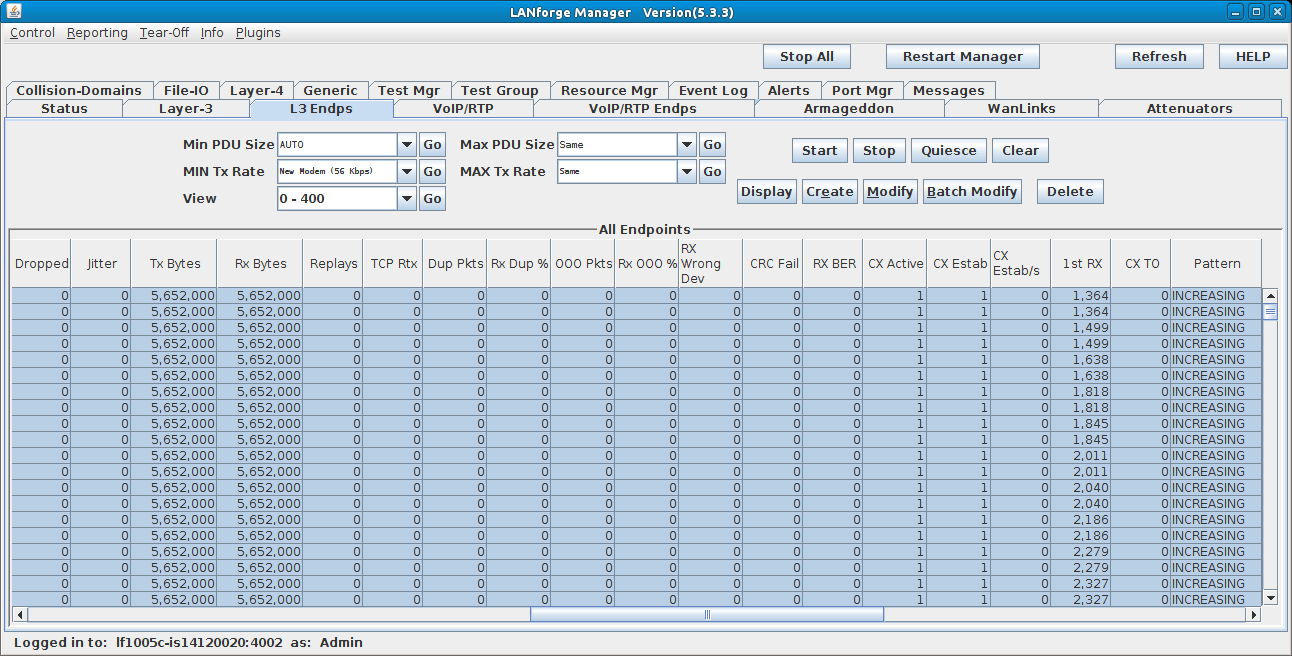
  6. Monitoring your cross connects. screenshot
    1. As you scroll to the left in the L3 Endpoints table, you can monitor the connection qualities.
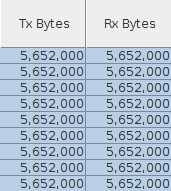
    2. Tx Bytes and Rx Bytes columns show traffic amount. screenshot
    3. The Pattern column shows traffic trend. screenshot
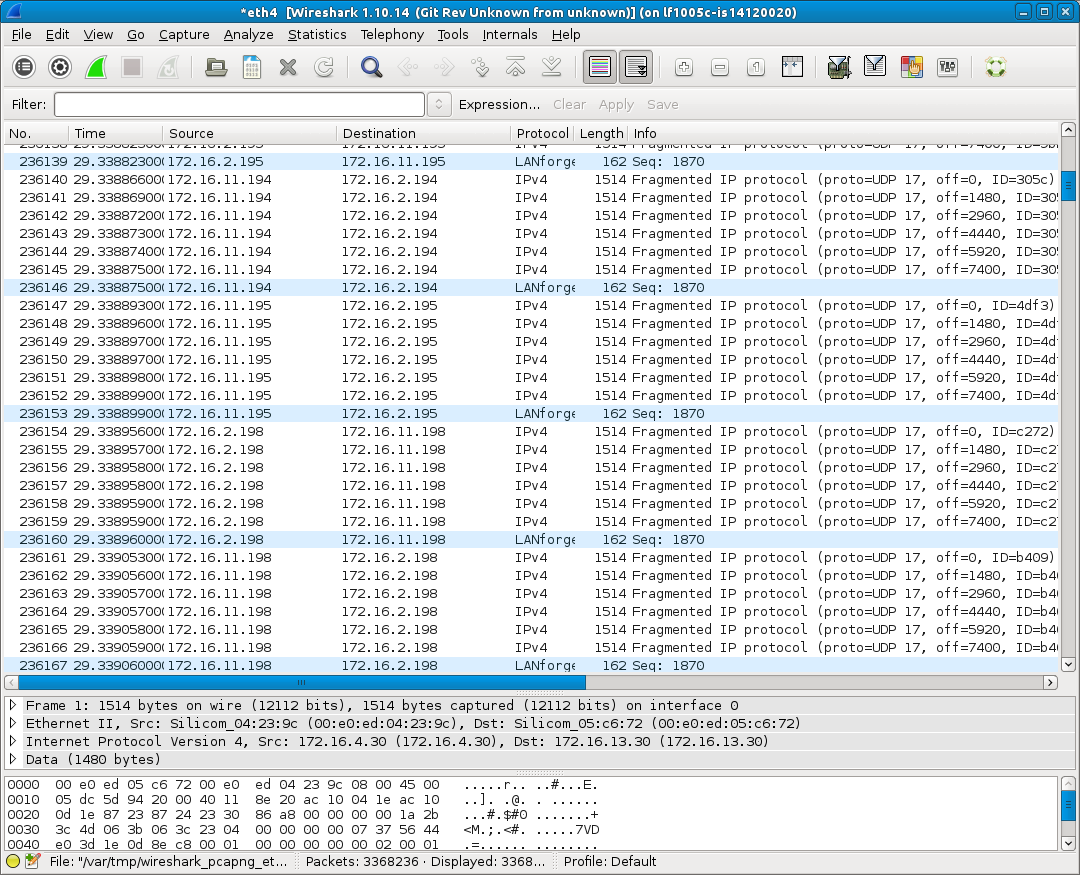
  7. Sniffing your cross connects with Wireshark from the parent ports eth4 or eth5. screenshot
    1. To sniff the parent ports that the MAC-VLANs are associated with, you want to be connected to the LANforge server desktop using either Remote Desktop or VNC.
    2. Operating this many cross connects can be taxing on many machines. To minimize the sluggishness of Wireshark, start Wireshark when none of the Cross-Connects are active, and use the LANforge client to start and stop the traffic.
    3. In the Layer-3 tab, click Select All and click Stop.
    4. In the Port Mgr tab, select interface eth4 and click the Sniff Packets button.
    5. Wireshark will open and be capturing packets.
    6. In the Layer-3 tab, click the Start button, and let your test run for one or two minutes.
    7. Then click the Stop or Quiesce buttons to end the test.
    8. Now you can save the Wireshark capture.

Candela  Technologies, 2417 Main Street, Suite 201, Ferndale, WA 98248, USA
www.candelatech.com | sales@candelatech.com | +1.360.380.1618
Facebook | LinkedIn | Blog