Candela Technologies Logo
Network Testing and Emulation Solutions

Displaying Sequence Gaps

Goal: Generate and show sequence gaps (time between packets) by running traffic through a WanLink with an intermittent latency spike.

Tracking sequence gaps can be useful in the following scenarios:
  • Roaming with and without 802.11r.
  • OSPF failovers.
  • Cellular to WiFi handoff.

In this test scenario, LANforge will be set up to generate sequence gaps. Then the sequence gaps will be shown via the layer-3 display window.

Four physical ports will be used, two to generate traffic and two for the WanLink endpoints. This test uses a LANforge CT922 system.

LANforge will be generating UDP traffic at 1 Mbps through a WanLink that is scripted to apply one second of latency every ten seconds. The one second latency should create a one second sequence gap. The packet size will be smaller to increase the rate of traffic and thus decreasing sequence gaps, this will make any larger sequence gaps more apparent.

 
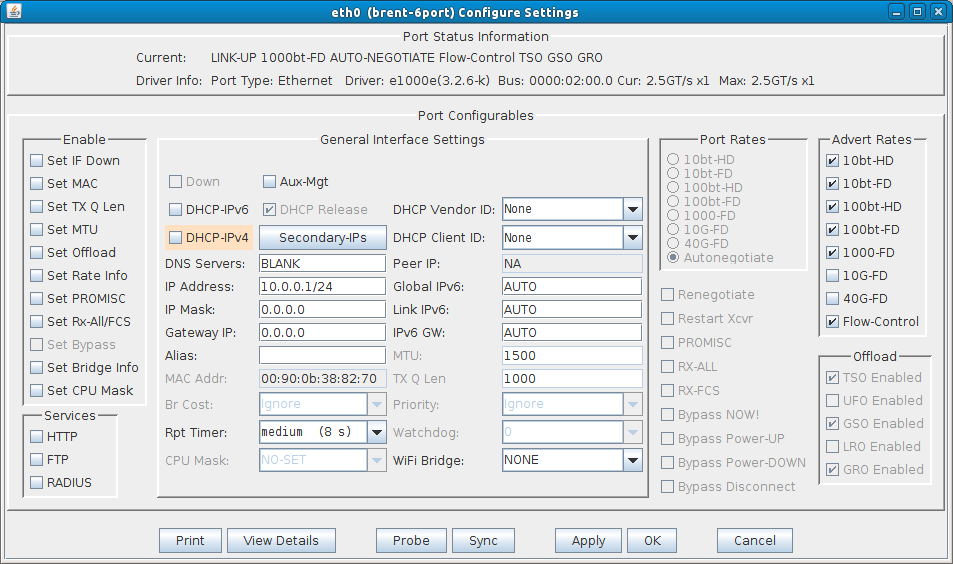
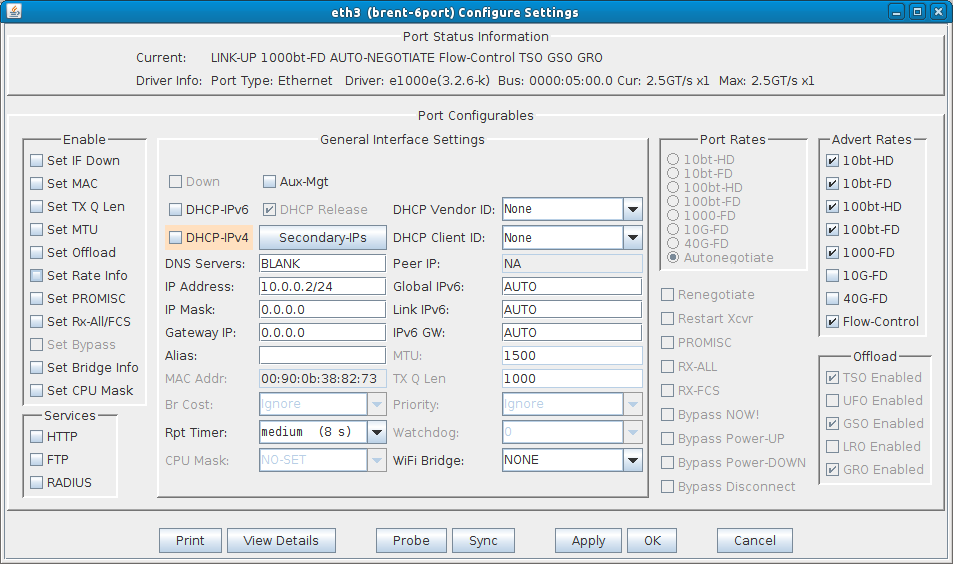
  1. Set IPs on traffic generating ports, eth0 and eth3 in this case.
    1. In the Port Manager tab modify eth0. screenshot
      1. Set the IP Address.
    2. In the Port Manager tab modify eth3. screenshot
      1. Set the IP Address.
  2. Create a WanLink.
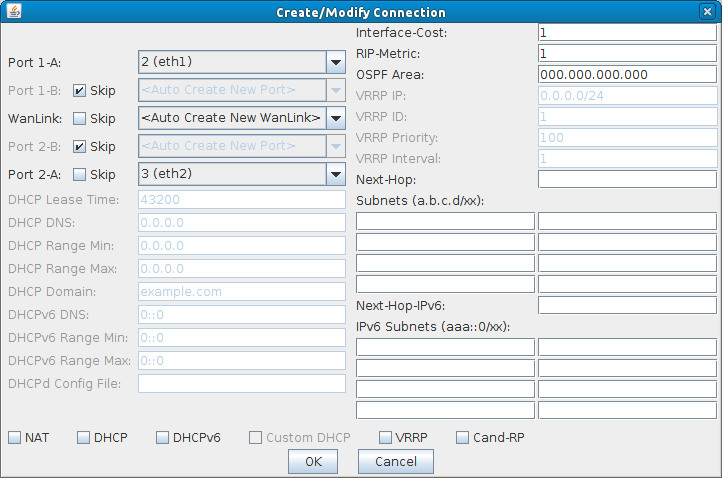
    1. In Netsmith, right click an open area and click New Connection. screenshot
      1. Select the Skip checkboxes on Port 1-B and Port 2-B.
      2. Set Port 1-A to eth1.
      3. Set Port 2-A to eth2.
      4. Click OK.
      5. Click Apply in Netsmith.
  3. Configure the WanLink.
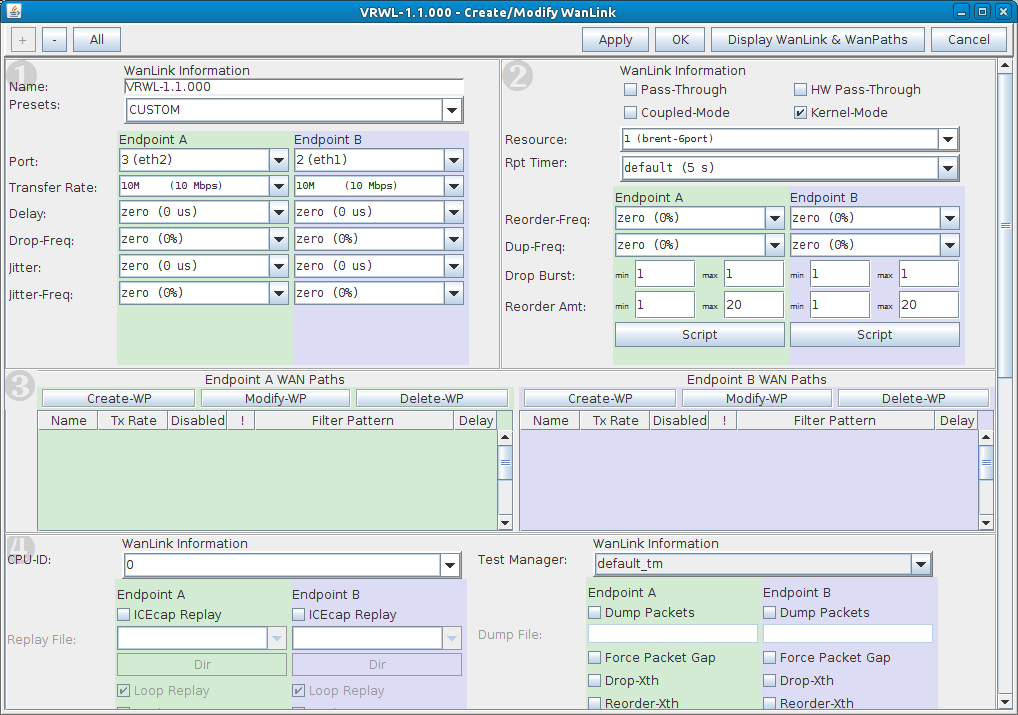
    1. In the WanLinks tab, modify the WanLink. screenshot
      1. Set the Transfer Rate to 10Mbps for both endpoints.
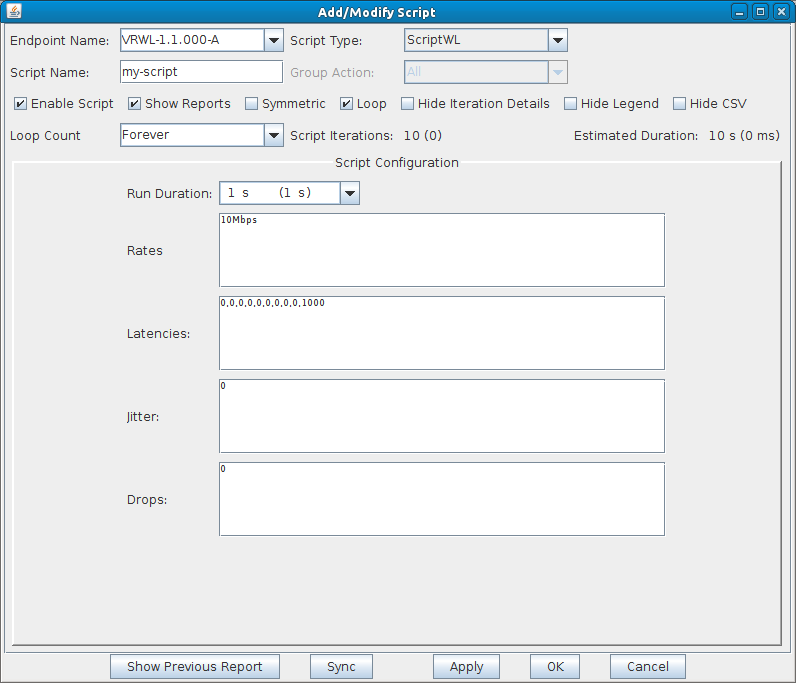
    2. Click the Script button on Endpoint A. screenshot
      1. Set the Script Type to ScriptWL.
      2. Click the Loop checkbox.
      3. Run Duration = 1s
      4. Rates = 10Mbps
      5. Latencies = 0,0,0,0,0,0,0,0,0,1000
      6. Jitter = 0
      7. Drops = 0
      8. Click OK.
    3. Click OK to close the WanLink modify window.
  4. Create a Layer 3 connection.
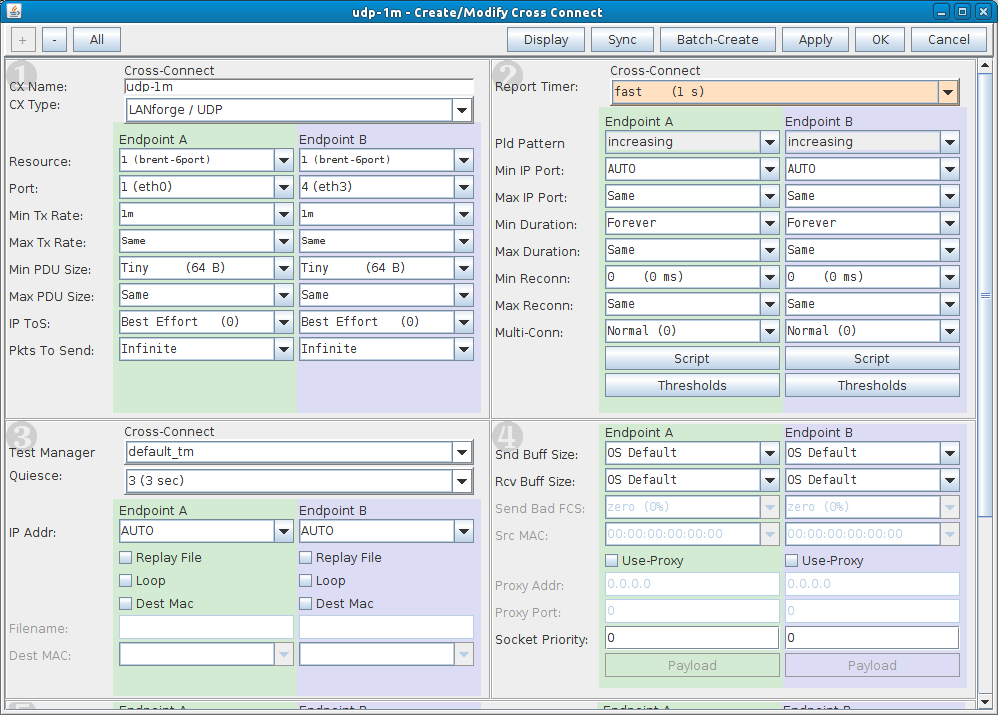
    1. In the Layer-3 tab, Click Create. screenshot
      1. CX Name = udp-1m
      2. Report Timer = 1s
      3. Endpoint A Port = eth0
      4. Endpoint B Port = eth3
      5. Endpoint A and B = 1m
      6. Endpoint A and B Min PDU Size = 64 B
      7. Click OK.
  5. Create a test group to start the layer 3 connection and WanLink at the same time.
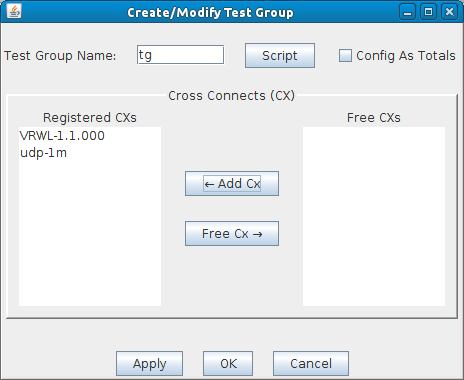
    1. In the Test Group tab, click Create. screenshot
      1. Test Group Name = tg
      2. Select the WanLink and Layer 3 connection on the right and click Add Cx.
      3. Click OK.
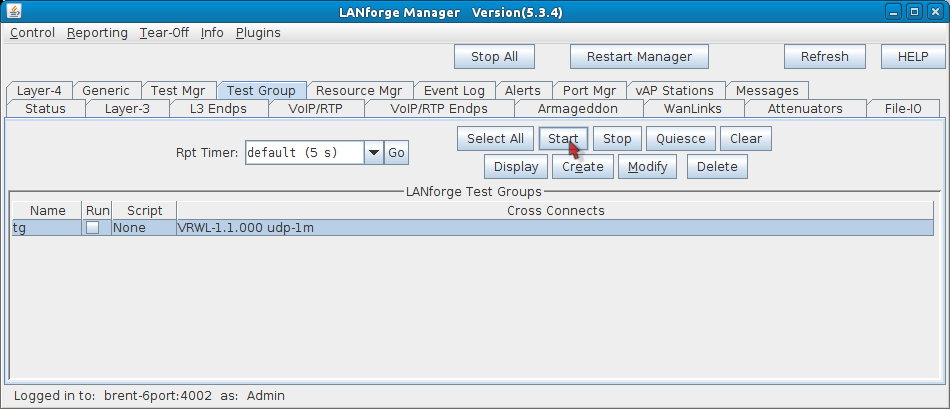
  6. Start the test group. This will start both the layer 3 connection and the scripted WanLink.
    1. In the Test Group tab, select tg and click Start. You will see the Script Report window appear. screenshot
  7. Display the Layer 3 connection and analyze the Rx Gap (sequence gap).
    1. In the Layer-3 tab, select udp-1m and click Display. screenshot
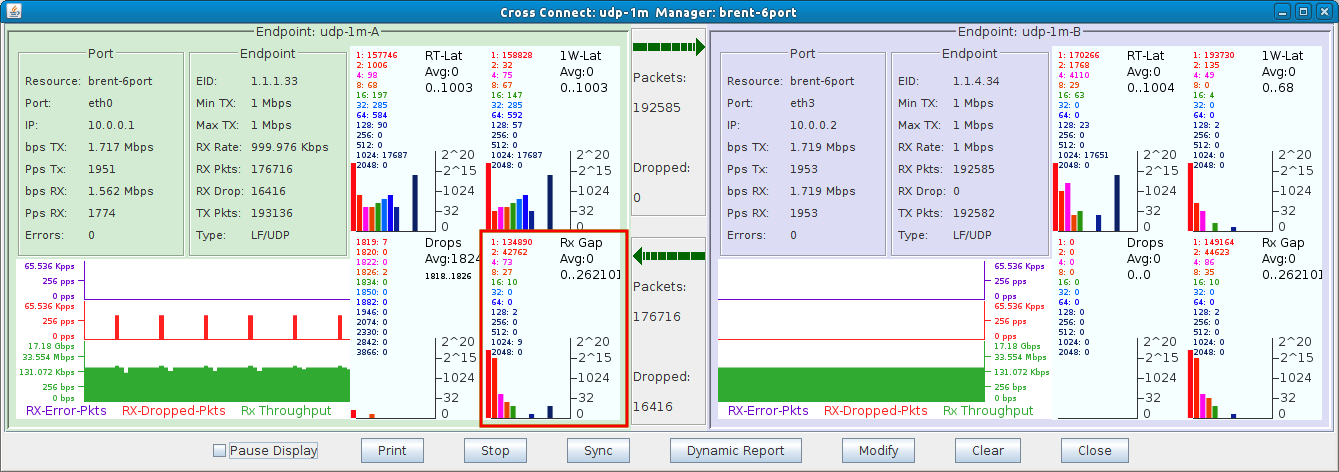
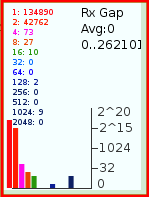
    2. The Rx Gap graph is highlighted in the below screenshot. The Rx Gap for Endpoint B doesn't show one second sequence gaps because that side of the WanLink was not scripted. screenshot
      1. The colored numbers on the left side of the colon represent time in milliseconds. The right colored numbers represent the number of times a sequence gap reached the particular time on the left side.

        You'll notice that 9 sequence gaps hit 1024ms. These gaps were the result of the WanLink script occasionally sending one second latency.

Candela  Technologies, 2417 Main Street, Suite 201, Ferndale, WA 98248, USA
www.candelatech.com | sales@candelatech.com | +1.360.380.1618
Facebook | LinkedIn | Blog