- Setup a Netsmith connection.
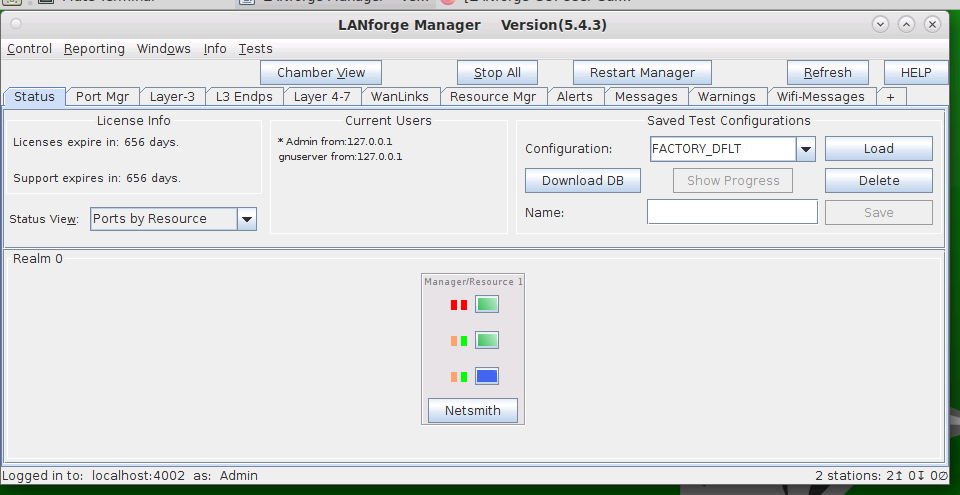
- Go to the Status tab and click Netsmith
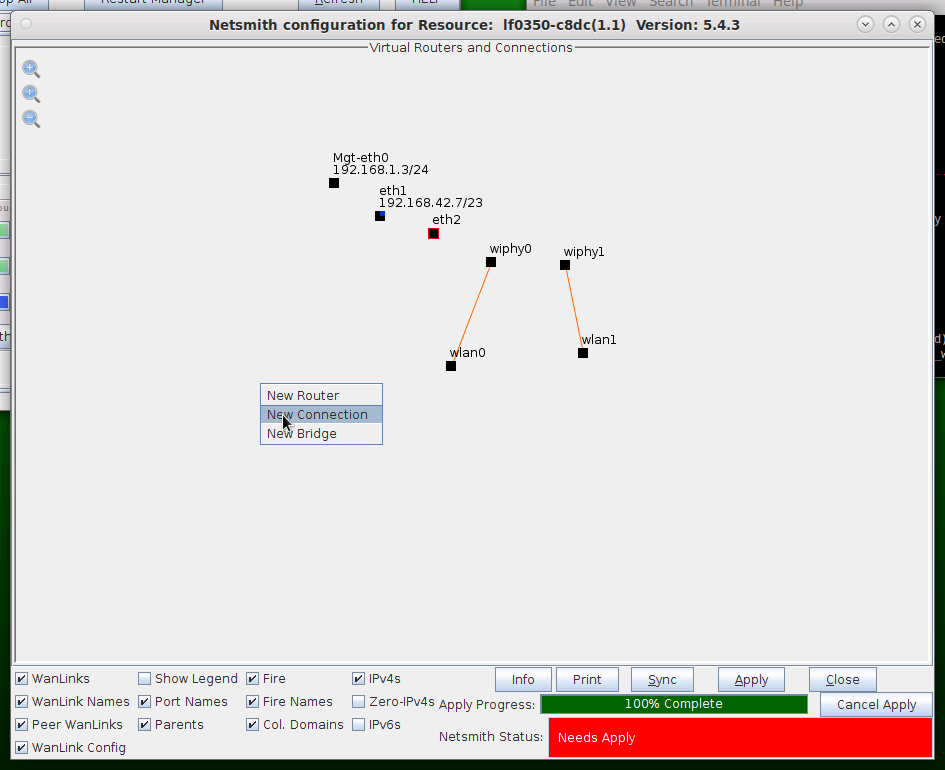
- Right-click in the Netsmith window and select New Connection
- Accept defaults, Auto Create everything and click OK
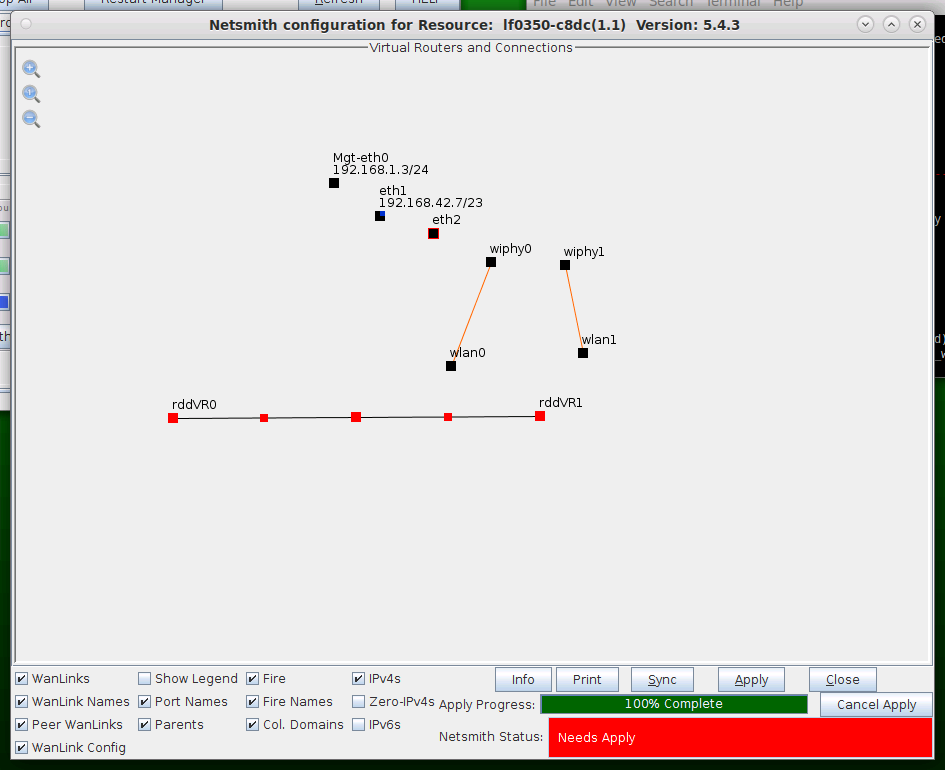
- Click Apply in the Netsmith window to create the connection
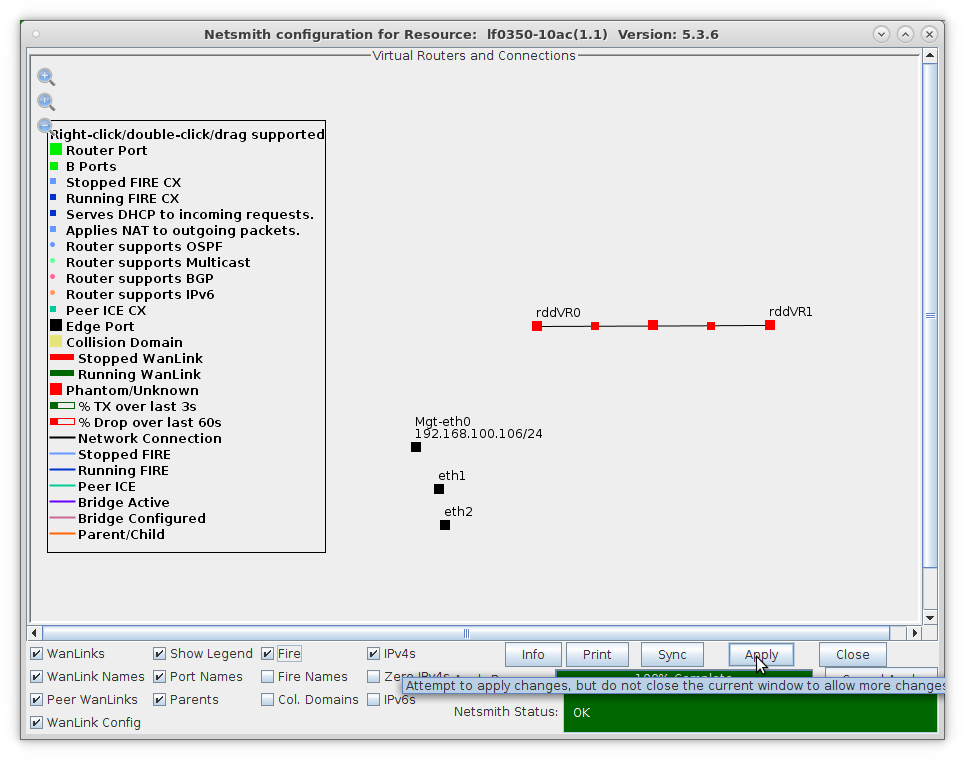
- The Netsmith window after applying changes
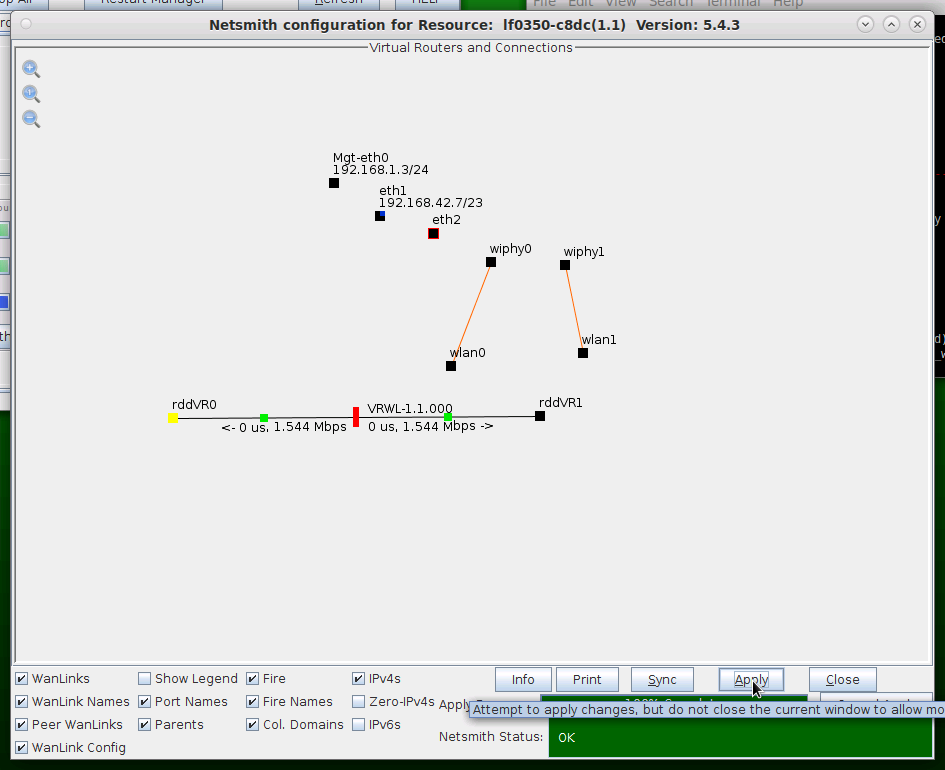
For more information see LANforge-GUI User Guide: Netsmith
- Setup the WanLink.
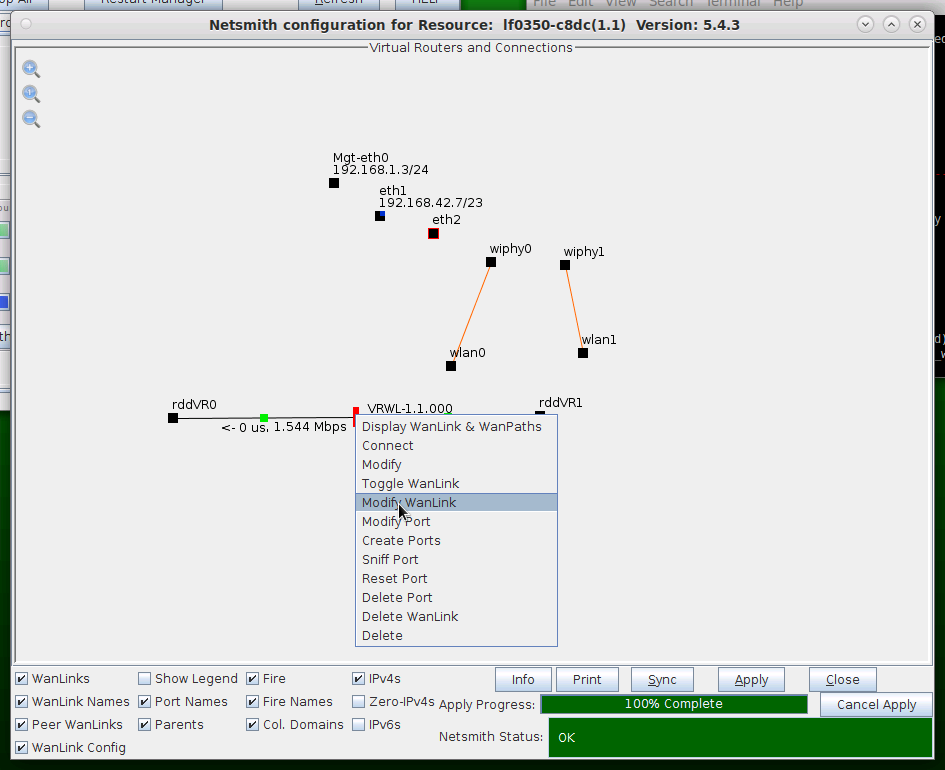
- Right-click the WanLink and select Modify WanLink
- Setup the WanLink with values larger than what each of theWanPaths will use
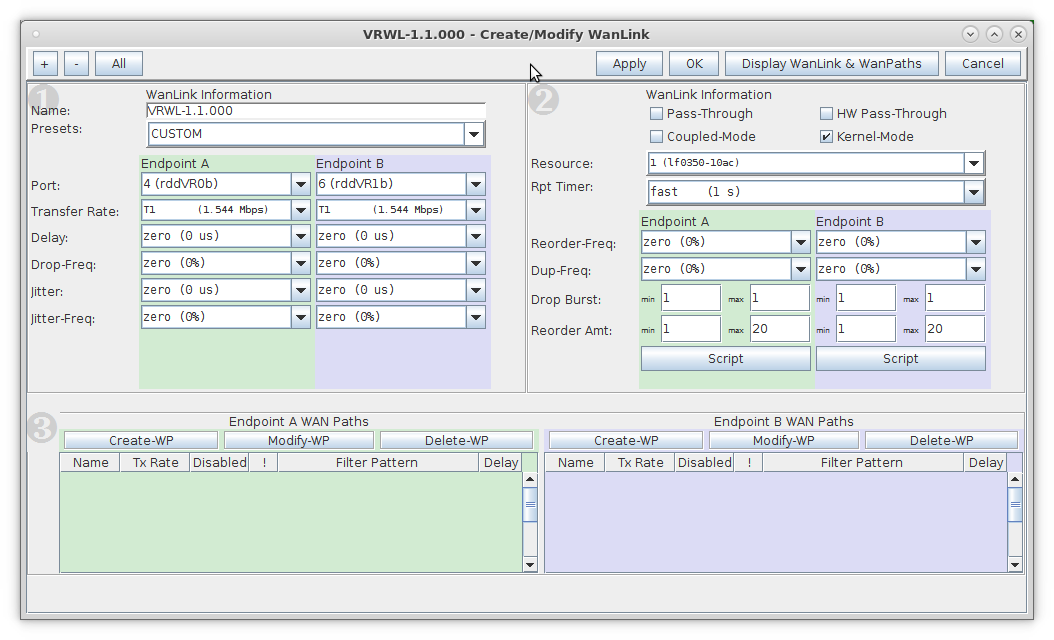
- WanPaths are subordinate to WanLinks. WanLinks, therefore, should be configured with sufficient bandwidth and buffering required by all of its WanPaths
- Click Apply and leave the Create/Modify WanLink window open
For more information see LANforge-GUI User Guide: WanLinks
- Setup the WanPaths.
- Click Create-WP on Entry Point A to create a new WanPath on this WanLink
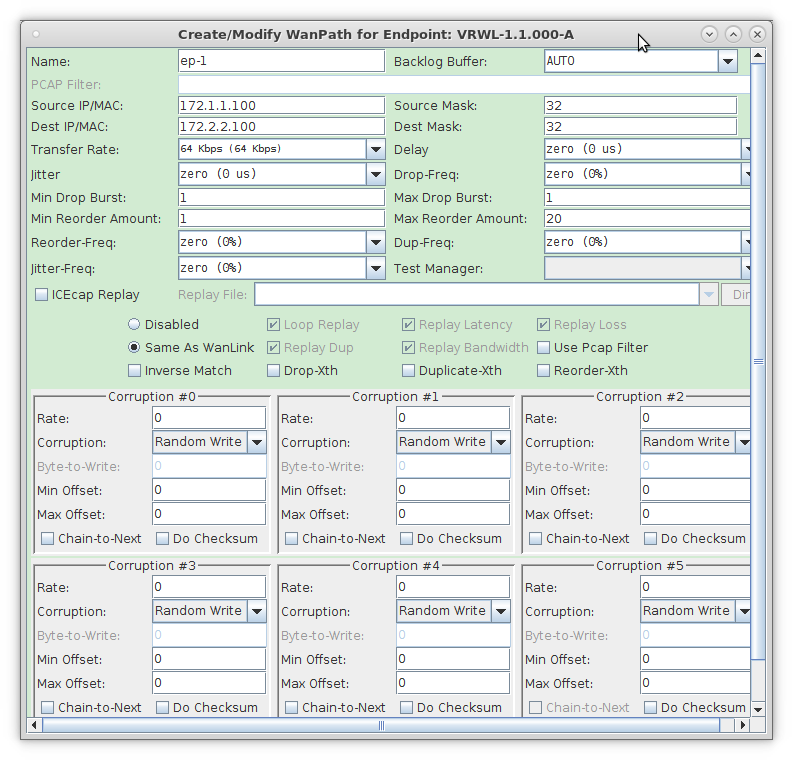
- NOTE: In order to filter by specific IP address, use a Source and Dest Mask of 32 to exactly match the IP coming in on the Entry Point
- Click OK to create the WanPath
- Click Create-WP on Entry Point B to create a new WanPath on this WanLink
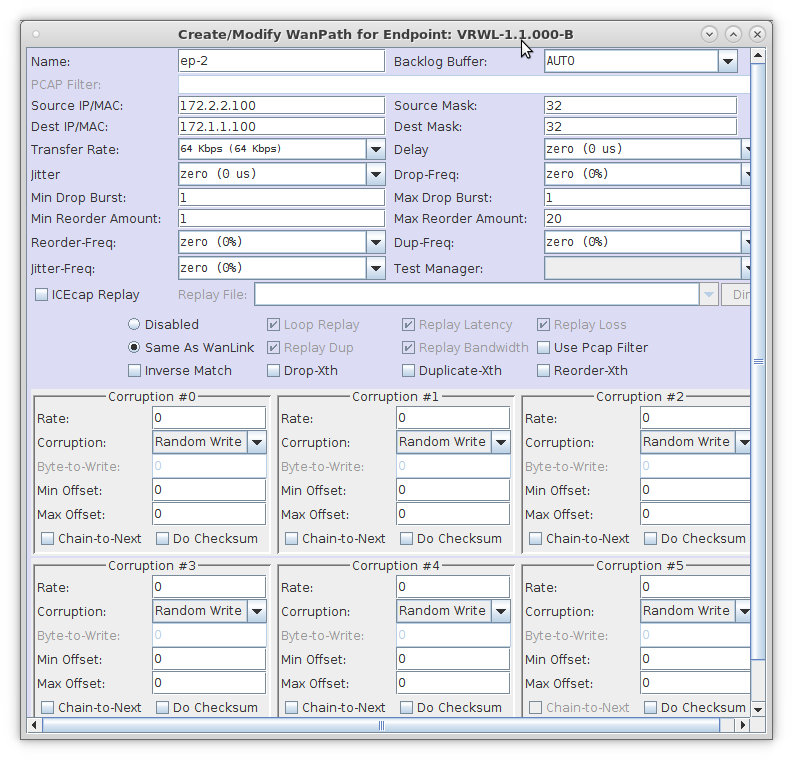
- NOTE: The Source and Destination IPs for this WanPath are the reverse of those for Entry Point A
- Click OK to create the WanPath
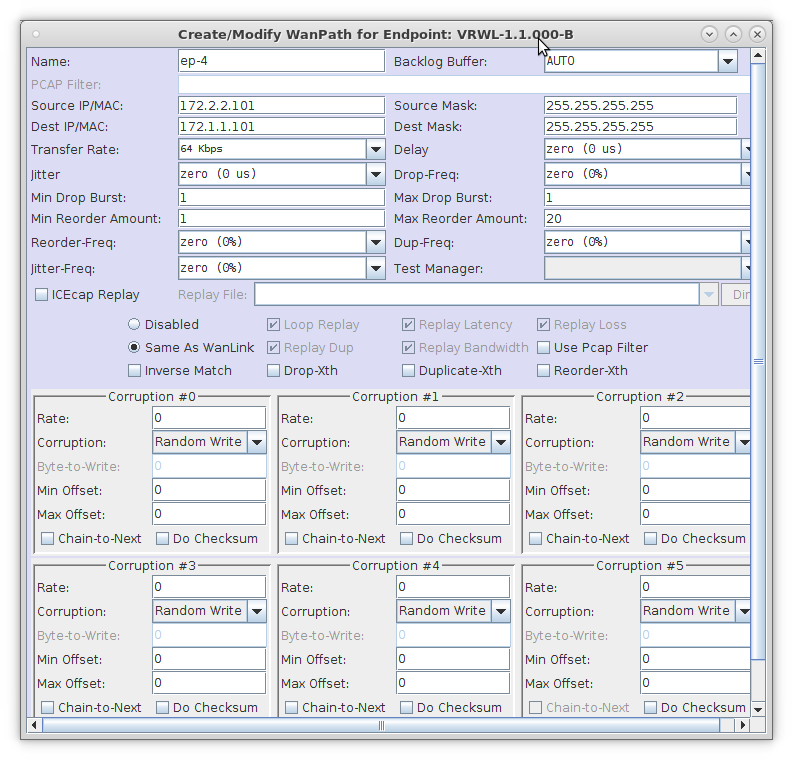
- Create a second WanPath for this WanLink using the next set of IP addresses
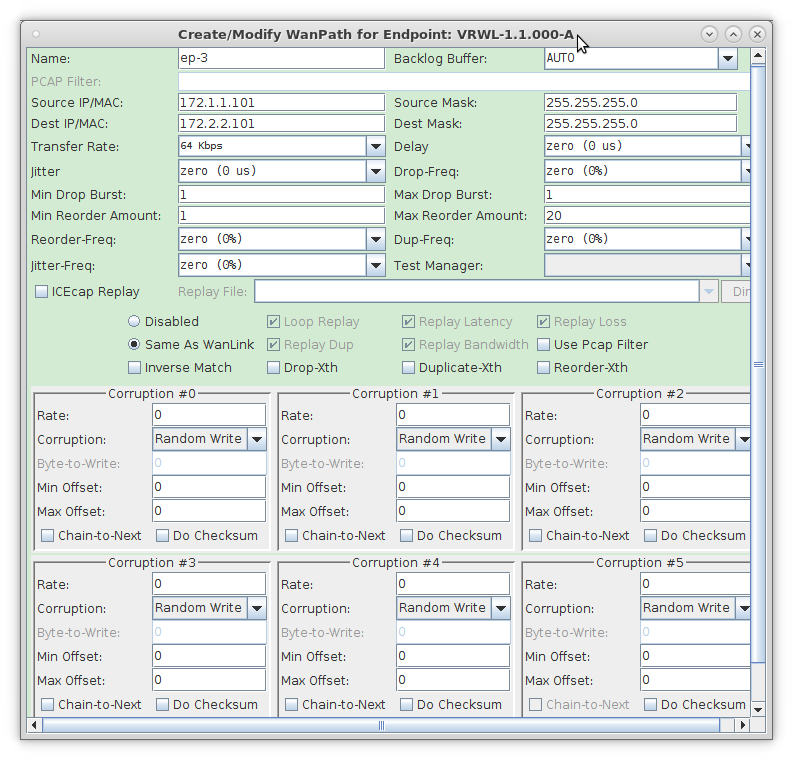
- Reverse the Source and Destination IPs for this corresponding WanPath
- Verify that the WanPaths on this WanLink are setup correctly, then click OK on the Create/Modify WanLink window shown here
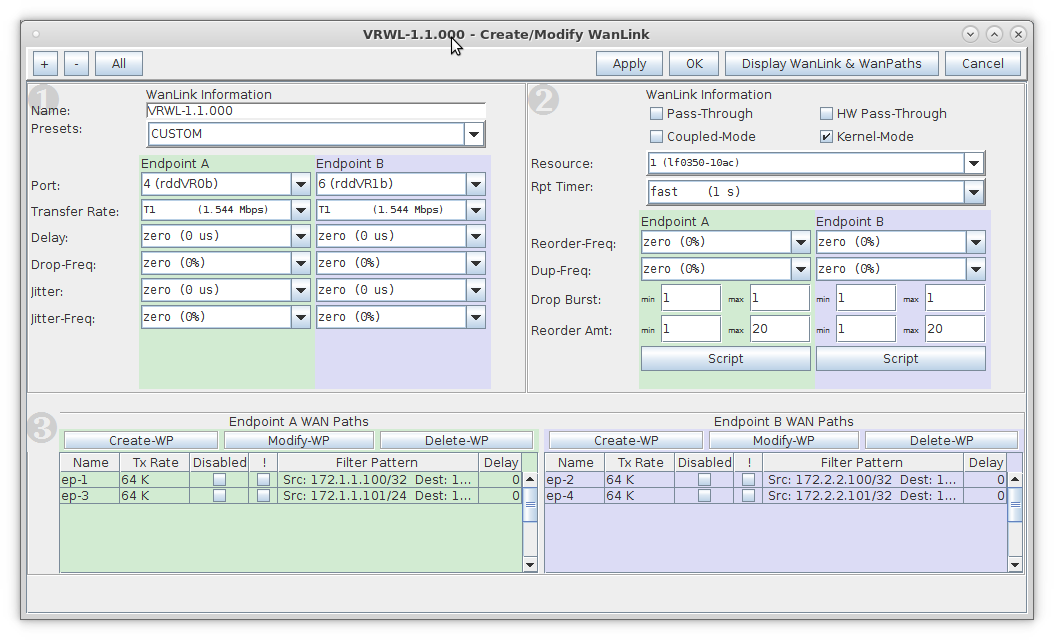
For more information see LANforge-GUI User Guide: WanLinks
- Setup the ports with IP addresses.
- Right-click on the WanLink and select Toggle Wanlink
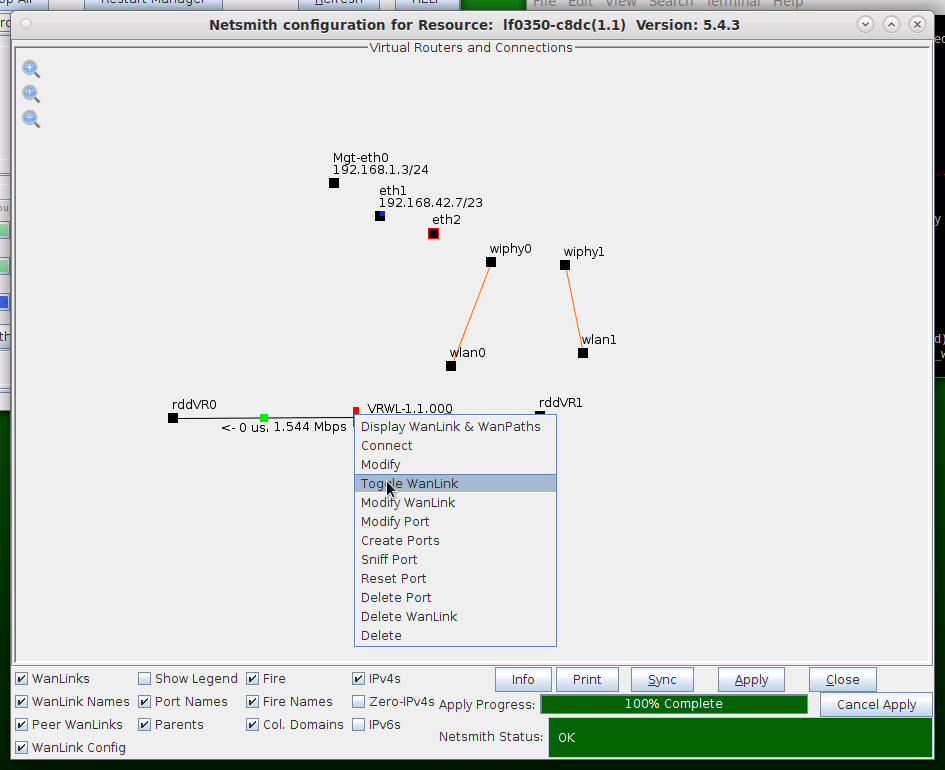
- Right-click port rddVR0 and select Modify Port
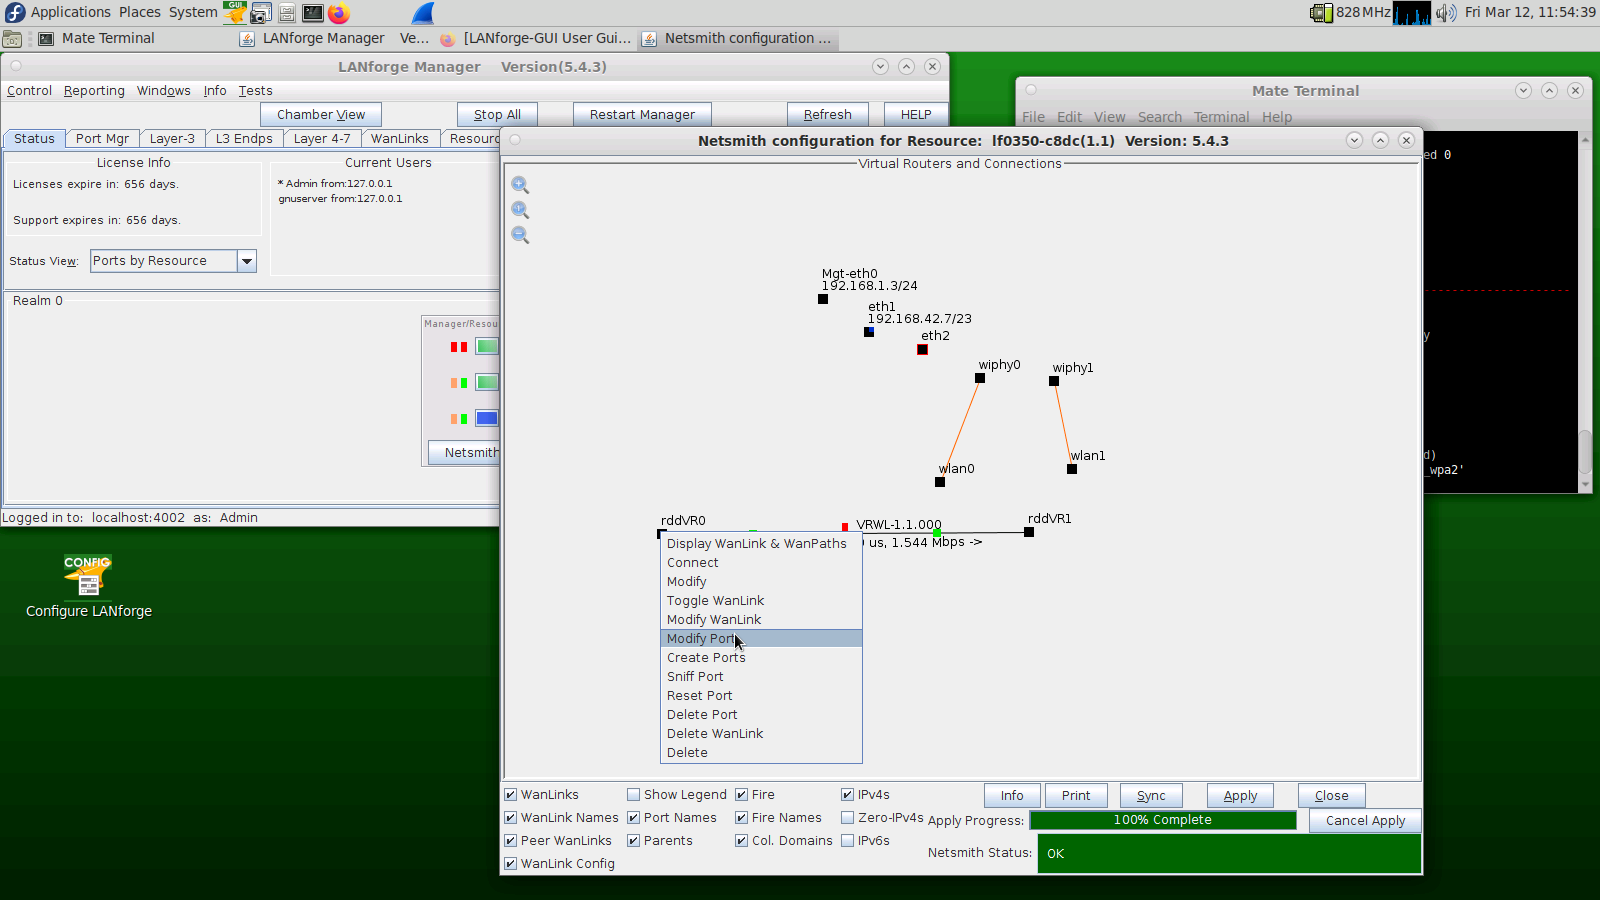
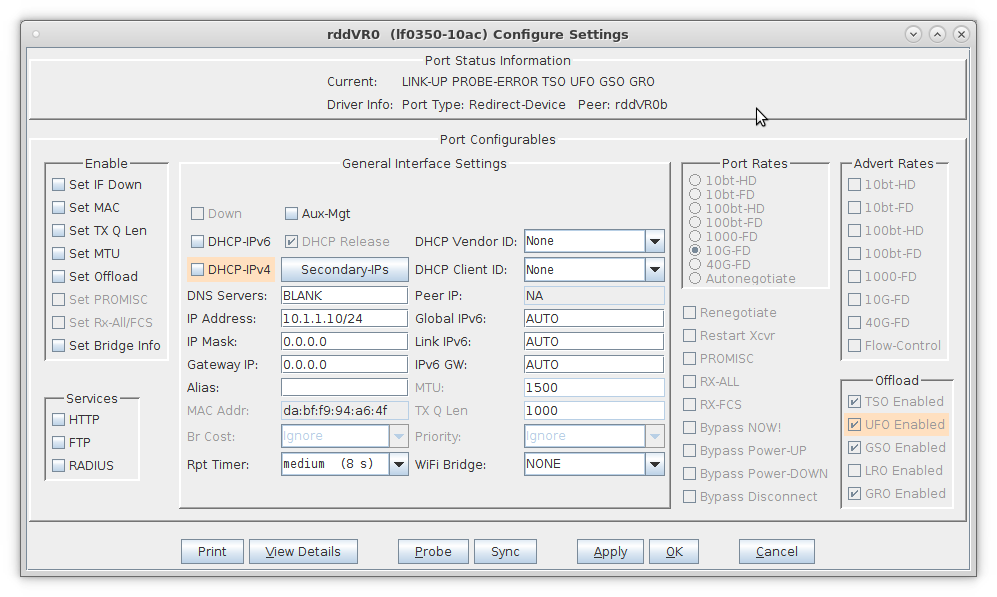
- Setup an IP address that is on a different network than the WanPath entry points
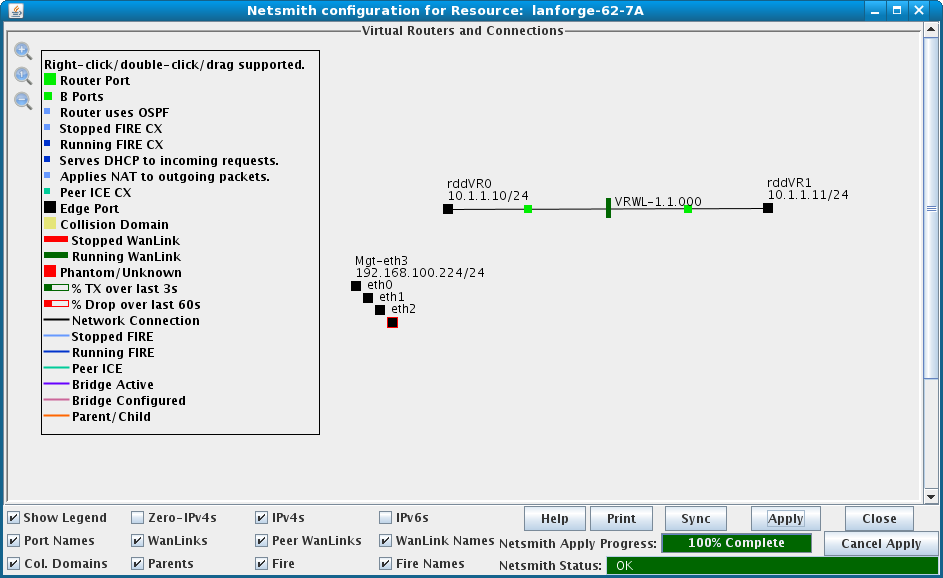
- Setup an IP address on port rddVR1 that is on the same network as rddVR0
For more information see LANforge-GUI User Guide: WanLinks
- Add the Virtual Routers.
- Right-click in the Netsmith window and select New Router
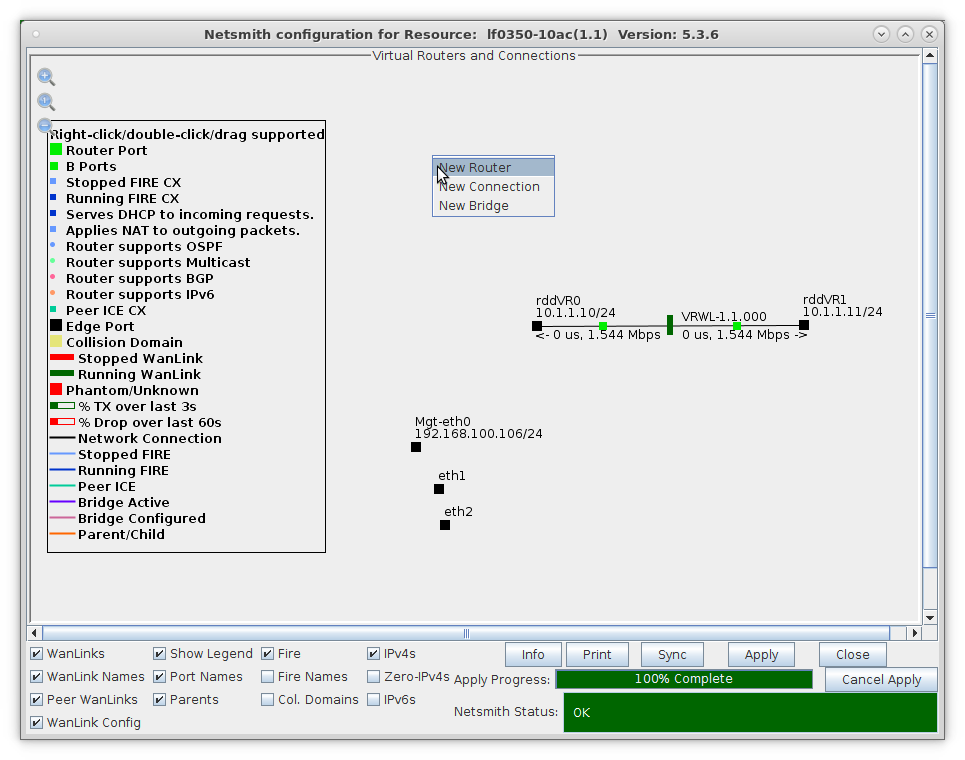
- Accept the defaults or change the Virtual Router name and graphical size
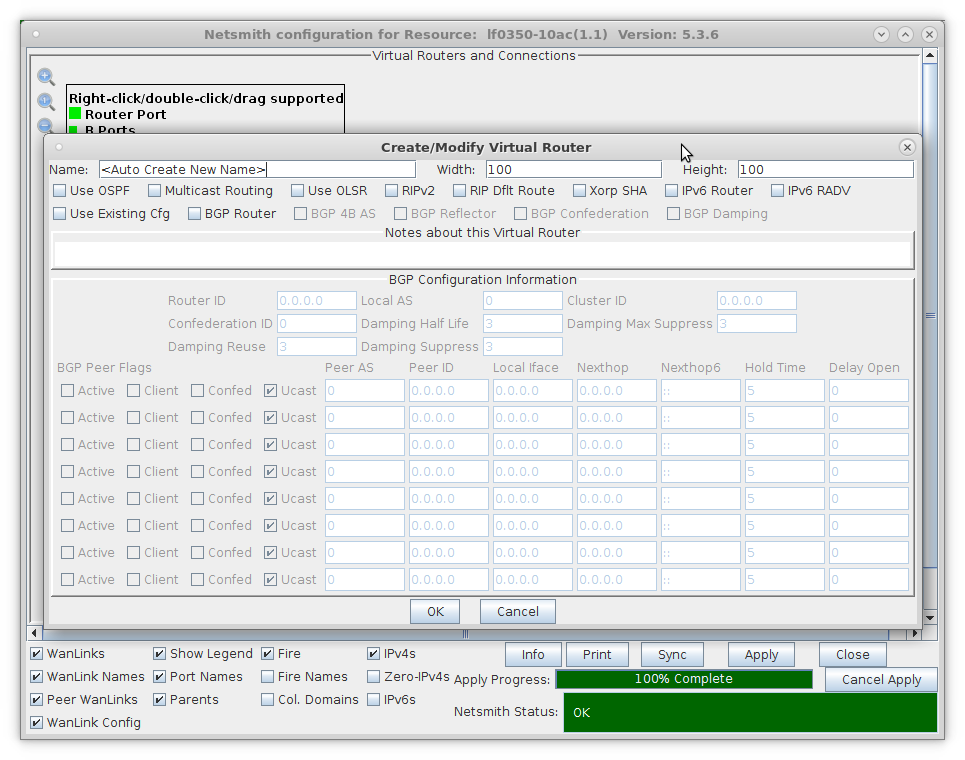
- Click the Apply button and repeat for the second Virtual Router
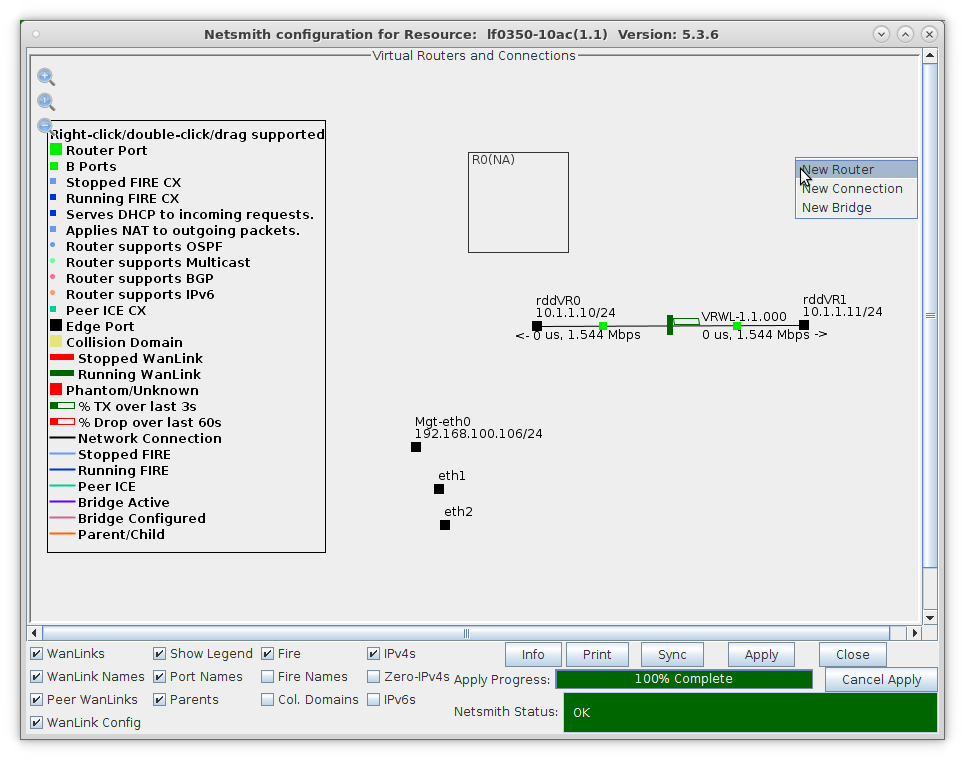
- NOTE: After making any changes to the Netsmith window, you must click Apply or your changes will NOT be implemented and could be lost
- NOTE: Clicking Sync makes sure any changes are synchronized with the current database
- Left-click rddVR0 and drag it inside Router R0(1)
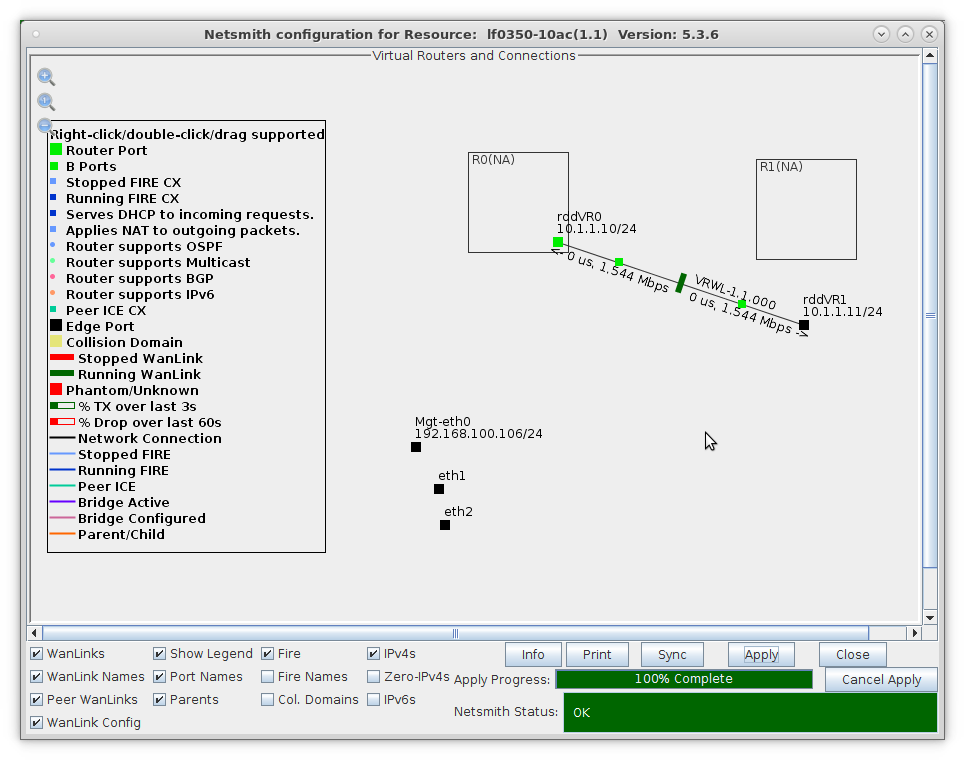
- Left-click rddVR1 and drag it inside Router R1(2)
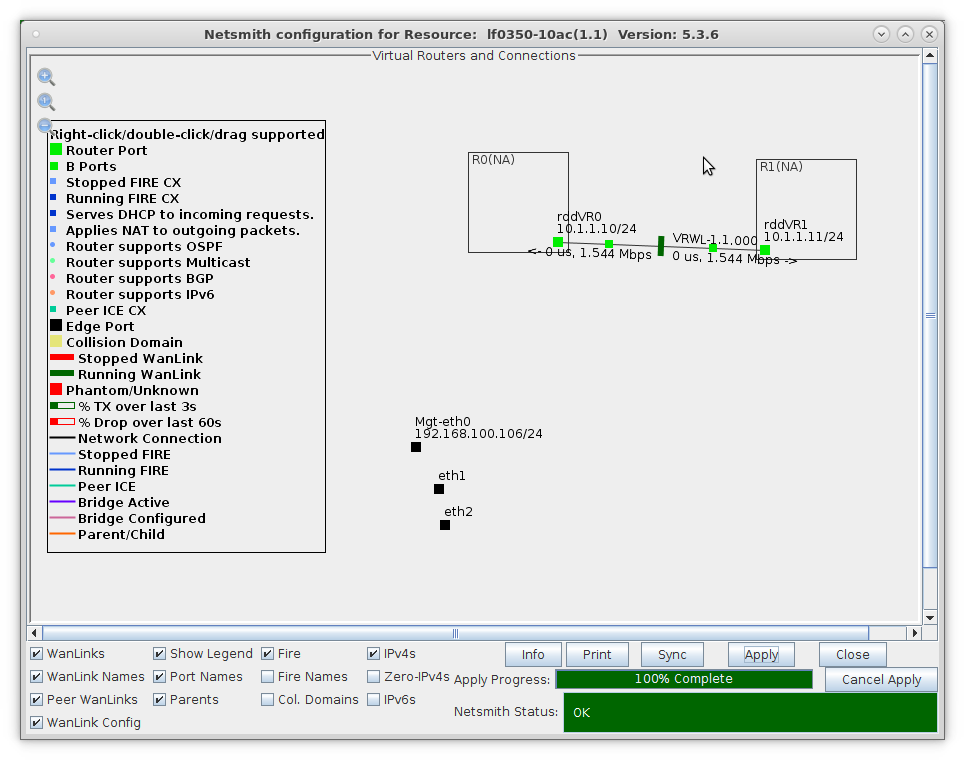
- Apply your changes in Netsmith
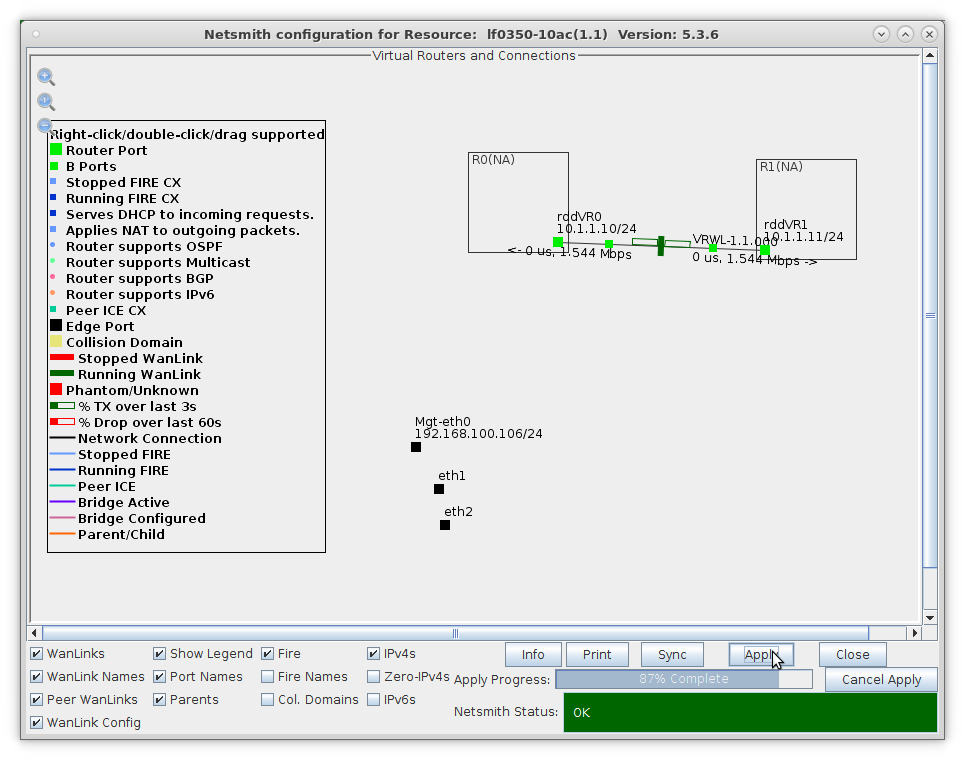
For more information see LANforge-GUI User Guide: WanLinks
- Setup the external interfaces.
- Right-click port eth1 and select Modify Port
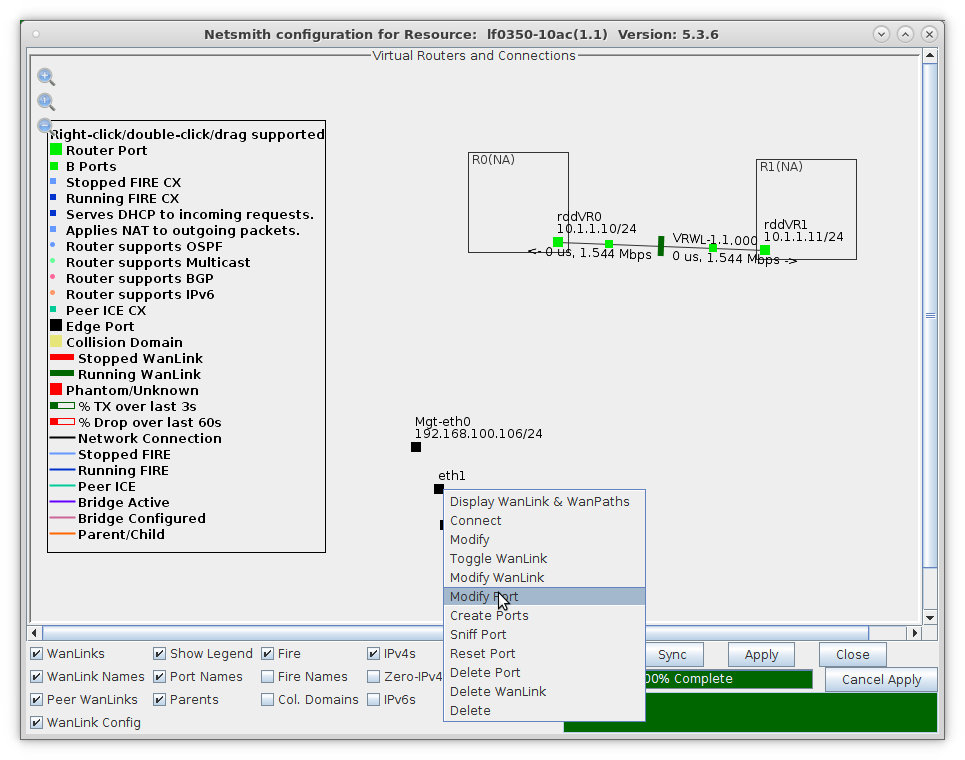
- Setup eth1 with a valid IP address and IP mask that is on the same network as the WanPath entry points ep-1 and ep-3
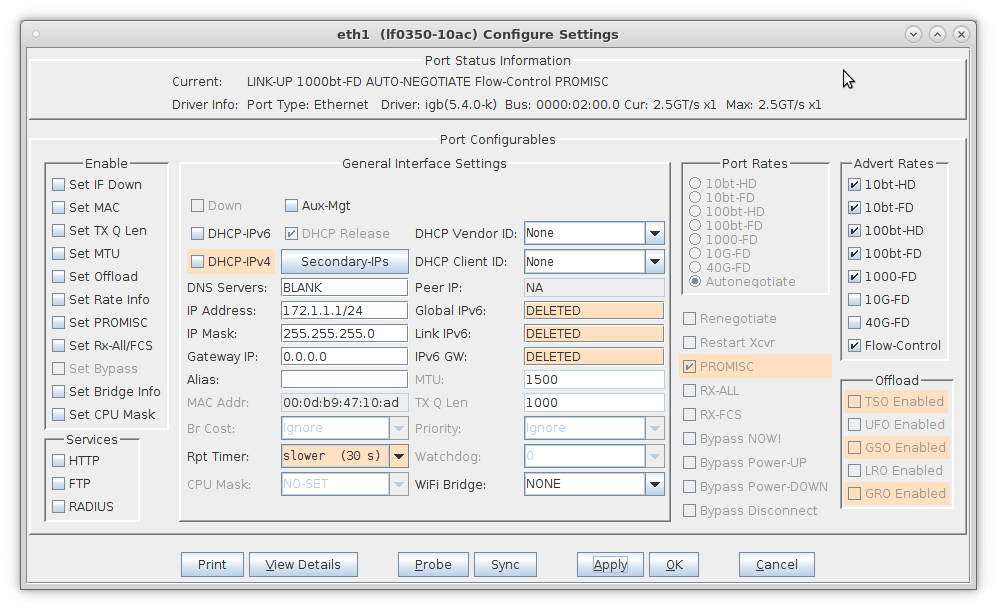
- Left-click port eth1 and drag it inside Router R0(1)
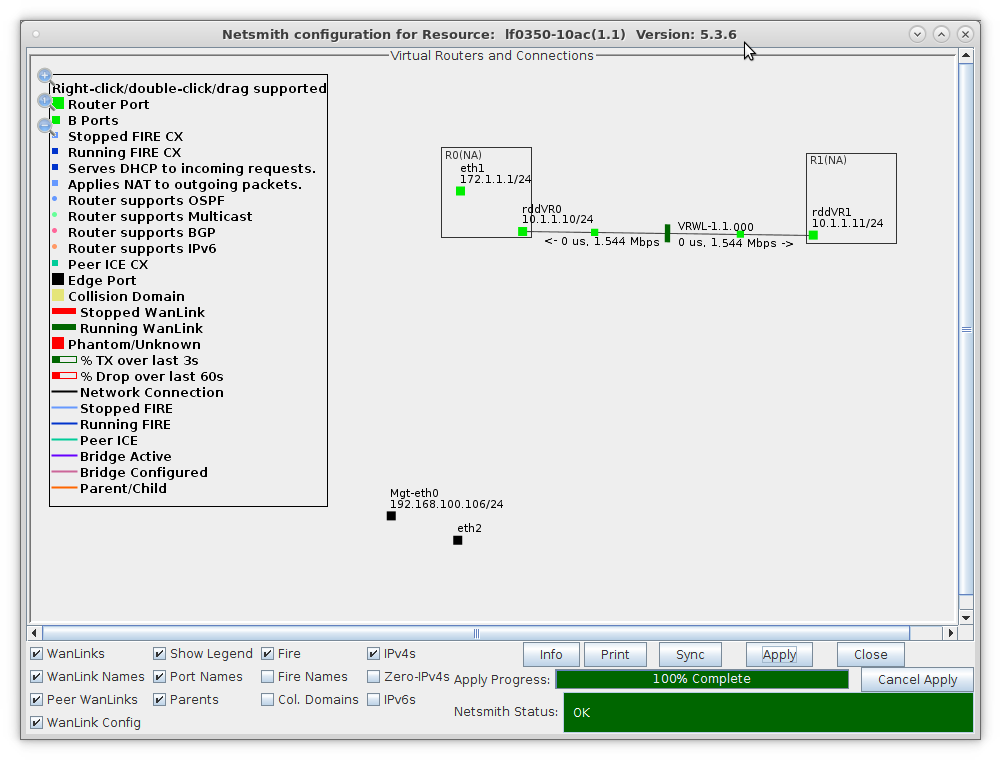
- Setup eth2 with a valid IP address and IP mask that is on the same network as the WanPath entry points ep-2 and ep-4
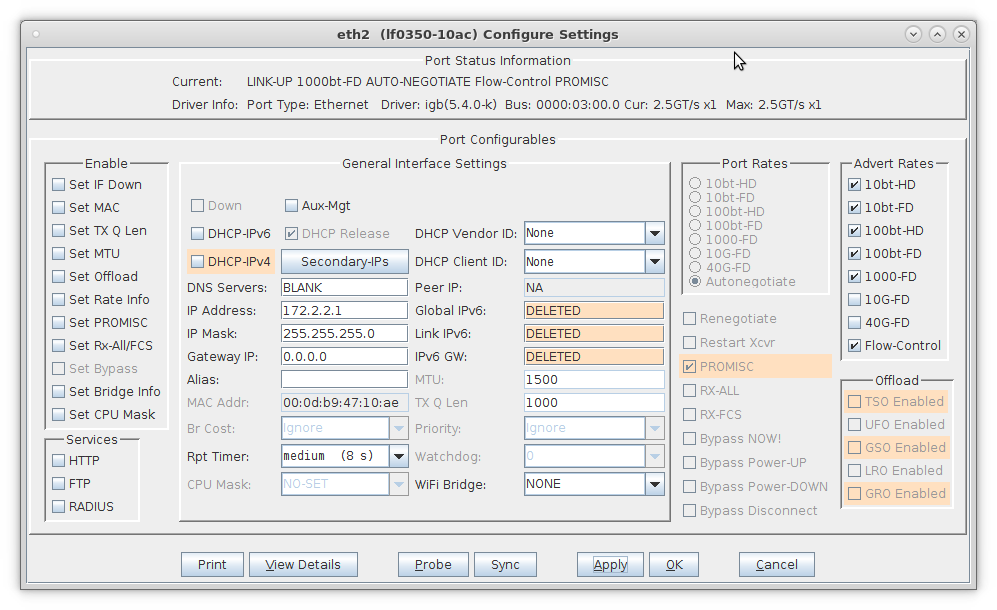
- Drag eth2 inside Router R1(2) and Apply changes in Netsmith
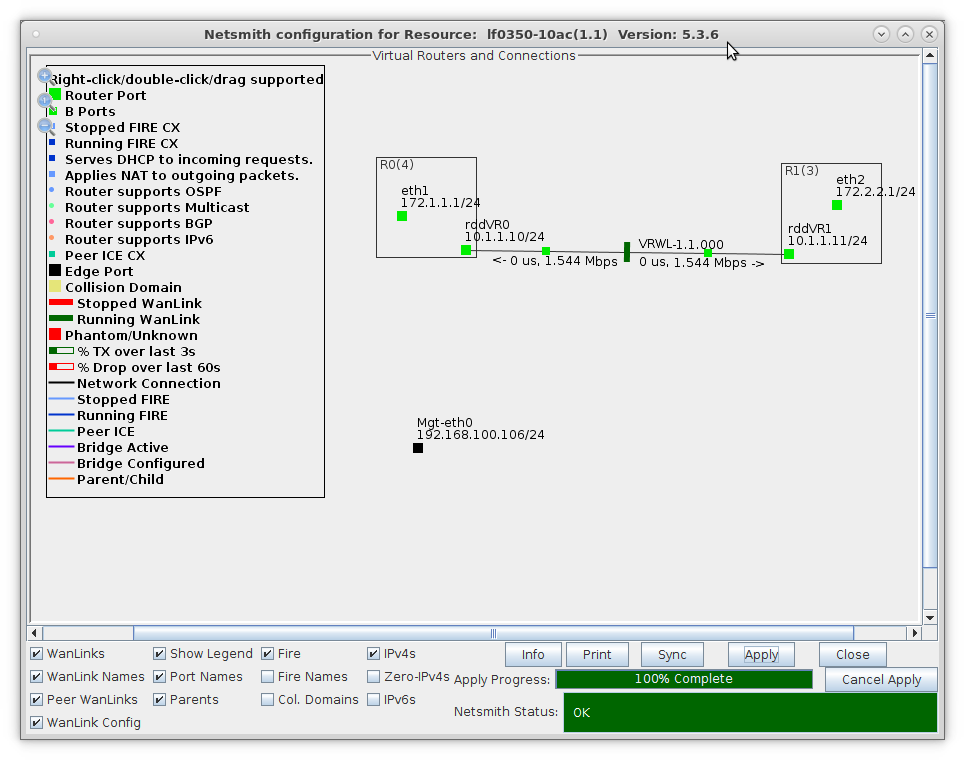
For more information see LANforge-GUI User Guide: WanLinks
- Run traffic to LANforge-ICE ports eth1 and eth2, then display results. Refer to the LANforge FIRE Cookbook to run traffic.
- Right-click the WanLink and select Display Wanlink & WanPaths
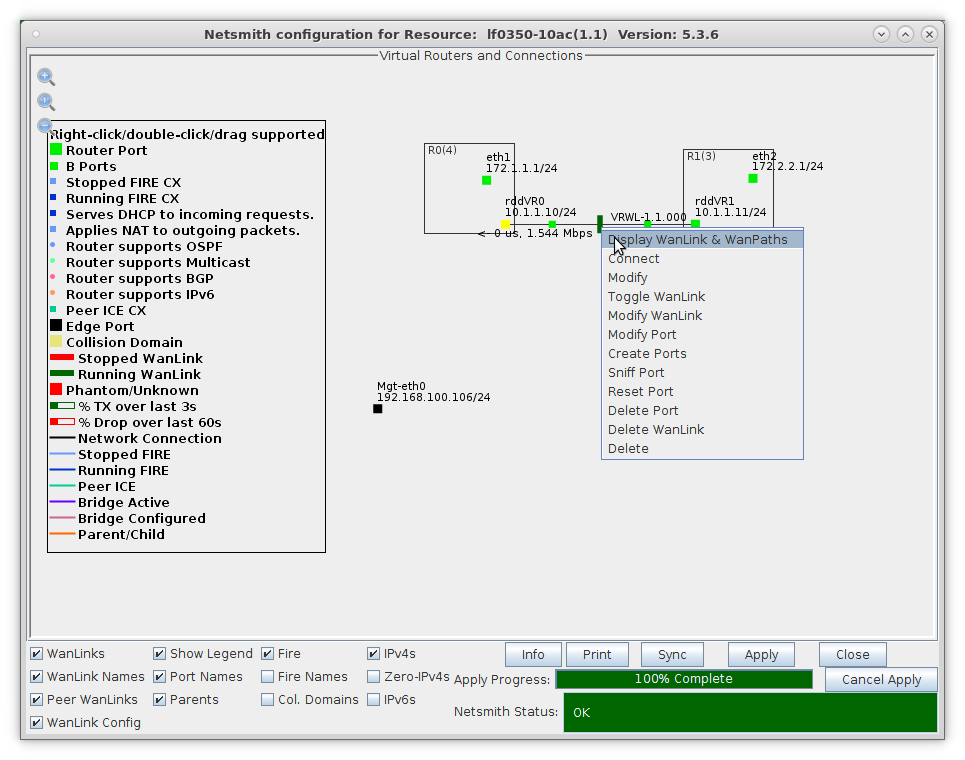
- The lower half of the WanLink display shows traffic passing on WanPath entry points ep-3 and ep-4 and other IP address are excluded from passing on the WanLink
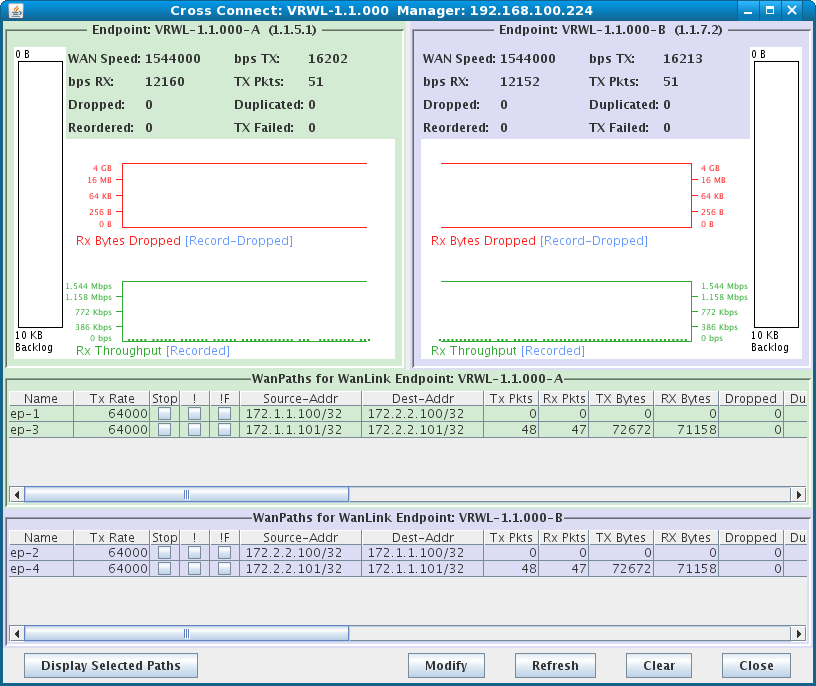
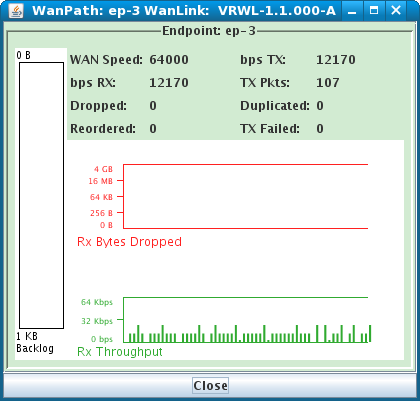
- Select a WanPath and click Display Selected Paths in the lower left corner of the WanLink display window
For more information see LANforge-GUI User Guide: WanLinks


