|
|
||
| Network Testing and Emulation Solutions |
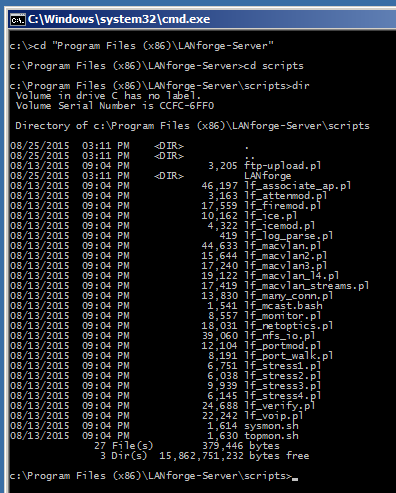
| Automated wireless traffic is possible using the lf_associate_ap.pl script. This script can be run within the LANforge server or outside the LANforge Server (on a windows desktop). The output of the script should be redirected to a text file if you want to review the resuts. Use this file in conjunction with the lf_firemod.pl script to create traffic. Requires a LANforge CT520 (or better) system and an access point. |

|
The lf_assocatiate_ap.pl script has many options, but here are the basic actions:
 And the radio should be set to channel -1 AUTO


perl .\lf_associate_ap.pl --resource 1  --resource 1 --mgr jedtest ^
   --action step1       --radio wiphy0    --ssid jedtest ^
   --first_sta sta100   --num_stations 1  --duration 20 ^
   --first_ip DHCP      --upstream eth1 --security wpa2 --passphrase jedtest1

 and we can inspect it.


./lf_associate_ap.pl --resource 1 --mgr localhost \
   --action step1       --radio wiphy0    --ssid jedtest \
   --first_sta sta100   --num_stations 1  --duration 20 \
   --first_ip DHCP      --upstream eth1   --security wpa2 --passphrase jedtest1


./lf_associate_ap.pl --resource 1 --mgr localhost \
   --action step1       --radio wiphy0    --ssid jedtest \
   --first_sta sta100 --num_stations 10 --duration 20 \
   --first_ip DHCP      --upstream eth1   --security wpa2 --passphrase jedtest1
./lf_associate_ap.pl --resource 1 --mgr localhost \
   --action step1       --radio wiphy0    --ssid jedtest \
   --first_sta sta100   --num_stations 10 --duration 120 \
   --first_ip DHCP      --upstream eth1   --security wpa2 --passphrase jedtest1 \
   --cxtype tcp --bps-min 30Mpbs \
   --bps-max 450Mbps

./lf_associate_ap.pl --resource 1 --mgr localhost \
   --action step1       --radio wiphy0    --ssid jedtest \
   --first_sta sta100   --num_stations 10 --duration 120 \
   --first_ip DHCP      --upstream eth1   --security wpa2 --passphrase jedtest1 \
   --cxtype tcp --bps-min 30Mpbs --bps-max 450Mbps &> report.txt
$ ./lf_associate_ap.pl --resource 1 --mgr localhost \
   --action step1       --radio wiphy0    --ssid jedtest \
   --first_sta sta100   --num_stations 10 --duration 120 \
   --first_ip DHCP      --upstream eth1   --security wpa2 --passphrase jedtest1 \
   --cxtype udp --bps-min 450Mpbs \
   --bps-max SAME &> report.txt
$  more report.txt
./lf_associate_ap.pl --resource 1 --mgr localhost \
   --action step1       --radio wiphy0    --ssid jedtest \
   --first_sta sta100   --num_stations 10 --duration 120 \
   --first_ip DHCP      --upstream eth1   --security open
./lf_associate_ap.pl --resource 1 --mgr localhost \
   --action step1       --radio wiphy0    --ssid jedtest \
   --first_sta sta100   --num_stations 10 --duration 120 \
   --first_ip DHCP      --upstream eth1 --security open \
   --wifi_mode abg

./lf_associate_ap.pl --resource 1 --mgr localhost \
   --action step1       --radio wiphy0    --ssid jedtest \
   --first_sta sta100   --num_stations 10 --duration 120 \
   --first_ip DHCP      --upstream eth1 --security open \
   --db_preload day_236
./lf_associate_ap.pl --resource 1 --mgr localhost \
   --action step1       --radio wiphy0    --ssid jedtest \
   --first_sta sta100   --num_stations 10 --duration 120 \
   --first_ip DHCP      --upstream eth1 --security open \
   --db_preload day_236 --db_save station_results

./lf_associate_ap.pl --resource 1 --mgr localhost \
   --action step1       --radio wiphy0    --ssid jedtest \
   --first_sta sta100   --num_stations 10 --duration 120 \
   --first_ip DHCP      --upstream eth1 --security open \
   --db_preload day_236 --db_save station_results --db_postload EMPTY
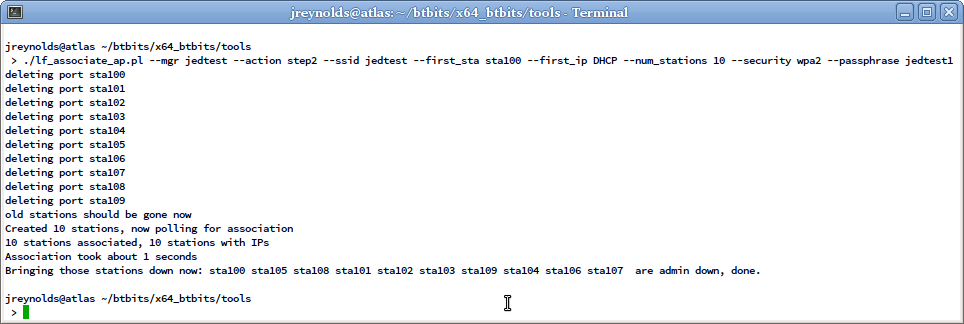
We can have a series of stations associate and unassociate over and over. This can be quite a bit of exercise for an AP. Below is a command that tests five clients connecting.
./lf_associate_ap.pl --mgr jedtest --action step2 \
 --ssid jedtest --first_sta sta100 --first_ip DHCP \
 --num_stations 10 --security wpa2 --passphrase jedtest1
This will create set of ten stations bring them up and then take them down.

These might have been update since publication, please check --help output for your version of the script.
./lf_associate_ap.pl   [--mgr {host-name | IP}]
      [--mgr_port {ip port}]     # use if on non-default management port
      [--resource {resource}]    # use if multiple lanforge systems; defaults to 1
      [--quiet { yes | no }]     # debug output; -q

      ##       AP selection
      [--radio {name}]           # e.g. wiphy2
      [--ssid {ssid}]            # e.g. jedtest
      [--security {open|wep|wpa|wpa2}] # station authentication type
      [--passphrase {...}]       # implies wpa2 if --security not set
      [--wifi_mode {a|abg|abgn|abgnAC|an|anAC|b|bg|bgn|g}]

      ##       station configuration
      [--num_stations {10}]
      [--first_sta {sta100}]
      [--first_ip {DHCP |ip address}]
      [--netmask {255.255.0.0}]

      ##       connection configuration
      [--cxtype {tcp/tcp6/udp/udp6}]   # use a tcp/udp connection, default tcp
      [--upstream {name|eth1}]
         # could be AP or could be port on LANforge
         # connected to WAN side of AP
      [--bps-min {10000000}]         # minimum tx bps
      [--bps-max {SAME|bps-value}]  # maximum tx bps, use SAME or omit for SAME
      [--duration {30}]      # connection duration, seconds, default 60
      [--poll-time {5}]    # nap time between connection displays
      [--action {step1,step2}]
         # step1: creates [num_stations] stations and L3 connections
         # step2: does bringup test

      [--traffic_type {separate|concurrent}]
         # for step1: separate does download then upload
         # concurrent does upload and download at same time

      [--db_preload {scenario name}]
         # load this database before creating stations
         # option intended as a cleanup step

      [--db_save {name}]
         # save the state of this test scenario after running the
         # connections, before --db_postload

      [--db_postload {scenario name}]
         # load this database after running connections,
         # option intended as a cleanup step