|
|
||
| Network Testing and Emulation Solutions |
|
Updated 2019-11-21:New features in 5.4.1.
Updated 2018-07-24:New features in 5.3.8. The LANforge GUI (as of release 5.3.6) can be configured to start an embedded web server that can provide data about ports and layer-3 connections. This service can be queried with with any browser or AJAX connection. We're going to increasingly refer to it as the LANforge client. This feature provides these benefits:
Present and potential drawbacks of the JSON feature:
|

|
The LANforge GUI is started using a script (lfclient.bash or lfclient.bat). From a terminal, we call that script with the -httpd switch. By default the GUI will listen on port 8080:
$ cd /home/lanforge
$ ./lfclient.bash -httpd
You can specify the port to listen on:
$ ./lfclient.bash -httpd 3210
You can run the client headless with the -daemon switch as well:
$ ./lfclient.bash -httpd -daemon
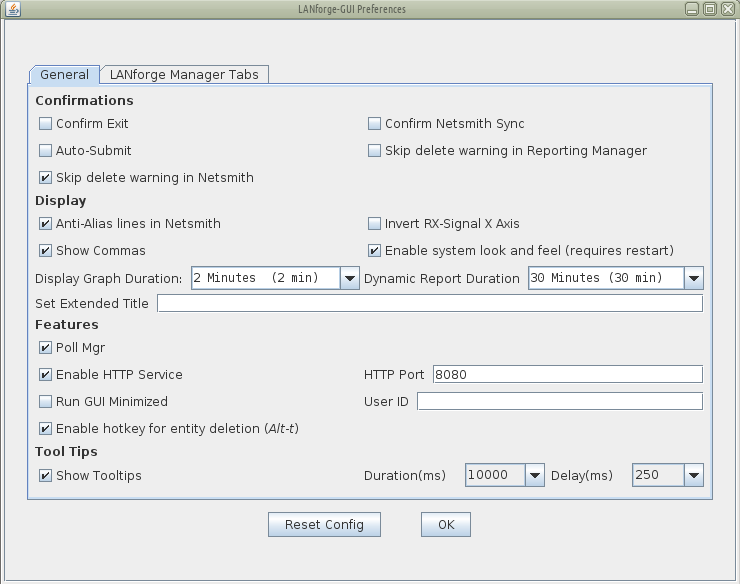
There is a setting in the 5.3.8 Control→Preferences menu for setting a minimized mode and the HTTP port number as well.
From the terminal we can query the port to find a basic message from the GUI:
$ curl -sq http://localhost:8080/
This first page (/) will give you a JSON list of the resource URLs available. Most URLs will provide JSON as their default content type. Notably, /help defaults to HTML.
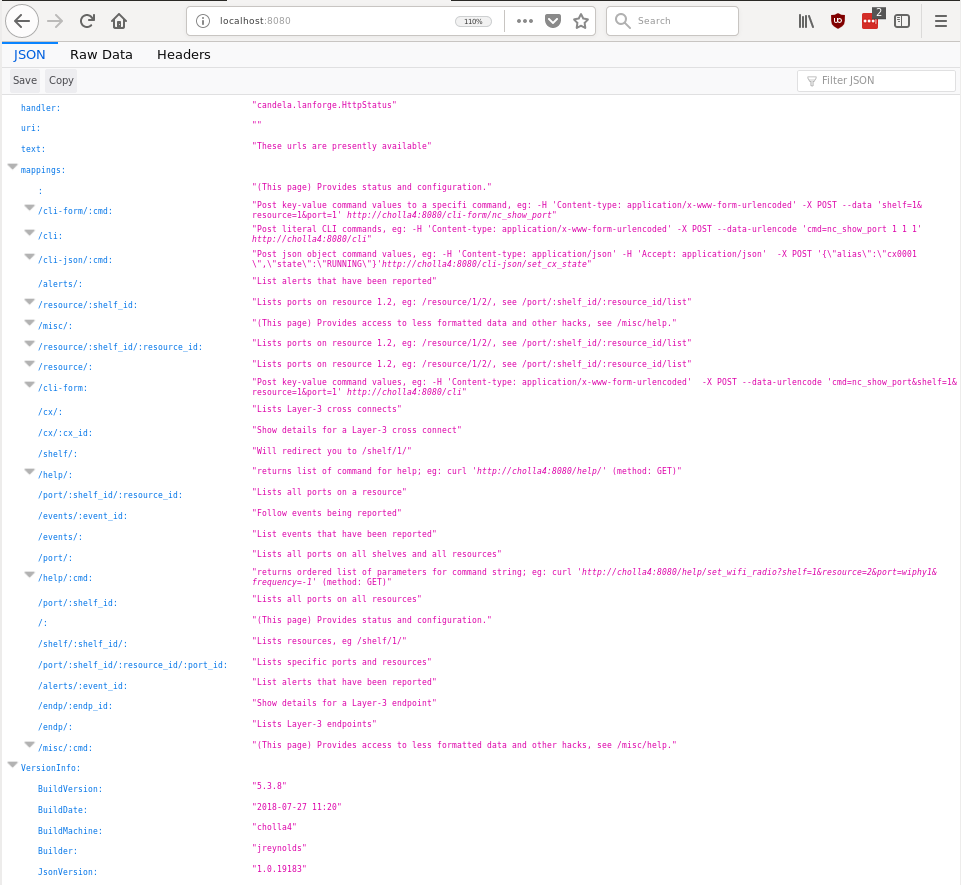
By default, most URLs will treat a default Accept: */* header as text/html. Compare the two techniques below:
$ curl -sqv -H 'Accept: application/json' http://localhost:8080/resource/1/1
{"handler":"candela.lanforge.HttpResource$JsonResponse","uri":"resource","candela.lanforge.HttpResource":{"duration":"27"},"resources":[{"1.1":{"_links":"/resource/1/1","entity id":"NA","hostname":"idtest.candelatech.com"}},{"1.2":{"_links":"/resource/1/2","entity id":"NA","hostname":"hedtest"}},{"1.3":{"_links":"/resource/1/3","entity id":"NA","hostname":"ct524-debbie"}},{"1.4":{"_links":"/resource/1/4","entity id":"NA","hostname":"jed-apu2-a"}},{"1.5":{"_links":"/resource/1/5","entity id":"NA","hostname":"jed-apu2-b"}},{"1.6":{"_links":"/resource/1/6","entity id":"NA","hostname":"ct524-emily"}},{"1.7":{"_links":"/resource/1/7","entity id":"NA","hostname":"ct524-freya"}},{"1.8":{"_links":"/resource/1/8","entity id":"NA","hostname":"ct524-genia"}}]}
Clearly, the JSON output is difficult to read. We cover formatting output below.
Most of the queries to the client will return JSON by default. The notable exception is the /help URL. To get HTML output in the terminal, you have to specify Accept: text/html to curl:
$ curl -sqv -H 'Accept: text/html' http://localhost:8080/port/1/1/1
<!DOCTYPE html>
<html>
<head><title>/port</title>
</head>
<body>
<table border='1'><thead><tr><th>EID</th><th>AP</th><th>Activity</th><th>Channel</th><th>Device</th><th>Down</th><th>IP</th><th>Parent Dev</th><th>Phantom</th><th>Port</th><th>SSID</th></tr></thead>
<tbody>
<tr><td>1.1.1</td><td></td><td>0.0</td><td></td><td>eth1</td><td>false</td><td>0.0.0.0</td><td></td><td>false</td><td>1.1.01</td><td></td></tr>
</table><hr />
</body>
</html>
JSON formatted text is pretty difficult to read, there are a few different utilities that can help you look at it: jq, json_pp, json_reformat, tidy, xmllint, yajl and jsonlint.
On Fedora, install:
$ sudo dnf install -y jq perl-JSON-PP tidy libxml2 yajl
On Ubuntu, install:
$ sudo apt install -y jq libjson-pp-perl perltidy xmllint libxml2-utils yajl-tools
Now we can perform a query:
$ curl -sq /port/1/1/1
{
  "candela.lanforge.HttpPort" : {
     "duration" : "1"
  },
  "handler" : "candela.lanforge.HttpPort$JsonResponse",
  "interface" : {
     "stuff":...
  },
  "uri" : "port/:shelf_id/:resource_id/:port_id"
}
Notice that the URI object list paths with colon-tagged positions in them, e.g.: /cli-form/:cmd. These are interpreted as URL parameters and not query string parameters, they cannot be moved into the query string.
To save you typing, you might want to add this function to your .bash_aliases file:
function Json() {
   curl -sqv -H 'Accept: application/json' "http://localhost:8080${@}" \
    | json_reformat | less
}
Then you can make your calls this way:
$ Json /port/1/1/1
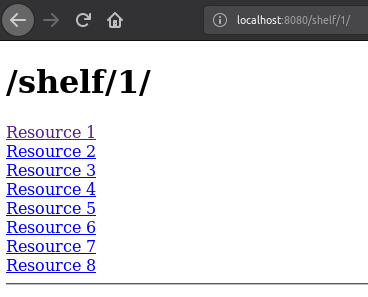
We can view a URL in a browser as well:

You can both view and stream event data. Querying events and alerts are both quite similar:
$ Json /events
{
"handler" : "candela.lanforge.HttpEvents$FixedJsonResponder",
"events" : [
   {
      "2249259" : {
         "event" : "Connect",
         "_links" : "/events/2249259",
         "entity id" : "NA"
      }
   },
   ....
A busy LANforge system will generate hundreds of thousands of events. Only the last few thousand can be recalled.
You can inspect a singular event:
$ Json /events/2249259
{
    "handler": "candela.lanforge.HttpEvents$FixedJsonResponder",
    "uri": "events/:event_id",
    "candela.lanforge.HttpEvents": {
        "duration": "0"
    },
    "event": {
        "eid": "1.3.21",
        "entity id": "NA",
        "event": "Connect",
        "event description": "sta3106 (phy #1): connected to 00:0e:8e:d5:fa:e6",
        "id": "2249259",
        "name": "sta3106",
        "priority": "  Info",
        "time-stamp": "2018-07-24 14:39:33.776",
        "type": "Port"
    }
}
We can view /alerts similarly.
$ Json /alerts/92
{
   "handler" : "candela.lanforge.HttpEvents$FixedJsonResponder",
   "uri" : "alerts/:event_id",
   "alert" : {
      "name" : "wlan0",
      "time-stamp" : "2018-07-02 16:23:30.880",
      "entity id" : "NA",
      "id" : "92",
      "eid" : "1.1.5",
      "event description" : "Port wlan0 has no WiFi SSID Configured.",
      "event" : "WiFi-Config",
      "priority" : "  Warning",
      "type" : "Port"
   },
   "candela.lanforge.HttpEvents" : {
      "duration" : "1"
   }
}
Continually polling the /events URL is not as effective as streaming a websocket providing the same data. We need a web socket client. Websockets are built into modern browsers and there are python and perl utilities for the job as well. An easy to use python client is wsdump.
There is a useful python utility called wsdump (or wsdump.py). Try to install the python-websocket package to get it. There are many similar matches, but there is not one dedicated package that provides it. On Fedora:
root@fedora$ dnf whatprovides `which wsdump`
root@fedora$ dnf install -y python3-websocket-client
root@ubuntu$ ls -l /usr/bin/wsdump
  /usr/bin/wsdump → /etc/alternatives/wsdump
root@ubuntu$ ls -l /etc/alternatives/wsdump
 /etc/alternatives/wsdump → /usr/bin/python2-wsdump
root@ubuntu$ dpkg-query -S /usr/bin/python2-wsdump
python-websocket: /usr/bin/python2-wsdump

root@ubuntu$ sudo apt install python-websocket
You might need to install pip, and that might be in the python3-pip package. Then you can install via:
$ sudo apt install python-pip # or sudo dnf install python-pip
$ sudo pip install --upgrade pip
$ pip search websocket
$ sudo pip install websocket-client
Here's an example of wsdump below. Don't forget you are now using h the ws:// schema and not the http:// schema!
$ /usr/bin/wsdump ws://localhost:8081/
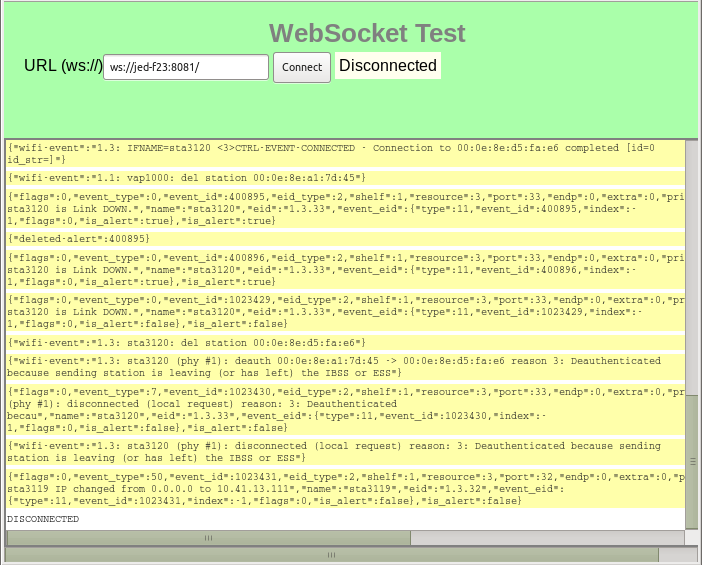
It might take a few second to start showing results if your system is not very active. You should be able to prompt output by executing this message in the Messages tab: gossip hi ben!

You can also use a web page to follow events because websockets are built into modern browsers. This is a screenshot of the
$ Json /shelf/1
{
    "handler": "candela.lanforge.HttpResource$JsonResponse",
    "uri": "shelf/:shelf_id",
    "candela.lanforge.HttpResource": {
        "duration": "0"
    },
    "resources": [
        {
            "1.1": {
                "_links": "/resource/1/1",
                "hostname": "idtest.candelatech.com"
            }
        },
        {
            "1.2": {
                "_links": "/resource/1/2",
                "hostname": "hedtest"
            }
        }
   ]
}
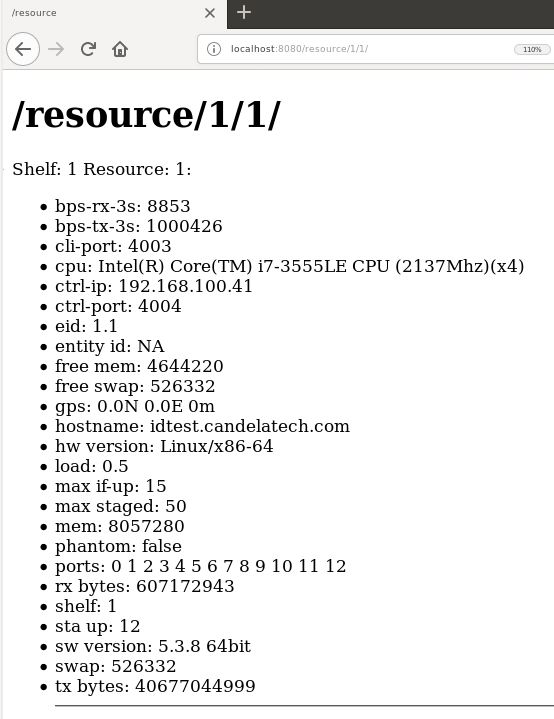
The /resource URL provides a digest of ports available at the requested resource.
$ Json /resource/1/1
{
   "handler" : "candela.lanforge.HttpResource$JsonResponse",
   "resource" : {
      "free swap" : 526332,
      "free mem" : 4634228,
      "load" : 0.4,
      "bps-rx-3s" : 7850,
      "sw version" : "  5.3.8  64bit",
      "entity id" : "NA",
      "tx bytes" : 40533976395,
      "phantom" : false,
      "eid" : "1.1",
      "hostname" : "idtest.candelatech.com",
      "hw version" : "Linux/x86-64",
      "mem" : 8057280,
      "cpu" : "Intel(R) Core(TM) i7-3555LE CPU (2137Mhz)(x4)",
      "max staged" : 50,
      "ctrl-ip" : "192.168.100.41",
      "ports" : "0 1 2 3 4 5 6 7 8 9 10 11 12 ",
      "gps" : "0.0N 0.0E 0m",
      "max if-up" : 15,
      "bps-tx-3s" : 1753832,
      "cli-port" : "4003",
      "sta up" : 12,
      "shelf" : "1",
      "rx bytes" : 606510139,
      "ctrl-port" : "4004",
      "swap" : 526332
   },
   "uri" : "resource/:shelf_id/:resource_id",
   "candela.lanforge.HttpResource" : {
      "duration" : "1"
   }
}
$ Json /port/1/5/list
{
   "handler" : "candela.lanforge.HttpPort$JsonResponse",
   "uri" : "port/:shelf_id/:resource_id/:port_id",
   "interfaces" : [
      {
         "1.5.b5000" : {
            "entity id" : "NA",
            "_links" : "/port/1/5/7",
            "alias" : "b5000"
         }
      },
      {
         "1.5.eth0" : {
            "alias" : "eth0",
            "_links" : "/port/1/5/0",
            "entity id" : "NA"
         }
      },
...
   ],
   "candela.lanforge.HttpPort" : {
      "duration" : "2"
   }
}
We can query multiple ports at a time by their number or their name by placing a comma between the specifiers. Additionally, we can query for just the fields we desire. All field names are lower-case: ?fields=tx+crr,rx+fifo.
$ Json '/port/1/5/wiphy0,wiphy1?fields=device,phantom,tx+bytes,mode'
{
  "interfaces" : [
     {
        "1.5.wiphy0" : {
           "tx bytes" : 401236186,
           "mode" : "802.11abgn",
           "device" : "wiphy0",
           "phantom" : false
        }
     },
     {
        "1.5.wiphy1" : {
           "phantom" : false,
           "device" : "wiphy1",
           "mode" : "802.11abgn",
           "tx bytes" : 403975812
        }
     }
  ],
  "candela.lanforge.HttpPort" : {
     "duration" : "1"
  },
  "uri" : "port/:shelf_id/:resource_id/:port_id",
  "handler" : "candela.lanforge.HttpPort$JsonResponse"
}

The /cx URL allows us to query Layer-3 connection information.
$ Json /cx
{
   "uri" : "cx",
   "handler" : "candela.lanforge.GenericJsonResponder",
   "connections" : [
      "41.1" : {
         "entity id" : "NA",
         "name" : "udp:r3r2:3000",
         "_links" : "/cx/41"
      },
      "50.1" : {
         "name" : "udp:r3r2:3009",
         "entity id" : "NA",
         "_links" : "/cx/50"
      }
   ]
}
And individual connections:
$ Json /cx/udp:r3r2:3000$ Json 'cx/udp:r3r2:3000'
{
   "uri" : "cx/:cx_id",
   "41.1" : {
      "drop pkts b" : 0,
      "type" : "LF/UDP",
      "rx drop % a" : 0,
      "rpt timer" : "1000",
      "pkt rx a" : 0,
      "avg rtt" : 0,
      "rx drop % b" : 0,
      "name" : "udp:r3r2:3000",
      "endpoints (a ↔ b)" : "udp:r3r2:3000-A <=> udp:r3r2:3000-B",
      "drop pkts a" : 0,
      "entity id" : "NA",
      "bps rx a" : 0,
      "eid" : "1.41",
      "state" : "Stopped",
      "pkt rx b" : 0,
      "bps rx b" : 0
   },
   "handler" : "candela.lanforge.GenericJsonResponder"
}
Endpoints may be listed and inspected:
$ Json /endp/
            {
   "uri" : "endp",
   "handler" : "candela.lanforge.HttpEndp$JsonResponse",
   "candela.lanforge.HttpEndp" : {
      "duration" : "4"
   },
   "endpoint" : [
      {
         "1.2.8.55.2" : {
            "_links" : "/endp/55",
            "entity id" : "NA",
            "name" : "sta3000-ep-B"
         }
      },
      {
         "1.2.8.57.1" : {
            "_links" : "/endp/57",
            "name" : "udp:r3r2:3000-B",
            "entity id" : "NA"
         }
      },
...
  ]
}
$ Json /endp/sta3000-ep-B
   {
      "candela.lanforge.HttpEndp" : {
         "duration" : "1"
      },
      "uri" : "endp/:endp_id",
      "endpoint" : {
         "rx rate ll" : 0,
         "pdu/s tx" : 0,
         "bursty" : false,
         "rx rate" : 0,
         "tx pkts ll" : 0,
         "rx bytes" : 0,
         "run" : false,
         "tcp rtx" : 0,
         "min pdu" : 1460,
         "pps rx ll" : 0,
         "ooo pkts" : 0,
         "cx to" : 0,
         "tx rate ll" : 0,
         "source addr" : "10.41.0.2 0",
         "name" : "sta3000-ep-B",
         "rx ber" : 0,
         "min rate" : 56000,
         "rx dup %" : 0,
         "max rate" : 56000,
         "tx rate (1 min)" : 0,
         "a/b" : "B",
         "destination addr" : "0.0.0.0 0",
         "dropped" : 0,
         "script" : "None",
         "jitter" : 0,
         "elapsed" : 0,
         "rx rate (1 min)" : 0,
         "tx rate" : 0,
         "1st rx" : -1,
         "tx bytes" : 0,
         "crc fail" : 0,
         "rx wrong dev" : 0,
         "tx pdus" : 0,
         "pattern" : "INCREASING",
         "rx drop %" : 0,
         "entity id" : "NA",
         "cwnd" : 0,
         "delay" : 0,
         "mng" : true,
         "cx estab" : 0,
         "rx pdus" : 0,
         "tcp mss" : "0/0",
         "dup pkts" : 0,
         "rcv buf" : "0/0",
         "pdu/s rx" : 0,
         "rx pkts ll" : 0,
         "max pdu" : 1460,
         "cx active" : 0,
         "eid" : "1.2.8.55",
         "rx ooo %" : 0,
         "replays" : 0,
         "cx estab/s" : 0,
         "pps tx ll" : 0,
         "tx rate (last)" : 0,
         "rx rate (last)" : 0,
         "send buf" : "0/0"
      },
      "handler" : "candela.lanforge.HttpEndp$JsonResponse"
   }
It is possible to create ports and connections by using the CLI commands. Your LANforge test scenarios (located in the /home/lanforge/DB/ directory) contain all the CLI commands that create your ports and connections. You can submit those commands over HTTP in two ways:
curl -X POST -H 'Content-type: application/json' \
               -d '{"message":"hello world"}' http://localhost:8080/cli-json/gossip
Then check your LANforge GUI messages.
curl -X POST -d 'message=hello+world' http://localhost:8080/cli/gossipThen check your LANforge GUI messages.
curl -X POST -d 'cmd=gossip hello' http://localhost:8080/cli/
Except for /cli-json, these methods accept application/x-www-form-urlencoded content type submissions. This is default for the NanoHttp library and default for curl.
These CLI commands do not return data, only a result code. All data that the Perl scripts would collect from command line queries is sent directly to the GUI. Some CLI commands send data over the websocket, like the diag command.
Commands are often complex and include a number of bitwise flags to set the state and features of ports. There is presently no tag-substitution for port flags, but there is a help utility that can help you compute them.
http://localhost:8080/help/
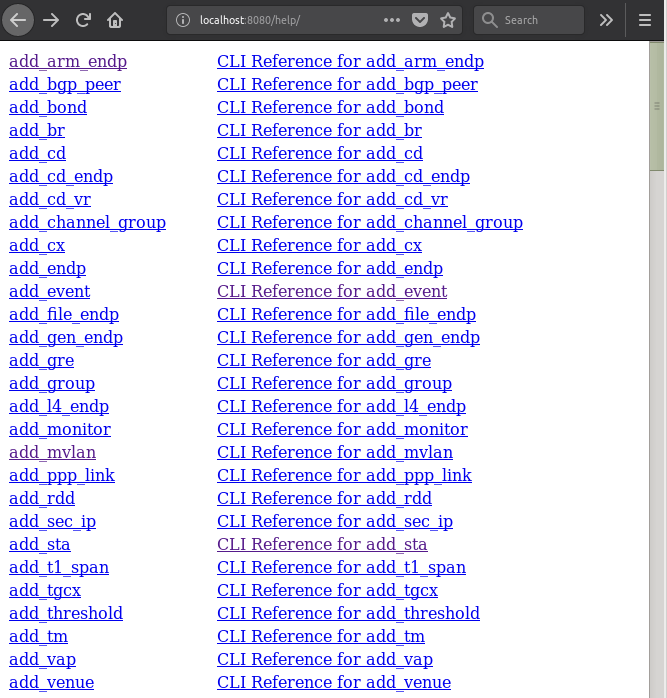
Select a command to see the field helper screen:
http://localhost:8080/help/set_port
Type values into the field inputs and the CLI command will be refreshed:
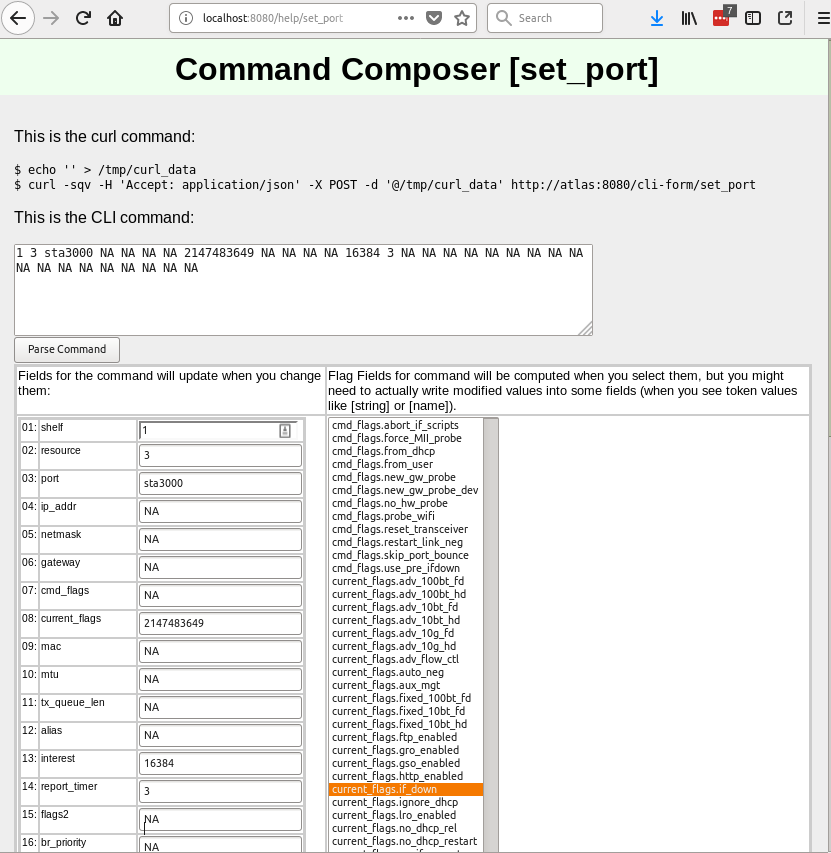
Click the Parse Command button and the values in the command box will be displayed in the curl command and the field inputs. (Notice this form is doing a GET request.)

You may find a list of flag fields that are organized by field names. The text area below the selection list is the sum of the selected fields. Copy the flag values into the input field above to incorporate it into your command.
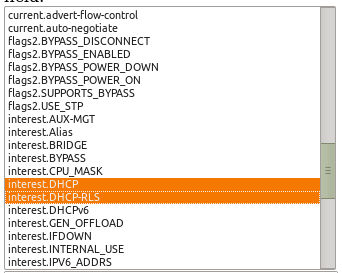
Please refer to the scripts lf_associate_ap.pl and lf_vue_mod.sh for examples of how to produce lists of CLI commands involved in creating stations. Please refer to:
These will provide ways of collecting the CLI commands in log files for you to place into the command /help/ page.
$ cd scripts
$ ./lf_vue_mod.sh --mgr localhost --resource 3 --create_sta --name sta3101 \
  --radio wiphy1 --ssid idtest-1000-open --passphrase '[BLANK]' \
  --log_cli /tmp/clilog.txt

$ cat /tmp/clilog.txt
set_wifi_radio 1 3 wiphy1 NA -1 NA NA NA NA NA NA NA NA 0x1 NA
add_sta 1 3 wiphy1 sta3101 1024 idtest-1000-open NA [BLANK] AUTO NA 00:0e:8e:c1:df:45 8 NA NA NA NA NA 1024
set_port 1 3 sta3101 0.0.0.0 255.255.0.0 0.0.0.0 NA 2147483648 00:0e:8e:c1:df:45 NA NA NA 8405038 1000 NA NA NA NA NA NA NA NA NA NA NA NA NA NA NA NA NONE
http://localhost:8080/help/set_wifi_radio?cli=1 3 wiphy1 NA -1 NA NA NA NA NA NA NA NA 0x1 NAProduces:
$ echo 'shelf=1&resource=3&radio=wiphy1&channel=-1&flags=0x1' > /tmp/curl_data
$ curl -sqv -H 'Accept: application/json' -X POST -d '@/tmp/curl_data' \
 http://localhost:8080/cli-form/set_wifi_radio
http://localhost:8080/help/add_sta?cli=1 3 wiphy1 sta3101 1024 idtest-1000-open NA [BLANK] AUTO NA 00:0e:8e:c1:df:45 8 NA NA NA NA NA 1024Produces:
$ echo 'shelf=1&resource=3&radio=wiphy1&sta_name=sta3101&flags=1024&ssid=idtest-1000-open&key=[BLANK]&ap=AUTO&mac=00:0e:8e:c1:df:45&mode=8&flags_mask=1024' > /tmp/curl_data
$ curl -sqv -H 'Accept: application/json' -X POST -d '@/tmp/curl_data' \
 http://localhost:8080/cli-form/add_sta
http://localhost:8080/help/set_port?cli=1 3 sta3101 0.0.0.0 255.255.0.0 0.0.0.0 NA 2147483648 00:0e:8e:c1:df:45 NA NA NA 8405038 1000 NA NA NA NA NA NA NA NA NA NA NA NA NA NA NA NA NONEProduces:
$ echo 'shelf=1&resource=3&port=sta3101&ip_addr=0.0.0.0&netmask=255.255.0.0&gateway=0.0.0.0¤t_flags=2147483648&mac=00:0e:8e:c1:df:45&interest=8405038&report_timer=1000¤t_flags_msk=NONE' > /tmp/curl_data $ curl -sqv -H 'Accept: application/json' -X POST -d '@/tmp/curl_data' \ http://localhost:8080/cli-form/set_port
Using the /cli-json/add_endp and /cli-json/add_cx URLs, it is possible to create Layer-3 connections. Create the Layer-3 endpoints first, of course.
Construct your command using the /help/add_endp page. For an example, use these parameters:
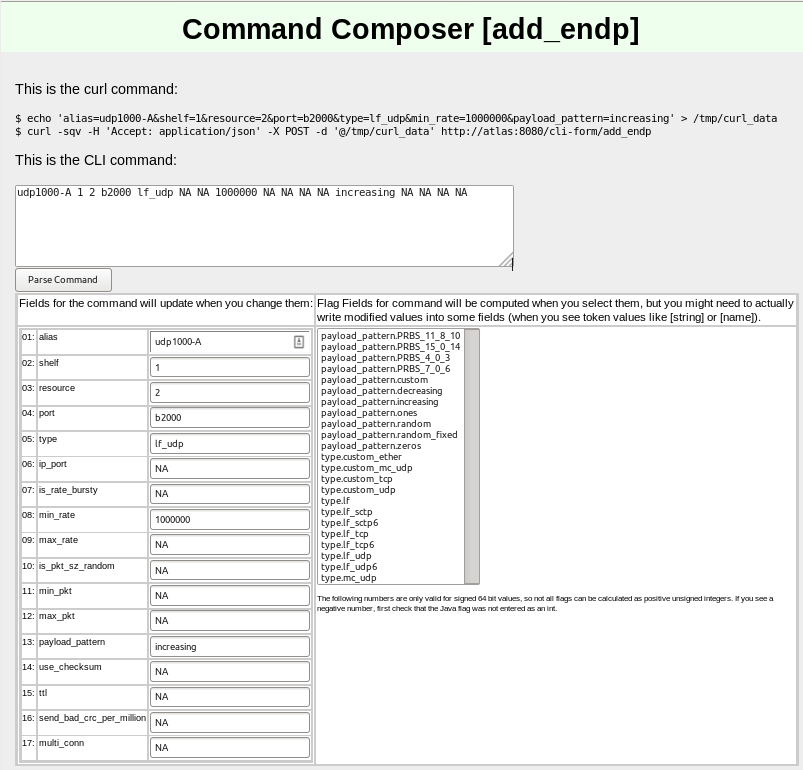
Click Parse Command and copy the resulting curl command into a text editor:

And for the B endpoint, choose a station:
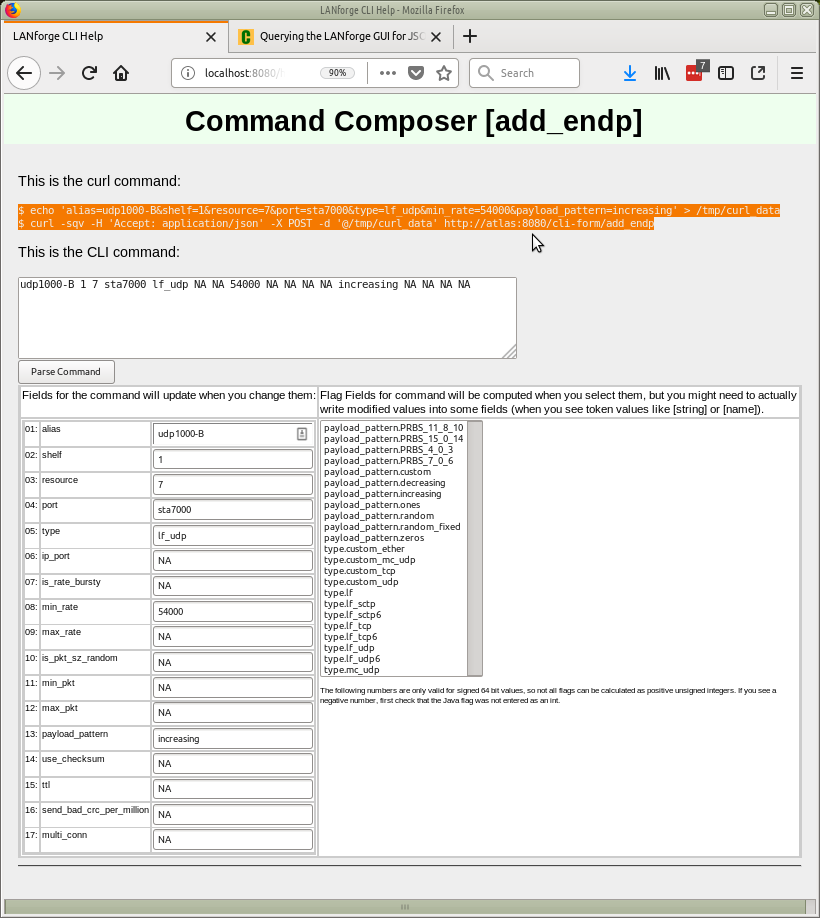
Click Parse Command and copy the resulting curl command into a text editor:

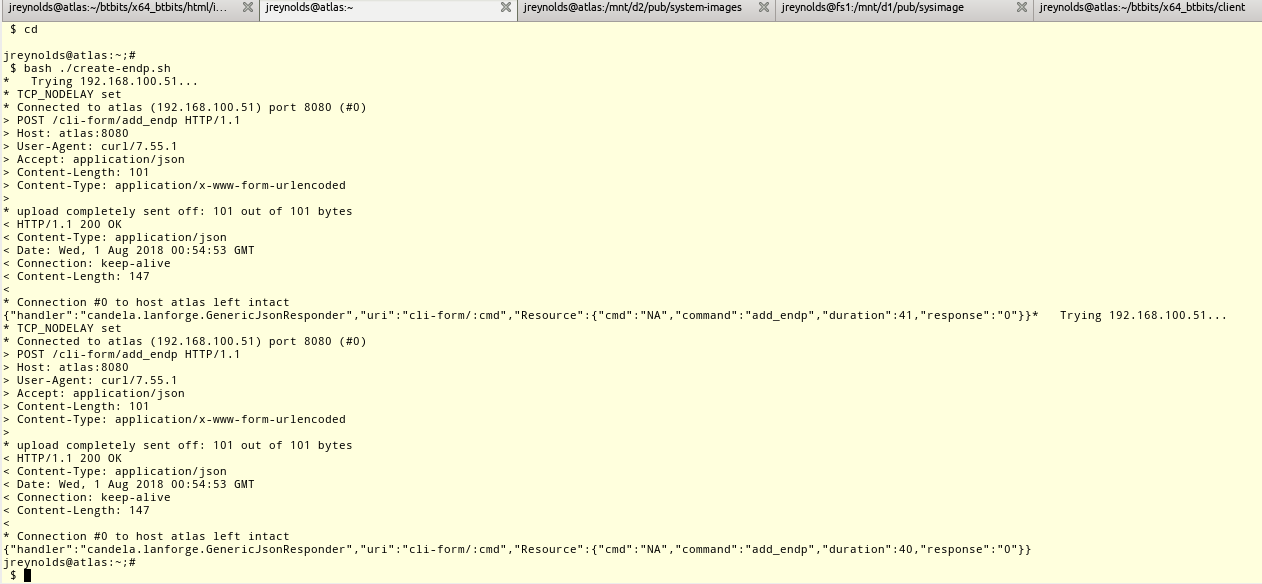
We'll save this file as a shell script: ~/create-endp.sh We can then run it from our terminal like so: bash -x create-endp.sh
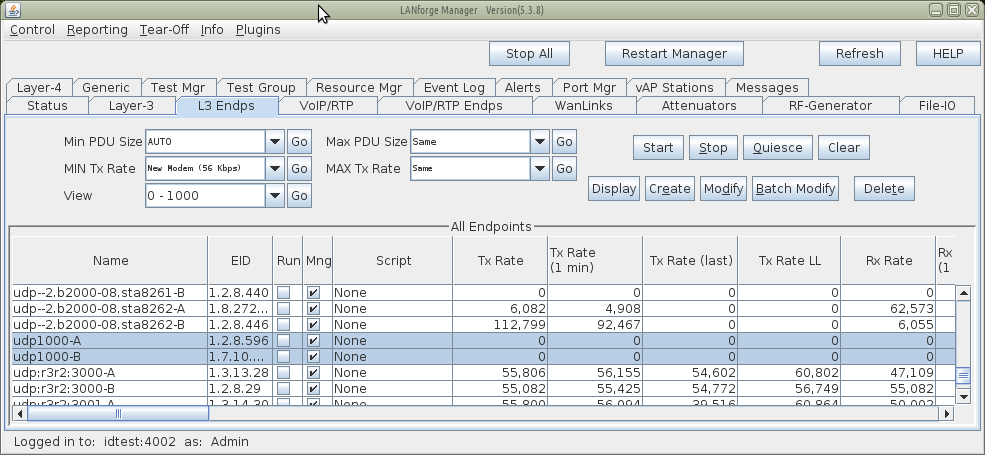
We should see the endpoints we've created in the LANforge GUI Endps tab:
With the creation of two endpoints, we can proceed with creating a Layer 3 cross-connect. This is much simpler, it really only takes the names of the two endpoints we created above. We'll choose default_tm for the test manager.
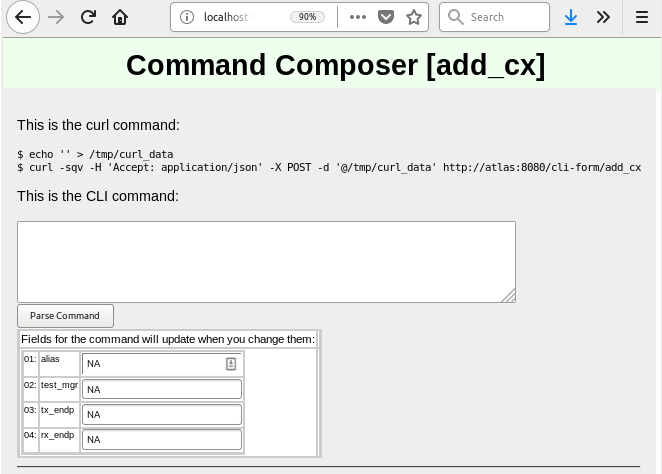
Click the Parse Command button and copy the resulting curl command into your editor with the shell script. Run the script again. It doesn't hurt to re-create the endpoints.
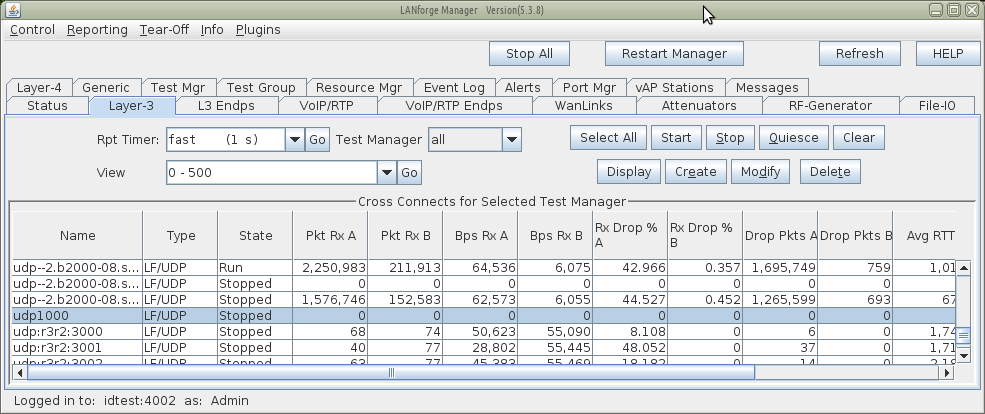
Cross connects have three good state: STOPPED, RUNNING, and QUIESCE. The command to change them is set_cx_state. You will have no trouble creating the command:
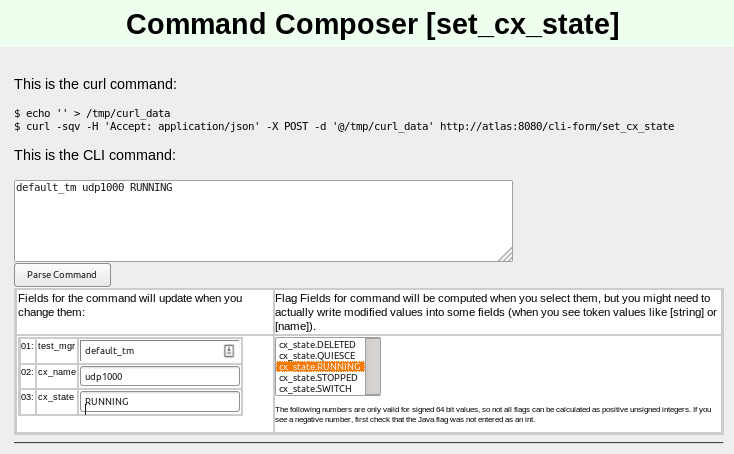
Click Parse Command and then you can paste the resulting command into your editor.
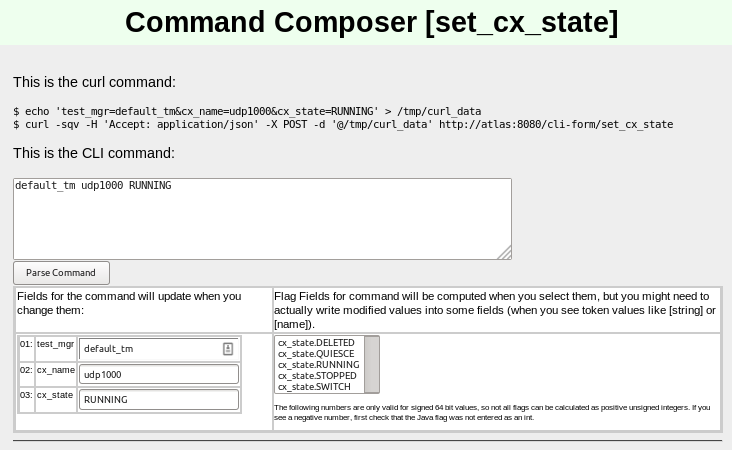
You can make JSON submissions and you can also submit Base64 encoded values in both form an and JSON submission URLs.
Field names that end in -64 are interpreted as base64 encoded values. From a linux terminal, you can convert text to base64 encoded value using the base64 command:
$ echo "RUNNING" | base 64
UlVOTklORwo=
Below is a CLI command example. You typically would not care to spend the effort doing this unless the data you need to express is difficult to URL encode.
$ echo 'test_mgr-64=YW55Cg==&cx_name-64=dWRwMTAwMAo=&cx_state-64=UlVOTklORwo=' > /tmp/curl_data
$ curl -A 'Accept: application/json' -X POST -d @/tmp/curl_data http://host/cli-form?set_cx_state
Instead of posting to /cli-form, you can post to /cli-json and your submission will be parsed as a json object. The parameter names stay the same. The base64 name extensions are also available! You need to specify that your Content-type in the POST is application/json.
$ echo '{"test_mgr":"default_tm","cx_name":"udp1000","cx_state":"RUNNING"}' > /tmp/curl_data
$ curl -sq -H 'Content-type: application-json' -H 'Accept: application/json' \
  -X POST -d@/tmp/curl_data http://localhost:8080/cli-json/set_cx_state
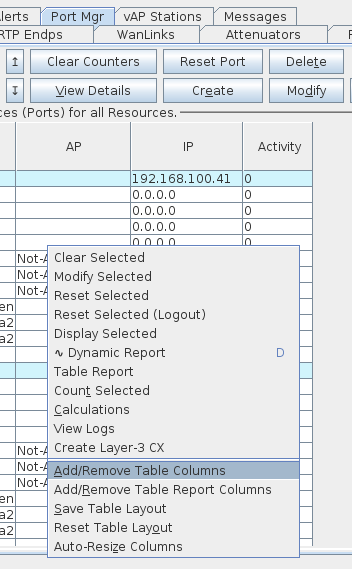
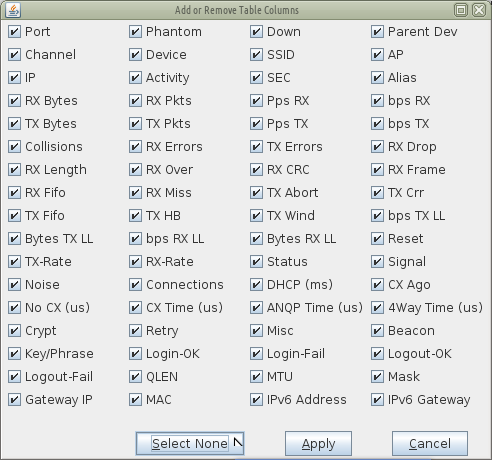
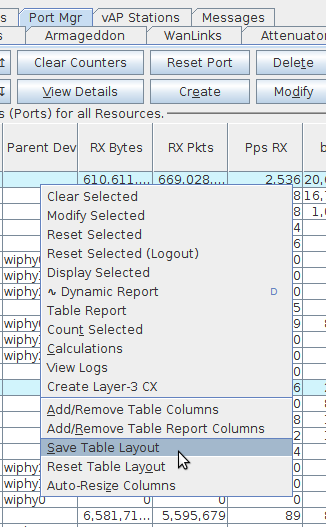
(This should be fixed as of 2018/08/14) When the LANforge cliet is in GUI mode, the columns of data that are returned match the GUI table columns displayed. You can use the Right-click→Add/Remove Table Columns menu item to change this. We do not recommend doing this for querying JSON data though, because the table columns definitions will not match up to the data the webserver expects to return.
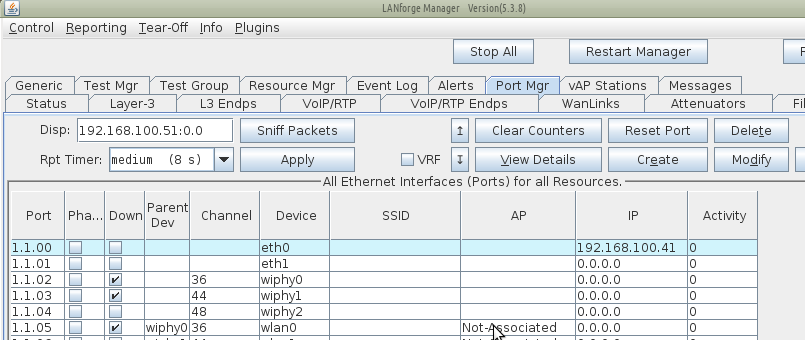
$ curl -sq http://localhost:8080/port | json_pp
{
   "error_list" : [
      "names_to_col_ids map is not going to work:\n[tx abort][25 > 4]\n[cx time (us)][48 > 4]\n[bytes rx ll][33 > 4]\n[bps tx][14 > 4]\n[channel][39 > 4]\n[no cx (us)][47 > 4]\n[rx frame][22 > 4]\n[login-fail][58 > 4]\n[tx hb][28 > 4]\n[mode][40 > 4]\n[anqp time (us)][49 > 4]\n[rx pkts][8 > 4]\n[bytes tx ll][31 > 4]\n[key/phrase][56 > 4]\n[signal][42 > 4]\n[connections][44 > 4]\n[ipv6 gateway][68 > 4]\n[time-stamp][69 > 4]\n[entity id][70 > 4]\n[bps rx ll][32 > 4]\n[rx errors][16 > 4]\n[tx errors][17 > 4]\n[pps tx][13 > 4]\n[rx over][20 > 4]\n[ap][38 > 4]\n[mtu][63 > 4]\n[qlen][62 > 4]\n[beacon][54 > 4]\n[rx drop][18 > 4]\n[tx wind][29 > 4]\n[reset][34 > 4]\n[device][61 > 4]\n[status][37 > 4]\n[activity][41 > 4]\n[cx ago][46 > 4]\n[crypt][51 > 4]\n[rx crc][21 > 4]\n[ipv6 address][67 > 4]\n[logout-ok][59 > 4]\n[parent dev][6 > 4]\n[ssid][55 > 4]\n[tx-rate][35 > 4]\n[mac][66 > 4]\n[login-ok][57 > 4]\n[4way time (us)][50 > 4]\n[logout-fail][60 > 4]\n[rx miss][24 > 4]\n[rx fifo][23 > 4]\n[noise][43 > 4]\n[alias][5 > 4]\n[tx pkts][12 > 4]\n[tx crr][26 > 4]\n[rx length][19 > 4]\n[dhcp (ms)][45 > 4]\n[retry][52 > 4]\n[misc][53 > 4]\n[mask][64 > 4]\n[tx bytes][11 > 4]\n[tx fifo][27 > 4]\n[collisions][15 > 4]\n[pps rx][9 > 4]\n[gateway ip][65 > 4]\n[bps tx ll][30 > 4]\n[rx bytes][7 > 4]\n[bps rx][10 > 4]\n[rx-rate][36 > 4]"
   ],
   "status" : "INTERNAL_ERROR"
}
The terminal you started the LANforge client on will also give a similar error:
1532480073953:  names_to_col_ids size:71
java.lang.IllegalArgumentException: names_to_col_ids map is not going to work:
1532480073953:  lfj_table columns:10
